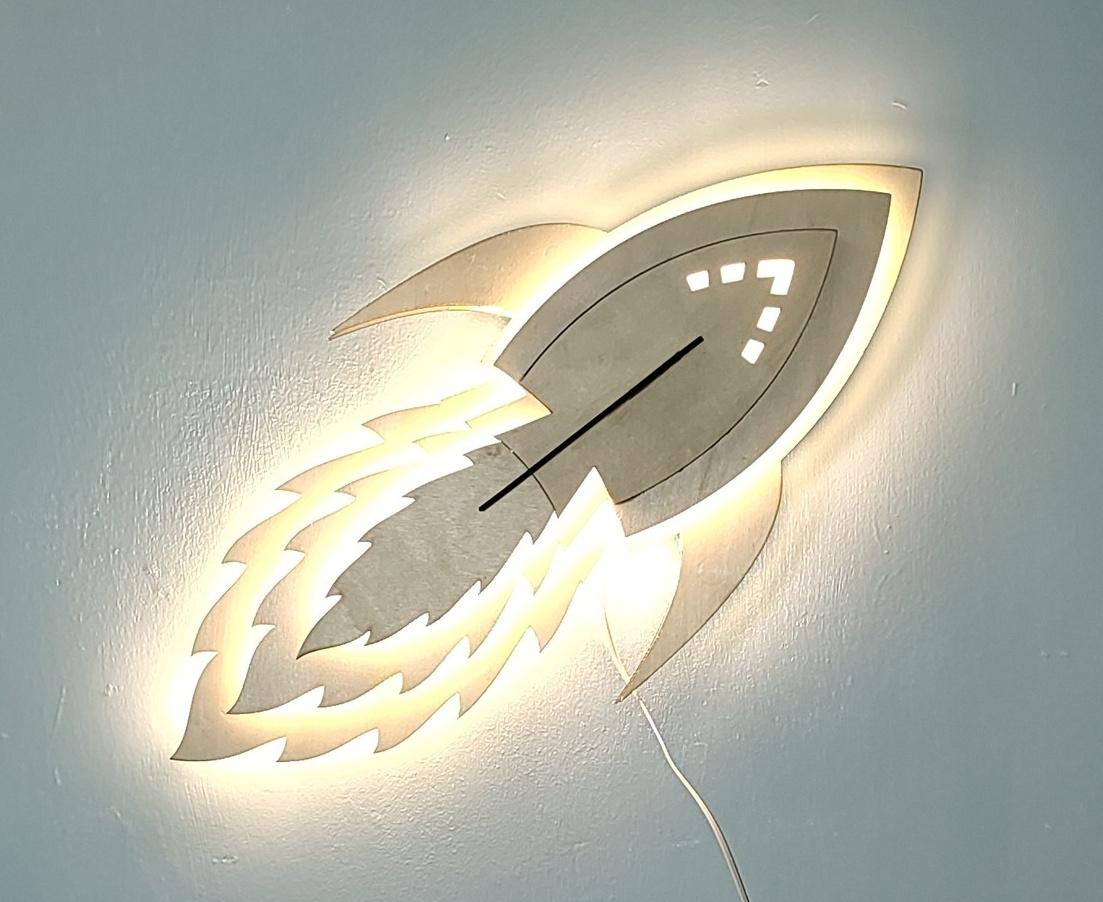
Rocket Wall Light
Retrospective Rocket Wall Light Make
This is the first post in a series of retrospective make posts I'm planning - I originally started this project in mid November 2024. Whilst I have made things sporadically over the past year or so, I've not been able to post much , mainly due to being in Autistic Burnout. There's not been much of a buzz here lately - I'm up and down, and as I've had a good few days, I thought I'd try and get a few posts done while I can. Subsequent posts will be a bit intermittent, but I have a list to work through - I'll post them up as and when I can.
Requirements
My youngest needed a replacement for his old hand-me-down bedroom wall lamp that he'd had since he was a baby. We talked about it and he asked for a "cartoon rocket" themed lamp.
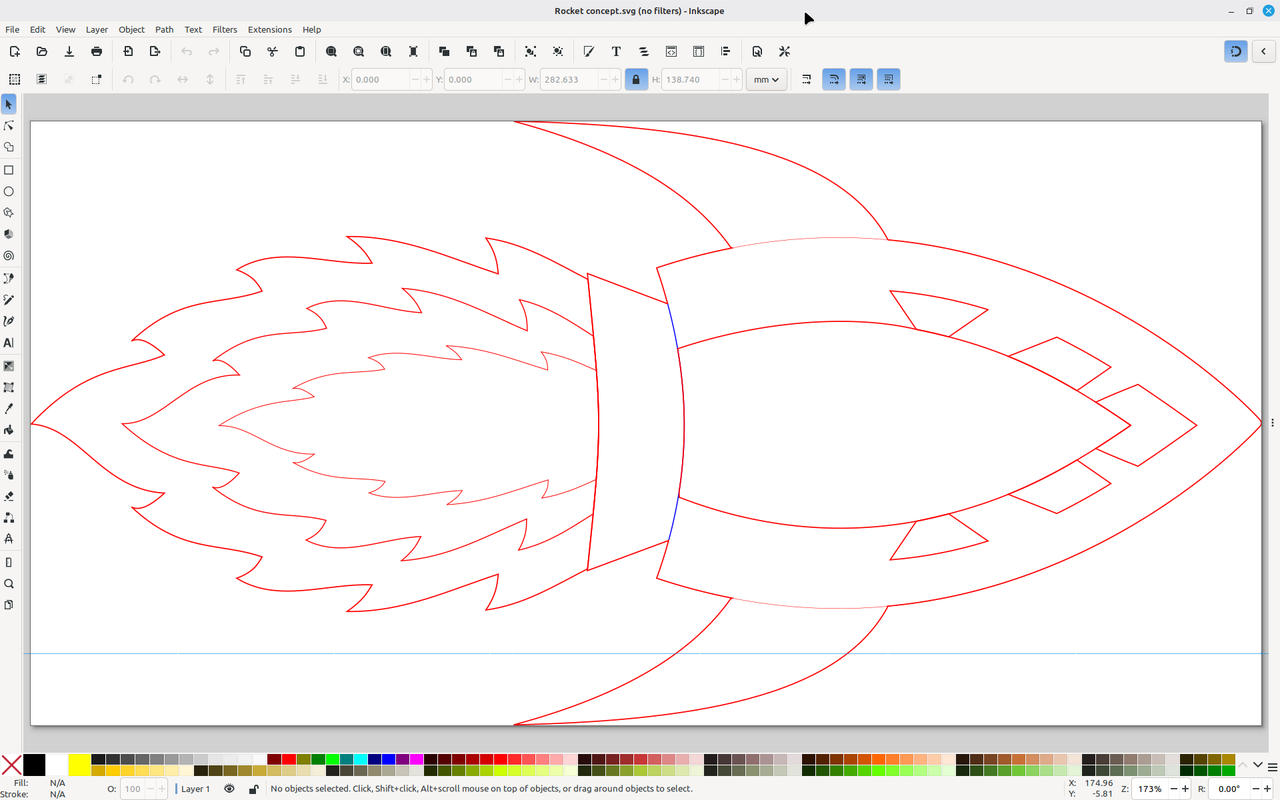
Design
I did a concept sketch in Inkscape to check I was on the right track, and he seemed to like it, so then I started working out how to actually build the real thing:
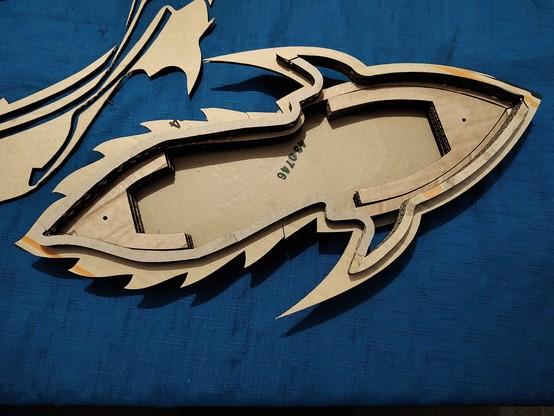
The basic idea is to use LED light strips (cheaply available in hardware stores locally and online) layered between the body panels cut from birch plywood. I decided that most of the light should come from the exhaust flame, with a bit coming from the portals and body. To separate each layer, there would be flat tabs keyed into hidden holes in the layers, like this:

The self-adhesive LED COB light strips can then be stuck to the outer face of the tabs, so they perform dual duty. However, as I was working through the design, it became increasingly difficult to position the holes where they wouldn't be seen and also keep them positioned so that the LED strips wouldn't be embedded too far inside the layers. After much re-jigging, I decided that the easiest way to proceed was to layer up the plywood to form curved walls that could be glued in place without any holes. What I eventually came up with was kind of rib-shaped sections that follow a simplified outline of each section they support, inset by about 10mm from the innermost points of the outline:

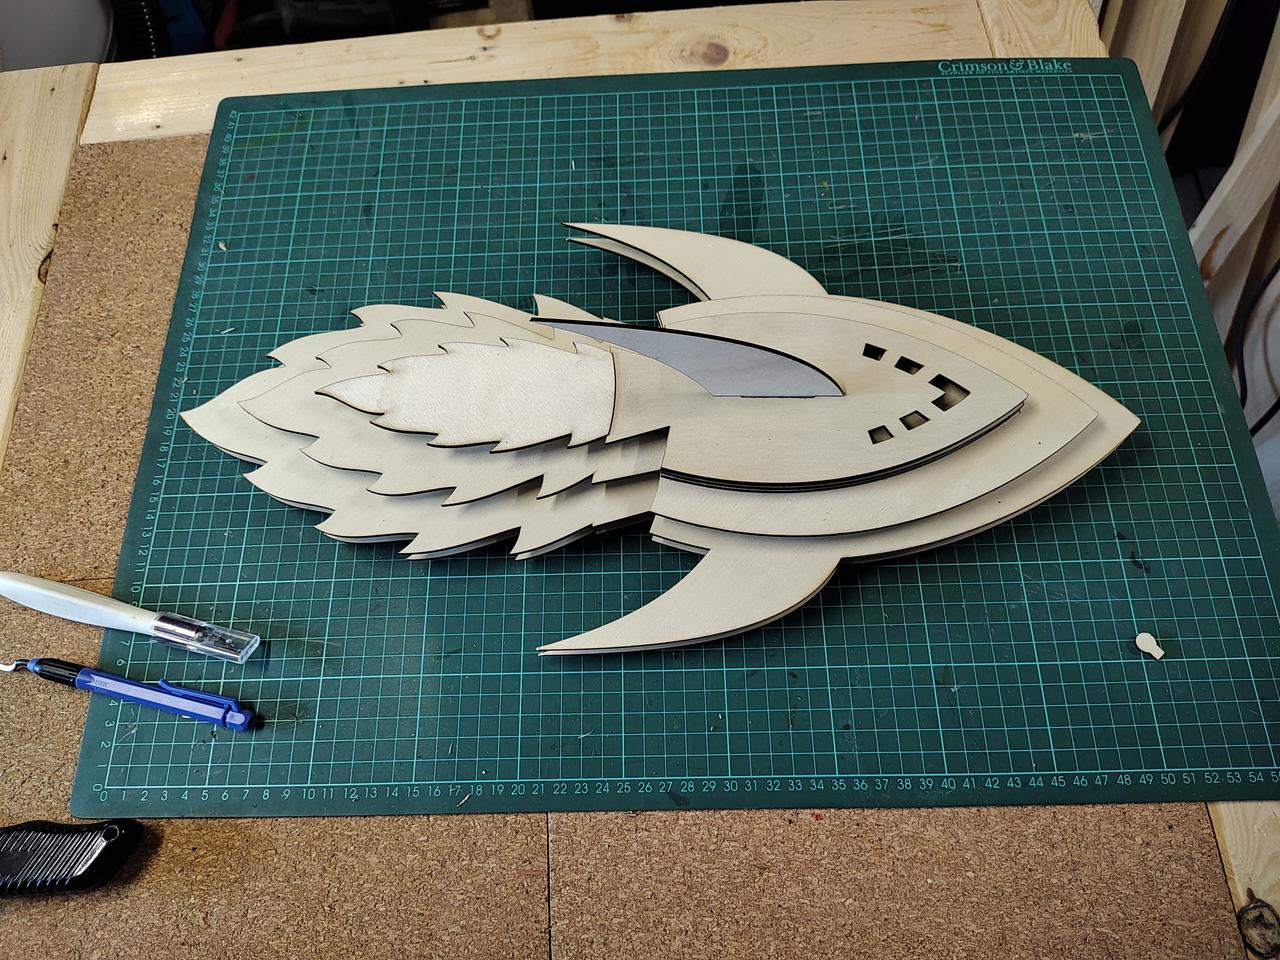
Cardboard Prototype
In order to reduce waste of plywood, I like to cut prototypes out of pieces of old corrugated cardboard boxes - it allows me to test the look and feel without risking having to throw away expensive, new materials, and it's available for free!
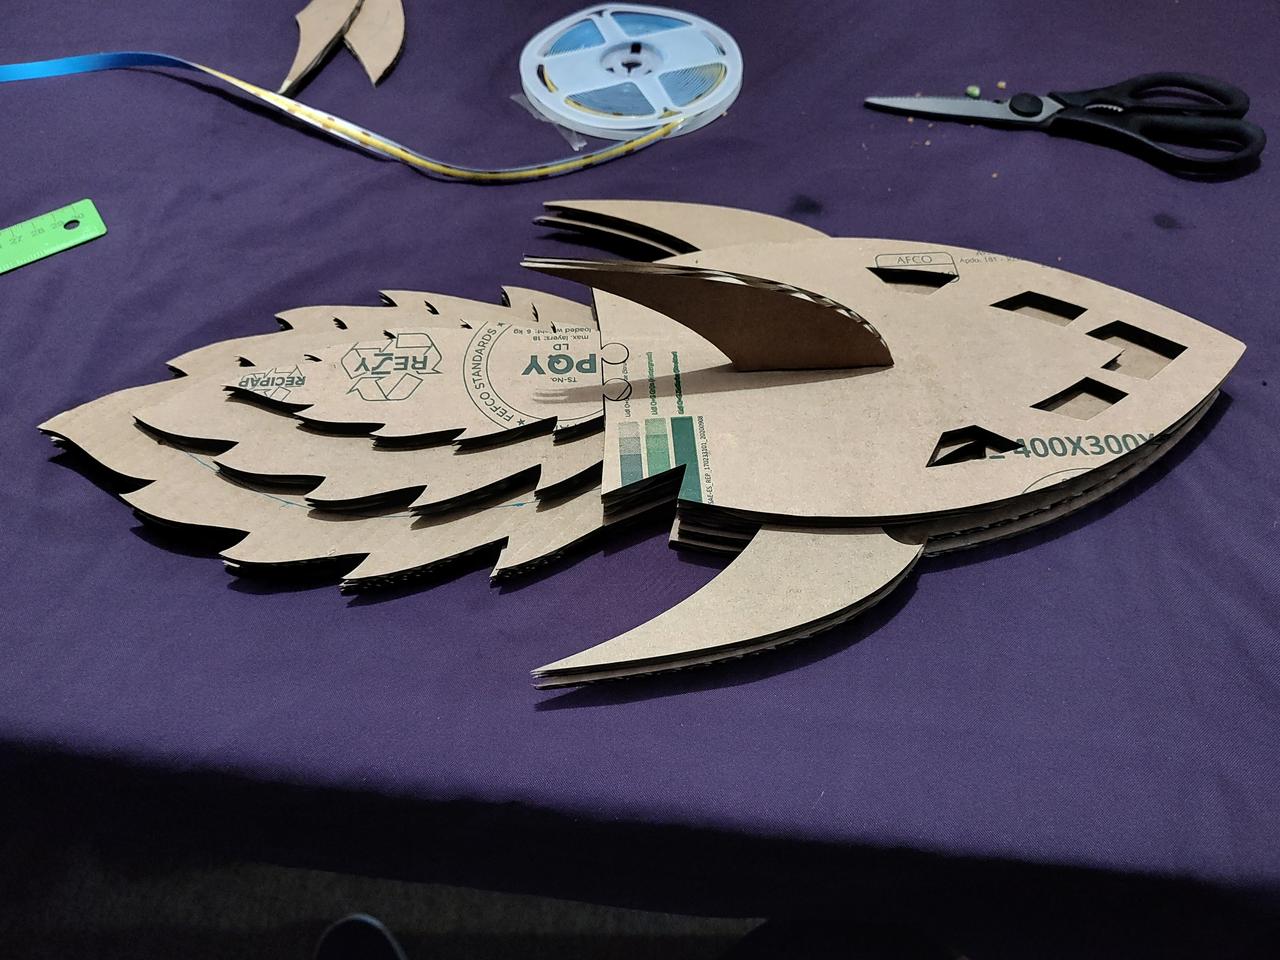
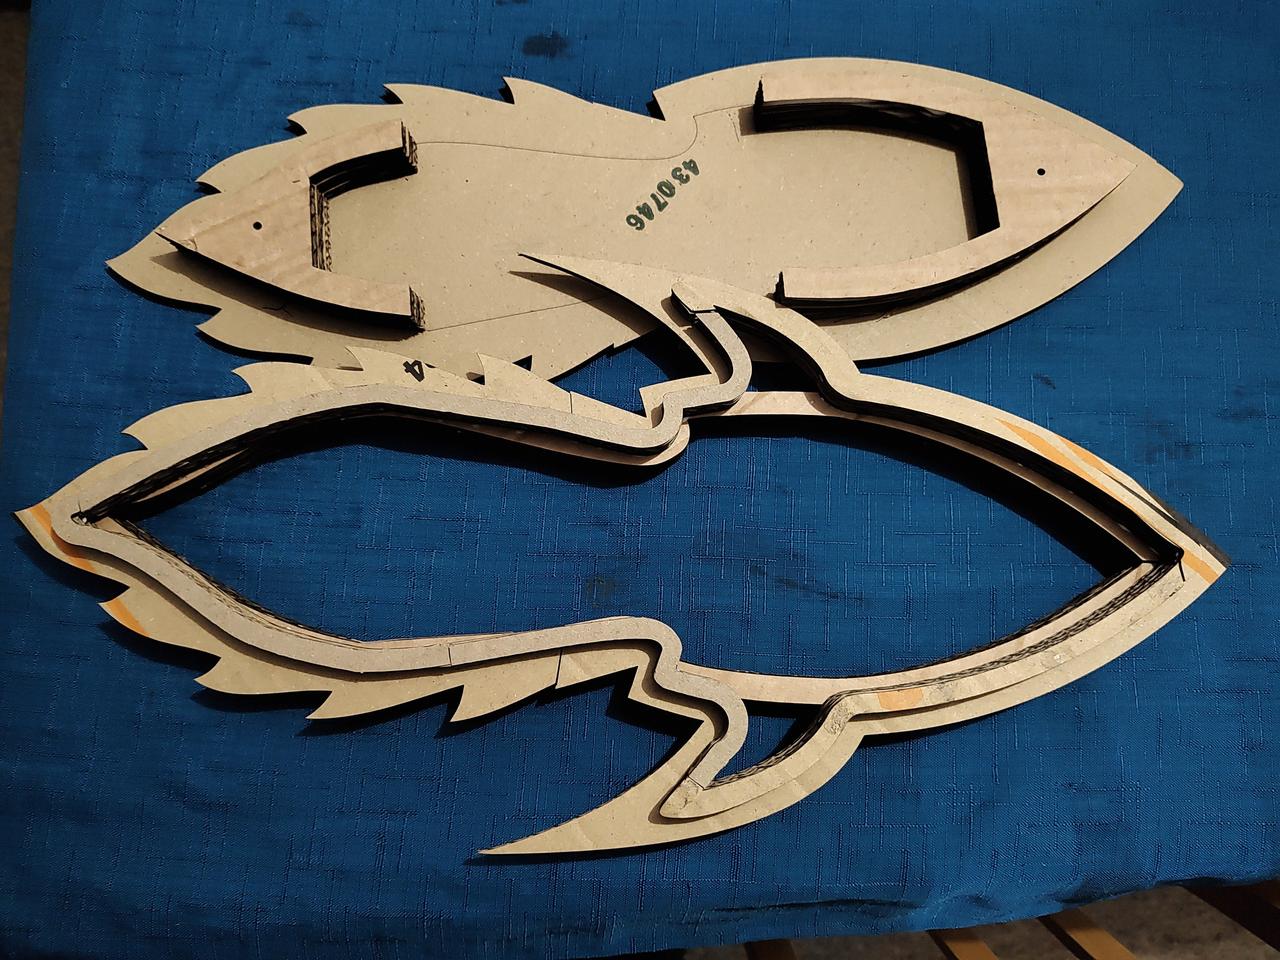
I had to make quite a few tweaks before I was ready to move onto cutting from plywood. I was also able to use the mock-ups to test that I had enough COB LED strip, and prove that the wall-fixing method I'd chosen was going to work OK.
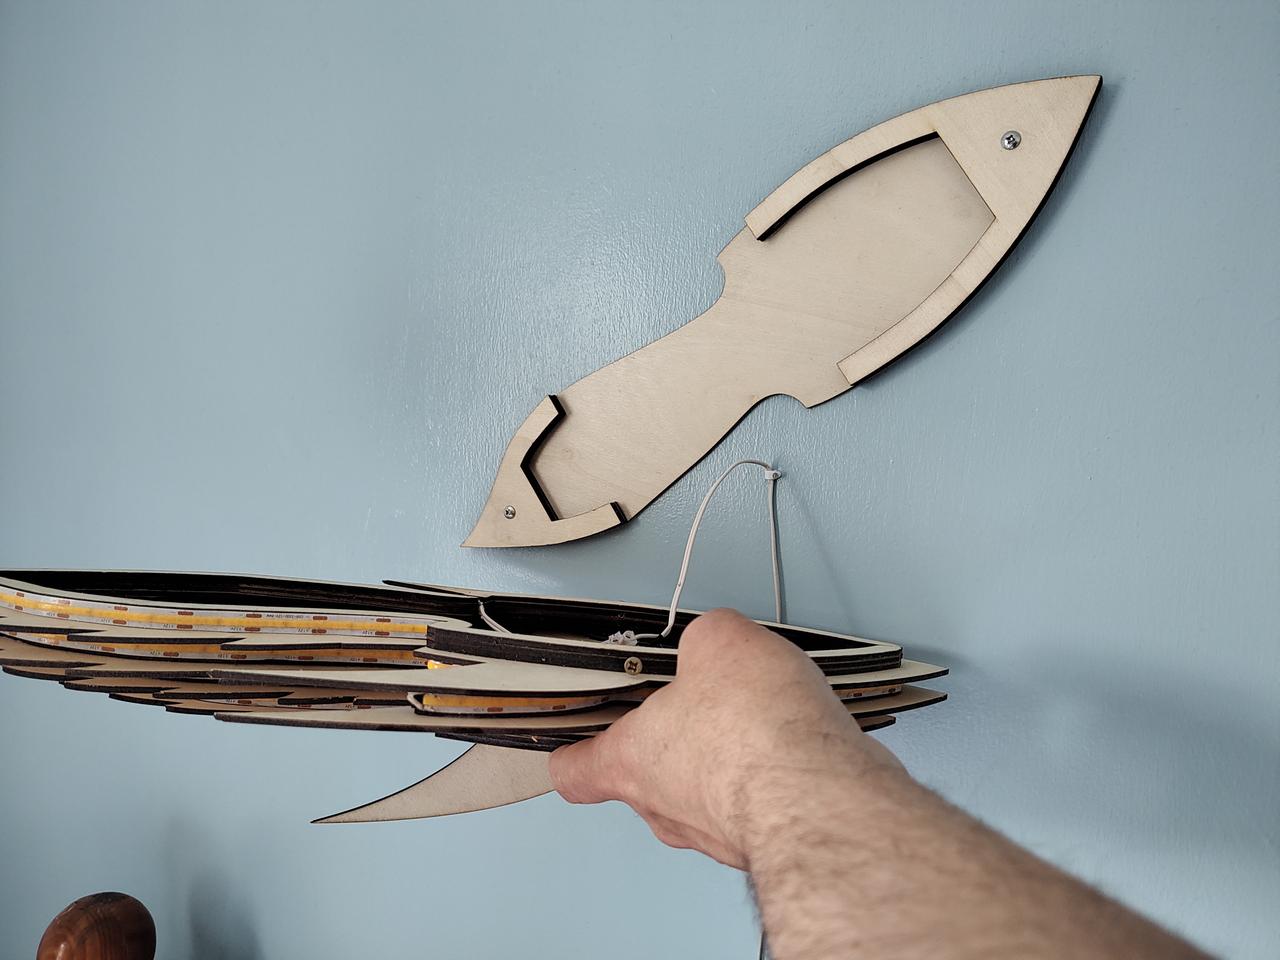
In the photo In the photo above, you can see how the two large, kind of curved "A" shaped lugs on the wall-plate that fit inside the first visible layer. This is to make it easy to fit to the wall and maintain if it ever develops a fault or gets damaged. The wall plate will be screwed to the wall, and a couple of hidden wood screws will keep the body in place.
Final Cut and Glue-Up
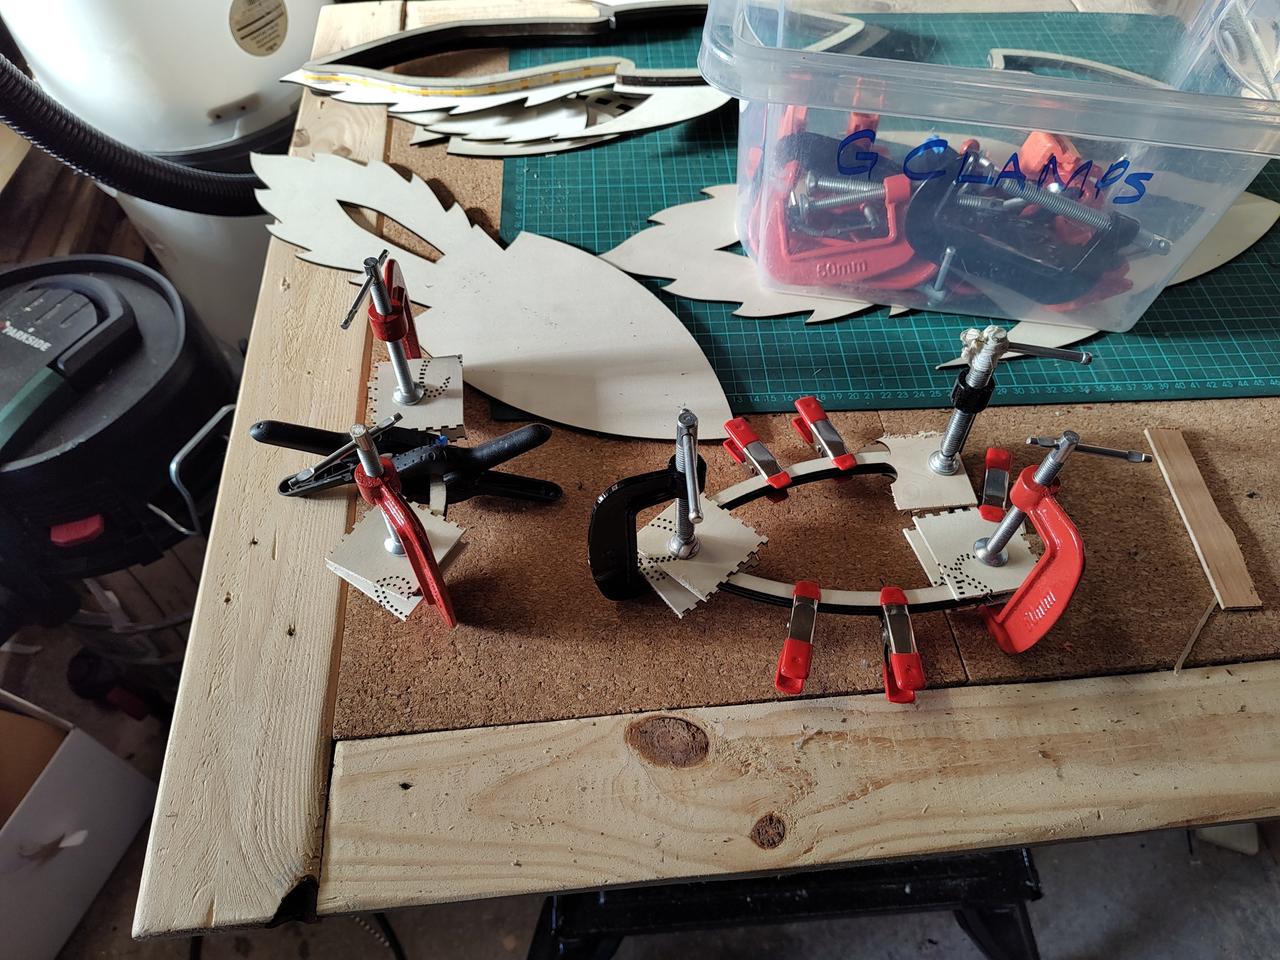
Arranging the pieces of the layered supports in the design for efficient use of materials was very time-consuming, and the glue-up process afterwards was also far more fiddly than I had hoped. I have a lot of clamps, but so many are needed for each piece, that I was limited in how many sections I could glue up at one time.
Wiring
Once the shell was completed, with the COB LED strips in place, all I had to do was solder the sections together with some lengths of twin core bell wire, and fit to the wall. The soldering was a bit fiddly due to limited room to manouvre inside, but only took about half an hour, and it worked properly first time, which was nice.
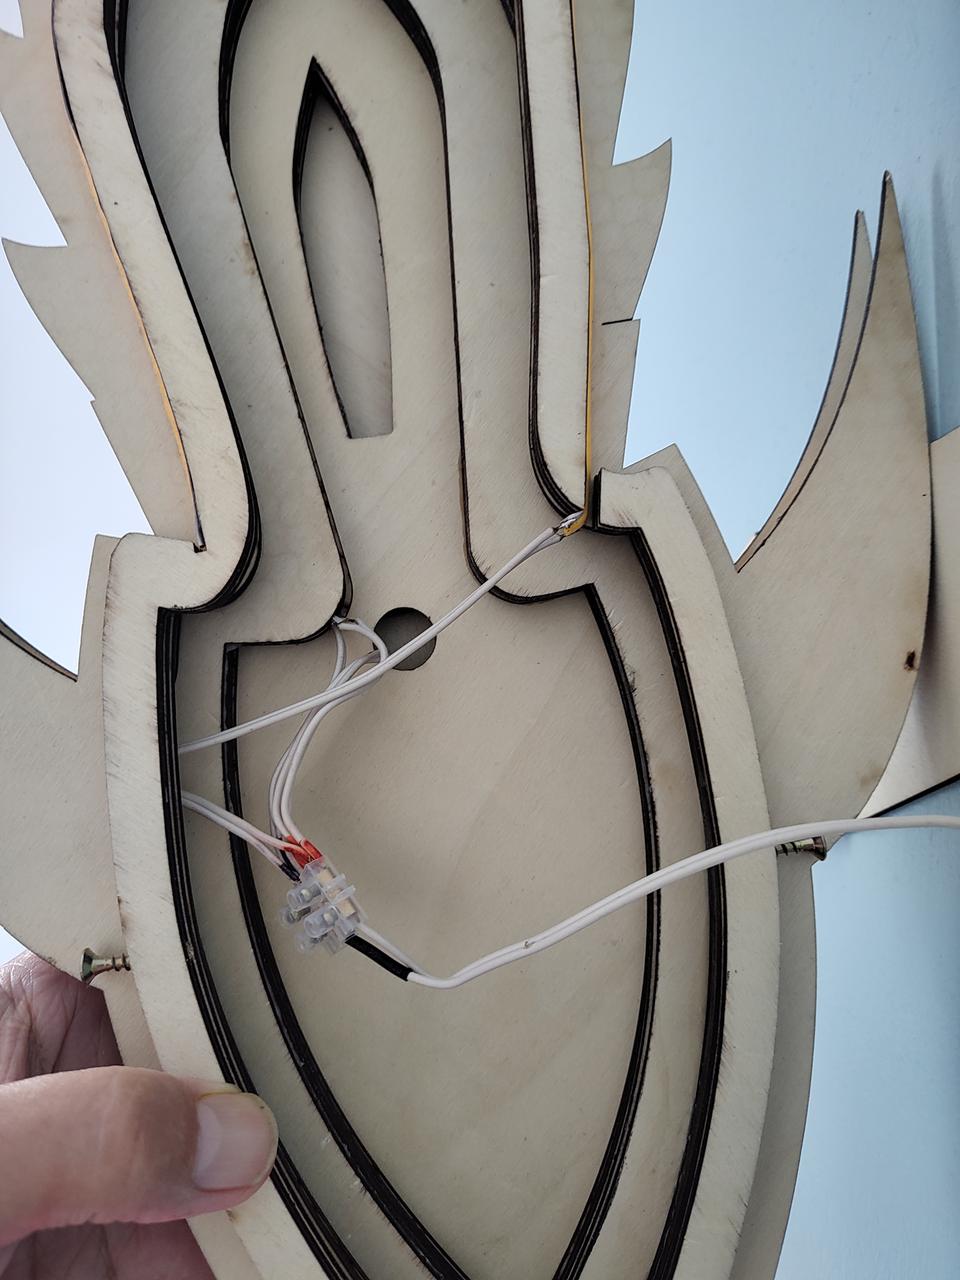
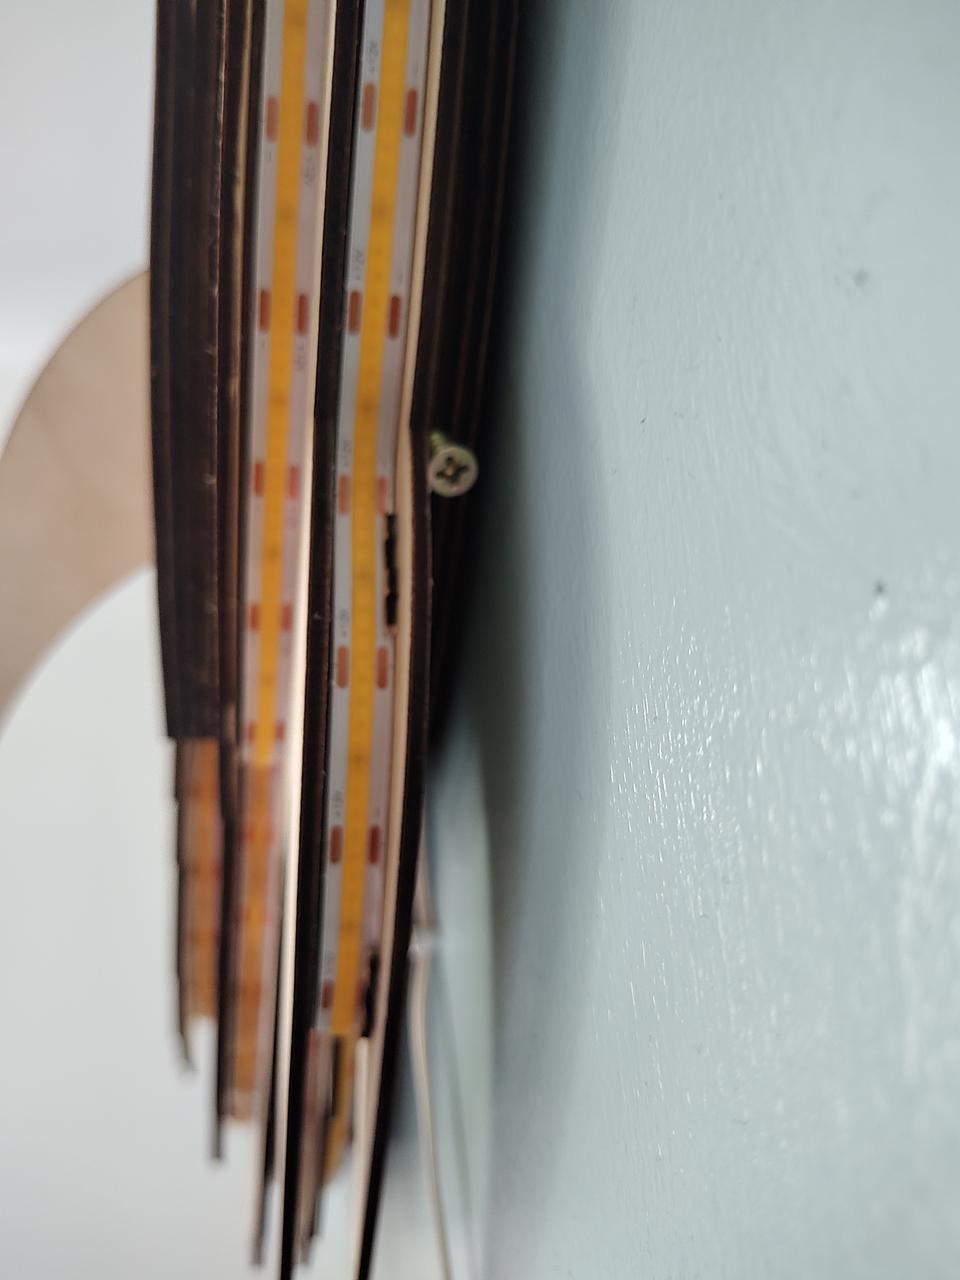
In the end, I decided it was easier to wire each section together in parallel with one plastic terminal block, rather than soldering each section in series. The piece of bell wire that goes off to the power supply. You can also see the two wood screws that keep the shell attached to the wall plate.
The wall plate is screwed to the wall with a couple of screws going into some plastic wall plugs.
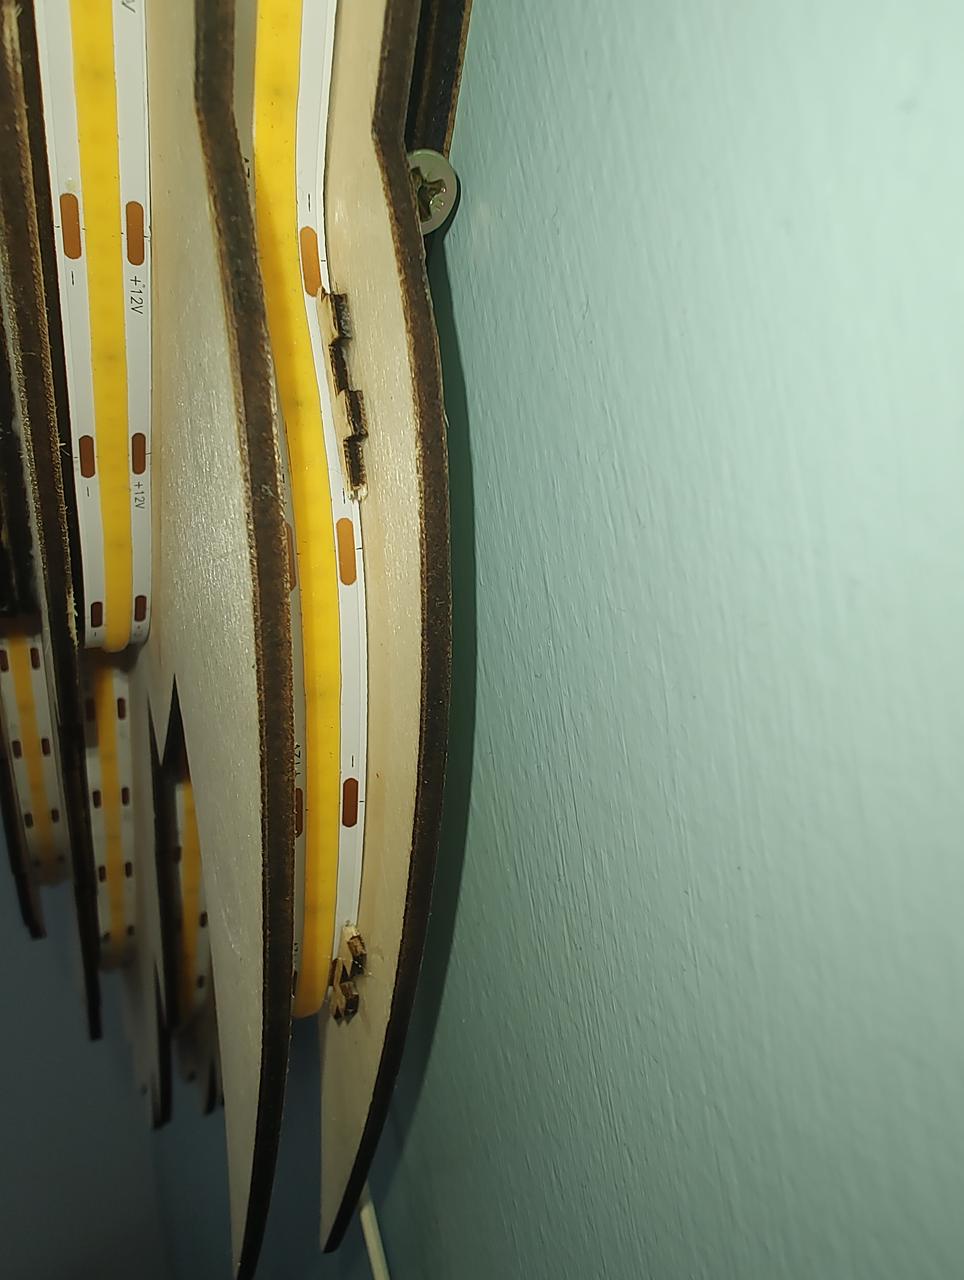
During construction, I noticed that in some places, the COB light strips were slowly peeling away from the supports - especially in places where they followed an indented curve, so I had to glue some small pieces of wood against the strip to keep it in place.
The retaining screws are hidden under the rocket's fins. It's easy to take off the wall and put back in place without damaging anything.
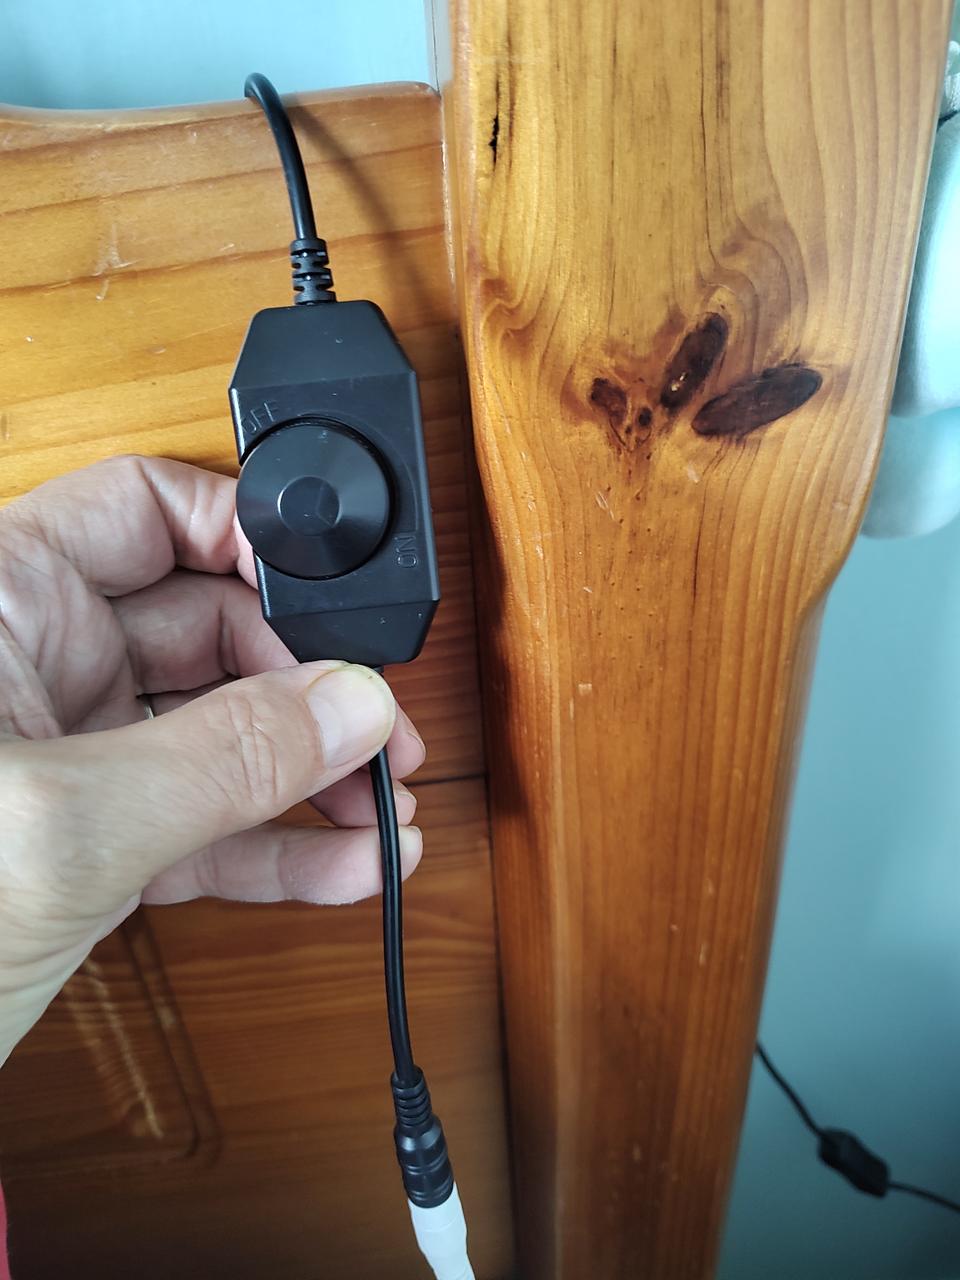
The final touch was to add in an inline PWM brightness control so that it can be adjusted for mood and comfort. It's positioned on the headboard for easy access. These are usually available with pre-soldered plugs and sockets that are compatible with your chosen power supply. I de-soldered the original connector from the COB LED strip, and soldered it to the bell-wire, and double-insulated it with heat-shrink.
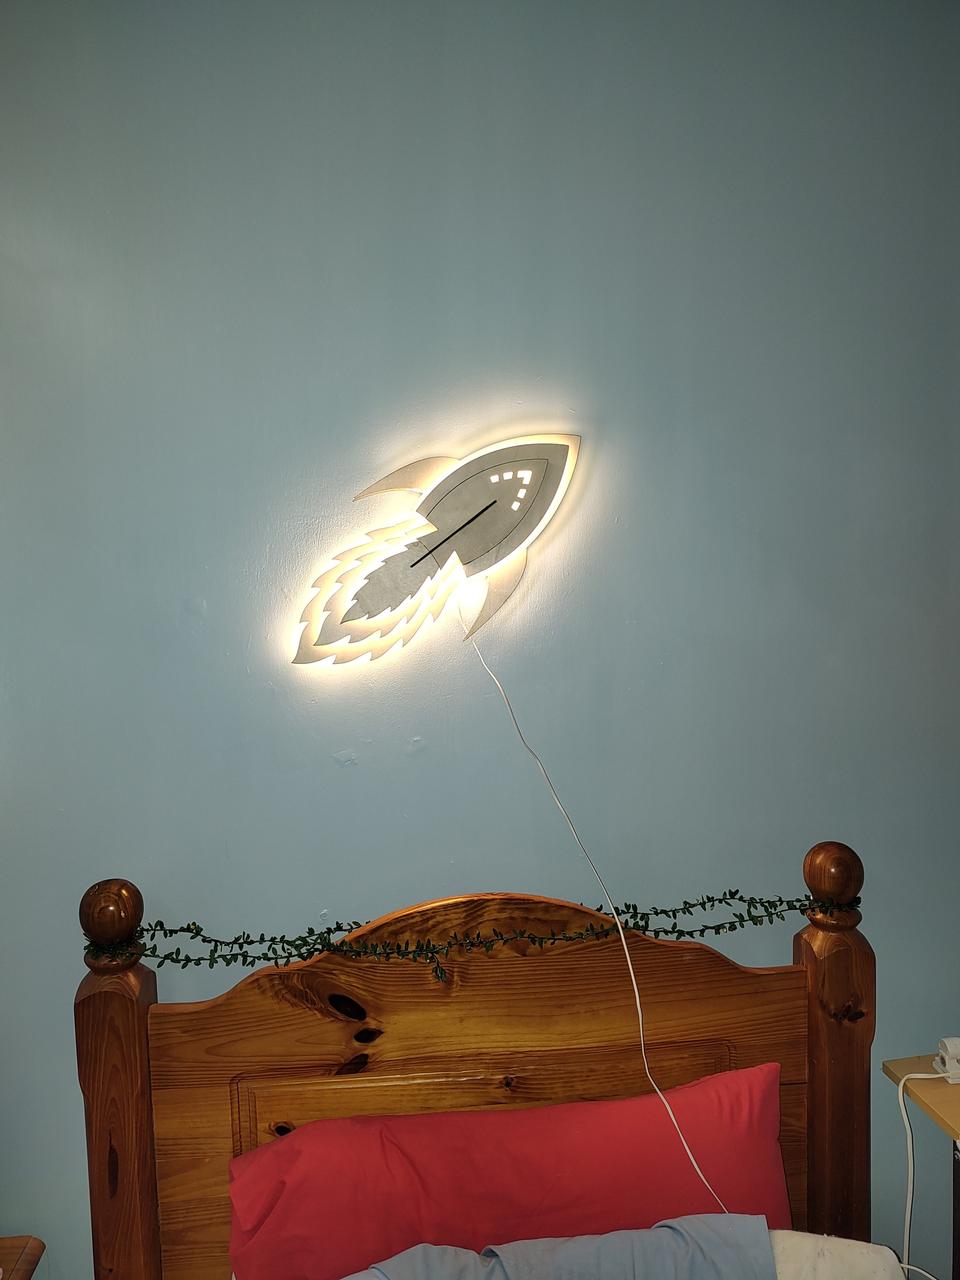
It's positioned over the headboard of the bed and the boy uses it every night for bed-time reading. This photo was taken just after it was fitted, and the wire is now stapled to the wall for safety and neatness.
Design files
Feel free to use these for non-commercial purposes. If you're a company and want to mass produce these, or something based on them, for sale, please reach out to me to discuss, via email at:
andy.darcy.jewell[at]mailo.uk
Vector Colour Code
I use colour coded SVG files and my laser CNC control software is set up to control the laser intensity and movement speed according to the colour.
| Colour | Vector/Fill | Function |
|---|---|---|
| Red | Vector | Cut |
| Blue | Vector,Fill | Engrave |
| Green | Any | Ignore |
| White | Fill | Ignore |
Note: When cutting, make sure you do engraving or enclosed shape cuts before the enclosing cut. In my setup, this is controlled by the z-order of the vectors - ones towards the "bottom" are cut before those towards the "top" of the stack, and that is how these files are organised, but please check that your setup does the same. I recommend doing a couple of test cuts in cardboard or scrap material first.
These files are all designed to fit within a 400x400mm cutting bed. Due to the size of some pieces, I don't recommend trying this project on a laser with a smaller bed, although you could scale them down or break them into smaller pieces.
| File | Notes |
|---|---|
| Rocket base and top layers.svg | Full 400x400 mm sheet |
| Rocket base layer spacers.svg | Part sheet |
| Rocket layer 1 extra spacers.svg | Part sheet |
| Rocket layer 1 with spacers.svg | Full 400x400 mm sheet |
| Rocket layer 2 extra spacers.svg | Part sheet |
| Rocket layer 2 with spacers.svg | Full 400x400 mm sheet |
| Rocket layer 3 extra spacers.svg | Layer 3 extra spacers |
| Rocket layer 3 with spacers.svg | Full 400x400 mm sheet |
| Rocket sections with supports.svg | Full 400x400 mm sheet |
| Rocket top layer 3mm slot.svg | Part sheet |
To download the files, right-click on the filename, and select "Save as...".
Materials
| Material | Qty | Notes |
|---|---|---|
| 3mm Birch Plywood 400x400mm | 6-7 sheets | Wherever you usually get it. Make sure you use laser-safe ply as some hardware store ply can emit dangerous fumes if they contain certain glues. |
| 12V COB LED Strip | 2 metres | Ebay/Temu/Hardware store/etc. |
| 2-core bell wire | 3 metres | Depends on how far your power socket is from your light |
| Plastic cable clips | 1 for every 30cm | Depends how long your lead needs to be. Use the appropriate size for your bell wire. |
| Inline brightness control | 1 | Usually available from same source as COB strip |
| 12V Power supply | 1 | May be available bundled with COB strip. |
| Wood glue | <50ml | Any generic wood glue should do. |