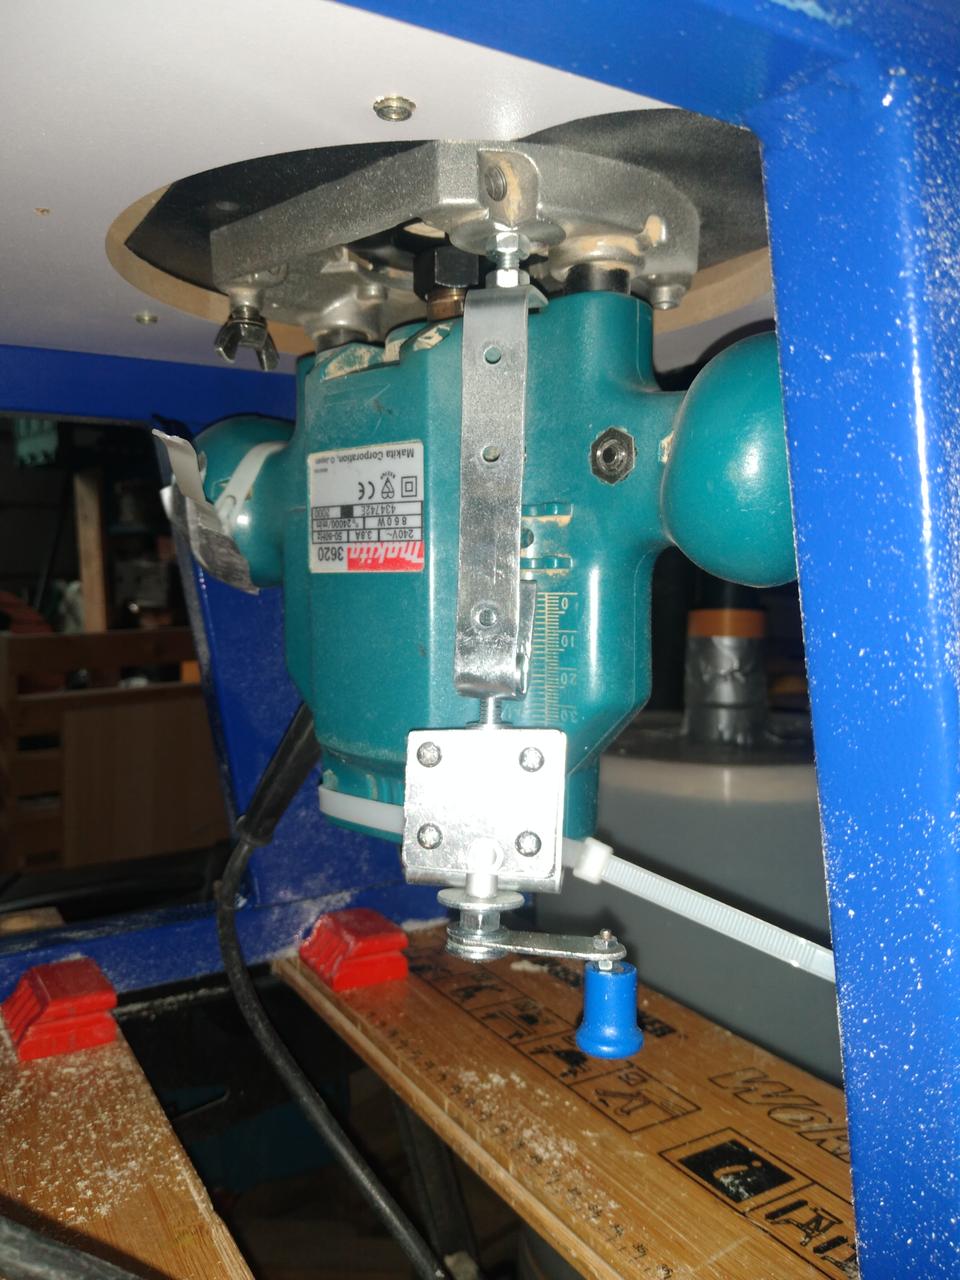
Makita Router Plunge Adjuster
This adjuster fits onto the body of my Makita router which I use on my router table, to enable easy, fine control of the bit height/plunge depth. I used left-over materials I bought for another project.

Problem statement
It's really hard to make fine adjustments to a plunge router's bit depth when it's mounted on a router table. You have to fight against the plunge springs which are quite strong, and because it's upside down, you have to push doubly hard, which means making tiny adjustments is almost impossible. I need to be able to adjust the bit depth by fractions of a millimetre with ease, and after many frustrating attempts at manual techniques, I decided a gadget was the only way to go!
Inspiration
I've seen videos online of people using expensive fixed routers on router tables, and the ease with which they can adjust them. I have two routers - a new McAllister 1400W one which was about £55 from B&Q, and this old second hand Makita 860W one that I bought on Gumtree for £10, which is mounted on my router table. A DeWalt fixed router would cost me over £300, and I'd then need to buy a more expensive router table, which would have the built-in depth adjustment, for about another £300, and that's money I don't have.
Solution
I used a 100mm M6 coaching bolt, an M4 machine screw, nuts and washers, and a mending plate bent into a "curly L" shape. The machine screw mounts into the hole that the depth step turret used to be in, and the coaching bolt mounts via a short piece of 8mm aluminium tubing sandwiched on a steel L plate and some other bits of steel to grip the top of the router body. The coaching bold screws into an M6 dowel nut to adjust the height. The whole assembly is lashed to the top of the router with a hefty cable tie. There is a crank handle attached to the top of the coaching bolt to enable it to be easily turned to make adjustments - the knob came off the end of an old, broken precision screwdriver!
Tools used
- Vice - to hold the metal parts during cutting and forming
- Hacksaw - for cutting the metal parts to size and shape
- Drill press - for drilling holes and opening up existing hole to fit screws and bolts
- Metal files - for getting rid of those nasty burrs and sharp edges
- Hammer - to beat the mending plate into the required shape
Bill of materials
| Item | £Cost | Notes |
|---|---|---|
| 100mm M6 coaching bolt | £0.50 | Approx cost £2.50 for 5 at DIY stores |
| 40mm M4 machine screw | £0.10 | Approx cost £2.00 for 20 at DIY stores |
| 100mm mending plate | £2.00 | Approx cost £6.00 for 3 at DIY stores |
| Aluminium tube | £0.10 | Approx £4.50 per metre at DIY stores |
| Aluminium plate | £?.00 | Had this on hand as scrap |
| M2 nuts and bolts | £?.00 | Had these on hand from a bargain store selection box |
| Cable ties | £0.10 | From my big tub of 100's of cable ties I periodically refill |