Laser Cutter Update
Laser Cutter Update
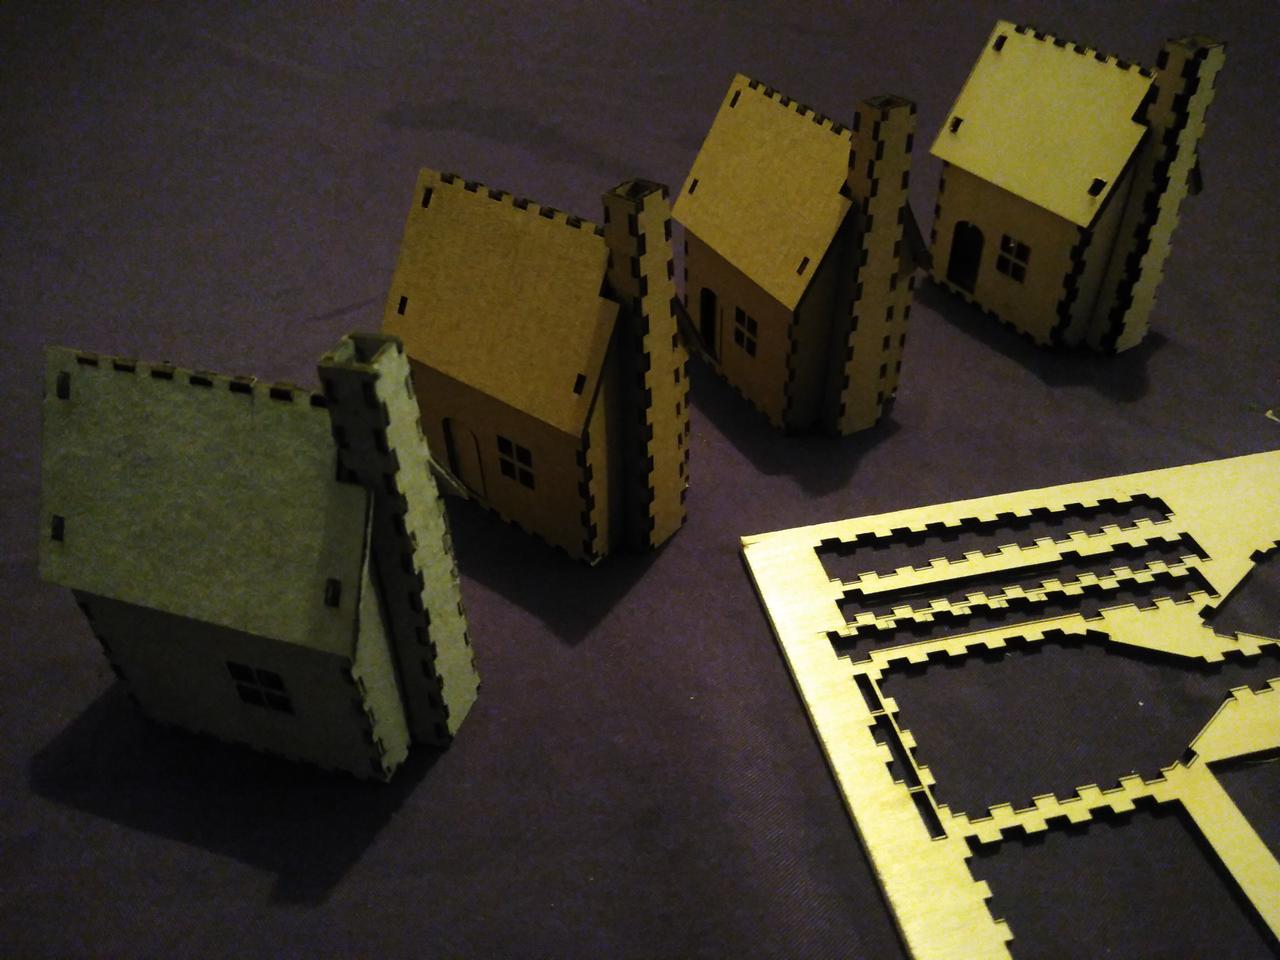 A row of four laser-cut Goblin Cottages in different materials - from left to right: 2mm dense cardboard; 2mm corrugated cardboard (x2); 3mm birch ply.
I've been quite busy of late, so I've neglected the blog for a while - I'm starting to address that with some updates. It's been quite the journey with the laser cutter - I'm no longer using the same control software, and I've "tweaked" my workflow quite a lot.
First off, LaserGRBL just wasn't working for me, despite all the effort to get it working. I couldn't get it to import images of any type, which is something I really need to do. But worst of all, I had several occasions where it just stalled and stopped sending GCode to the cutter mid job - leaving the laser on, too, and scorching the workpiece. It turns out that this is probably because Windows executables running under WINE are limited to 4GB of RAM, total, and when it fails to allocate memory during a cut run, it just freezes. It also flat out crashed a few times during job setup, meaning I had to start all over again, which is frustrating. I'm using an old but well-specced laptop for this, which boasts 16GB of RAM, so it's not really lack of actual memory at issue here. However, throughout the process, I learnt a lot about my machine, about G-Code, and also about what I do and don't like about LaserGRBL too, so it's not all lost. After all of that, I started looking round for something else.
I found "Universal G-Code Sender", or "UGS" for short, which is a Java-based program. It was so much easier to install and get running than LaserGRBL, but the interface is somewhat quirky in comparison. For a start, the work-flow is just weird in some respects. With LG, you can more or less just load an SVG vector or G-Code the same way, and start cutting; with UGS, you have to use a different tool for working with SVG than pure G-Code, and flipping between the two sometimes puts UGS into a state where I couldn't work out how to get it to do anything. Restarting the program would fix this, and I think it's primarily my lack of understanding of the "modes" of the program that causes this, but it was very frustrating. Another difference is the way the program handles "macro buttons" - both programs have similar concepts, where you can assign a bit of G-Code to a custom button in the interface, which will get sent to the cutter when you click it. LaserGRBL puts these along the bottom of the window, just under the G-Code visualiser panel; in UGS, they're "hidden" in the "Macros" tab of the Toolbox sub-window, and by default, you can't have them visible at the same time as the jog controller. That makes them a bit awkward to use, and they're also a lot more simplistic than the LaserGRBL ones - it offers just one type, whereas LG offers three types: standard, toggle and momentary action buttons, the latter two of which allow two separate bits of G-Code to be sent in each state, for instance you can toggle the air-assist with M08 in the first state, and M09 in the second. In UGS, you need to have two seperate buttons to achieve this, and the jog buttons are too big to be displayed at the same time.
Once I'd got my head round the quirky interface, and managed to work out how not to make it "lock up", I was able to get some work done. I did some more ambitious cuts than I'd done with LaserGRBL, and it was more stable. However, it seems that the same problem with freezing up during a job still occurs with UGS - and for much the same reasons, too: lack of memory. I suspect this is a limitation baked into the Java executable's configuration, but I've not delved into that.
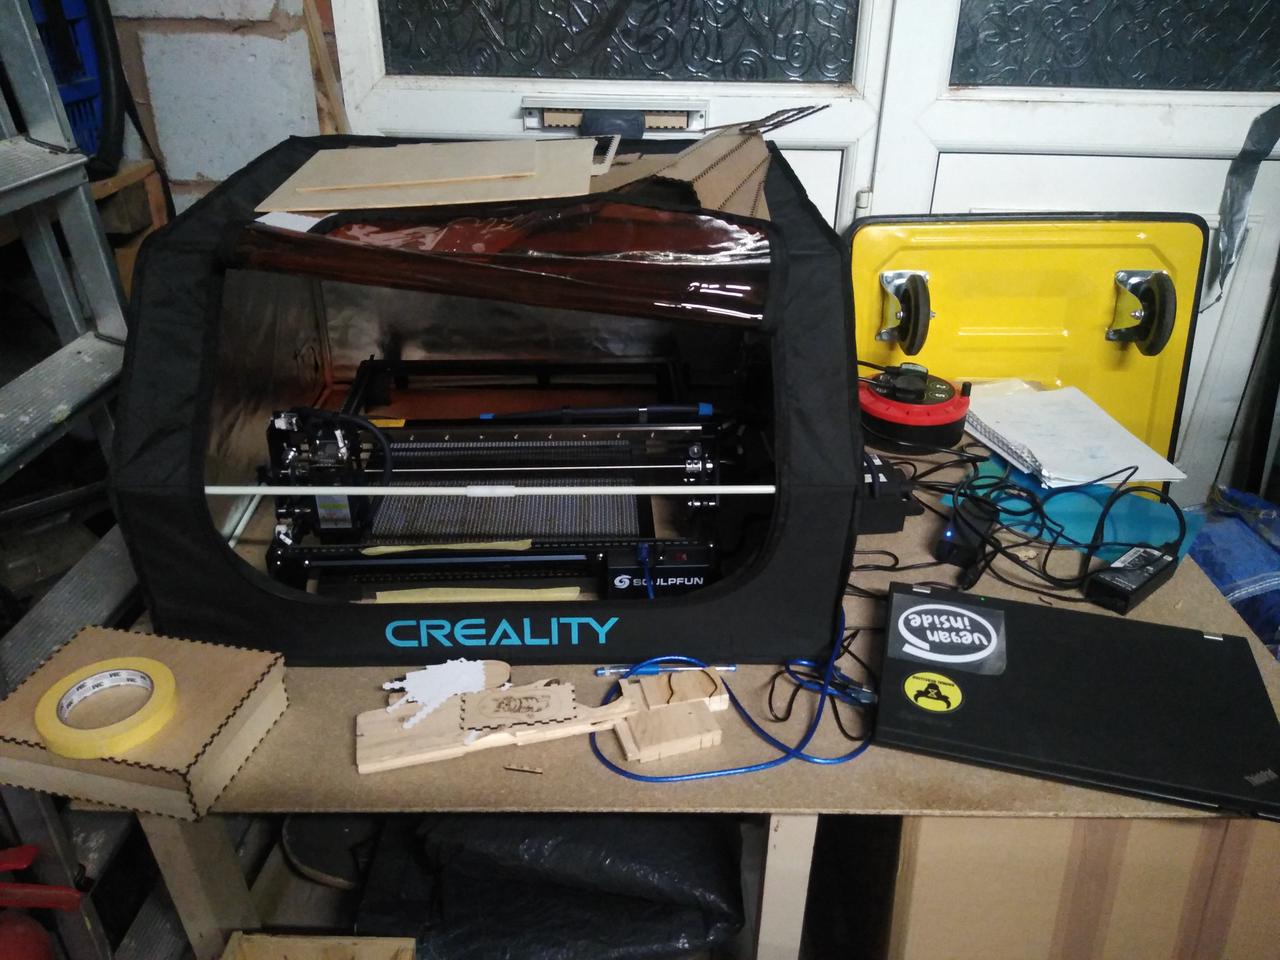 My laser cutter rig, tucked away in a corner of the
garage/workshop. The fume hood is made by Creality, but the laser cutter is by Sculpfun.
My laser cutter rig, tucked away in a corner of the
garage/workshop. The fume hood is made by Creality, but the laser cutter is by Sculpfun.After all that, the search for another approach was on again, and I even wondered if I could "just send the G-Code directly to the cutter" over the USB Serial link. On investigation, this apparently can work, but it won't notice if the controller returns an error - like seeking out of bounds - and can easily overflow the controller's buffer, leading to dropped commands, and spoilt workpieces. However, there are a number of command-line (CLI) G-Code utilities, and I tried out one of them called "GRBLHud". It's written in Python, so it might also work on Windows, and can be installed via Python's "pip" package installer. It has a rather spartan user interface, which is controlled by entering shell-like commands, and some instant-action key combinations, like "ctrl-c" (to cancel the currently running job). Everything else is manual, but it does have code that monitors responses from the controller, looking for errors, and it keeps track of how much buffer space it thinks the controller has available, and makes sure not to send too much at a time so it doesn't over-run the buffer, and drop commands. It doesn't have any sort of "buttons" or jog panel - but you can enter some G-Code commands directly on the command-line to jog the head to where you want it, and there is a command history that is remembered between jobs. It also doesn't deal with anything other than G-Code files - if you want to cut an SVG file, you have to convert it to G-Code some other way, but it has one big advantage that I am liking very much - you can launch it directly from the shell, with a G-Code file specified, and it will immediately start streaming that file to the controller. It's not fancy, but it is effective, and it hasn't once locked up when sending a job - the memory usage is obviously far lower because not only does it not have a memory-hungry GUI, but it doesn't try to "visualise" the progress of the cuts, which is evidently quite memory-intensive. I've now been using it for a couple of weeks, and I'm happy with it so far.
I've been using Inkscape's GCodeTools to turn vector designs into G-Code right from the start, but I have been unable to work out how to engrave JPEG or PNG images using this. I tried a number of DIY approaches, but all I got was Inscape crashing because I pushed it too far! That's not Inkscape's fault. UGS can import images, but it just seems to trace the edges of the image, rather than doing a raster-burn of them, and LaserGRBL says it can, but just hangs when trying, so I had to search for another way. I used to use a "K40" laser at hte local makerspace, and we used software with that called "K40-Whisperer", and that could burn rasterised versions of images, but it doesn't work with G-Code based cutters so is no help to me here. After a bit of searching, I managed to find another Python program called "image2gcode" that does exactly what I want: takes an image and, dot by dot, and converts it into G-Code "cut" moves to burn the image with a laser (or cut it with a CNC mill). You can tweak all sorts of parameters to get output you like, and the conversion is surprisingly fast, too. It did take a fair bit of twiddling to get right for my cutter, but it felt like discovery rather than a fight.
So now it feels like my workflow is shaping up quite well; I can design stuff in Inkscape, and export G-Code; I can rasterise images to G-Code with image2gcode, and I can send them to the cutter with GRBLHud. Sorted! Well, of course, not quite.
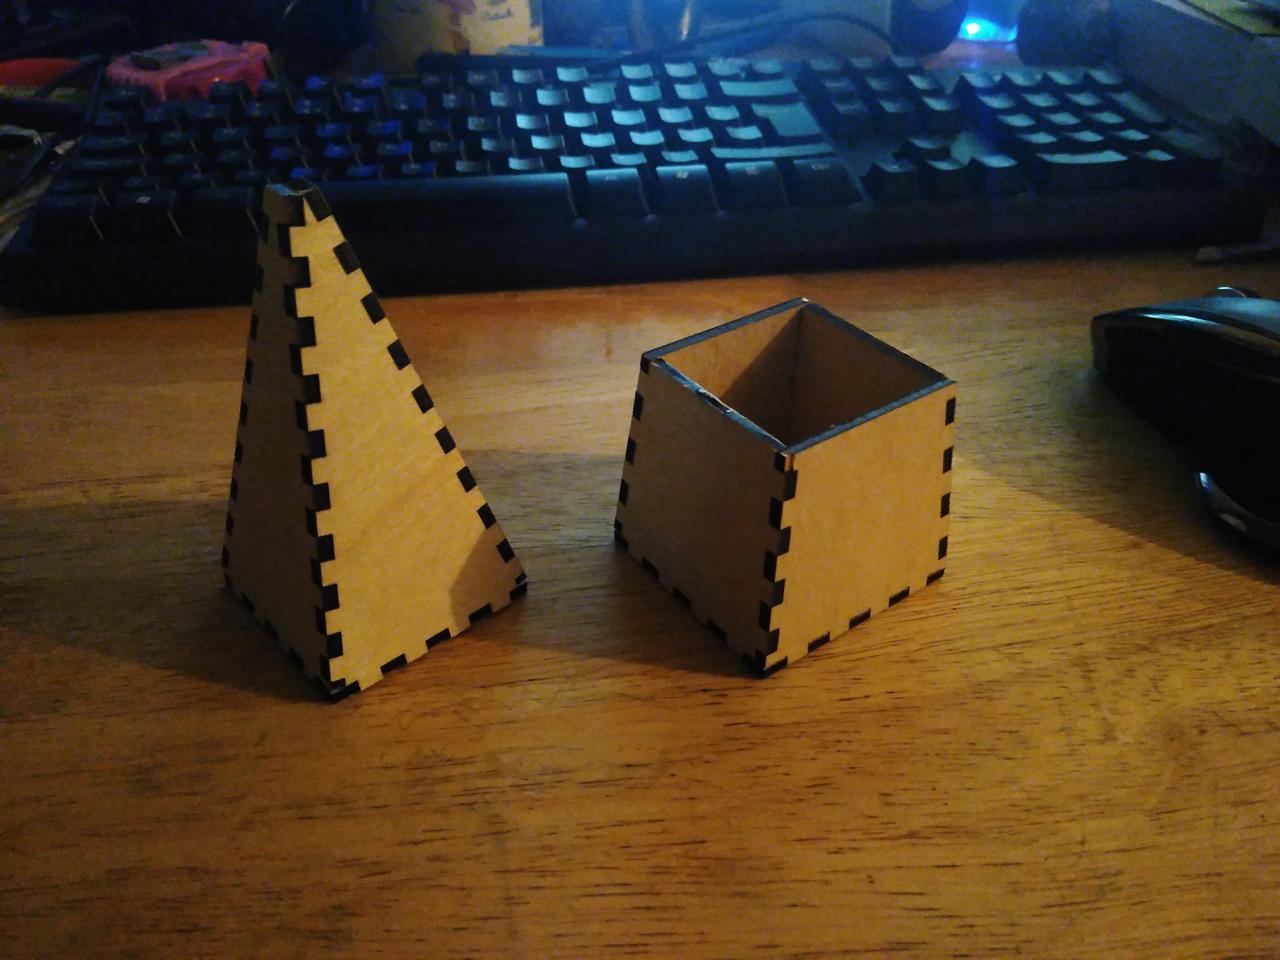 Tabbed structures - a tall pyramid, and a
slanted open-top box.
Tabbed structures - a tall pyramid, and a
slanted open-top box. Plaque for my dad's birthday. It bears the
logos of several famous prog rock bands, and bears the inscription "PAUL'S PROG ROCK COFFEE BAR".
Plaque for my dad's birthday. It bears the
logos of several famous prog rock bands, and bears the inscription "PAUL'S PROG ROCK COFFEE BAR".Along the way, I've been working on a number of projects to hone my technique - tabbed boxes; name-badges; some little model "Goblin Cottages"; and a plaque as a birthday present for my dad. I had got into the habit of manually modifying the G-Code files to do things like switch on the air-assist, and adjust the cutting speed (feed rate) and power (spindle speed), and was getting bored with the repetetive manual work involved. I'd decided I should fix that "at some point". The changes I would usually make - using a text editor, usually "vim" - were the following:
- Remove all "G00 Z0.000000" lines
- Remove all "G01 Z0.000000 F100 (Penetrate)" lines
- Insert a "M08 (Air on)" near the top
- Amend the first G 01, 02, or 03 line's feed rate from "F400.000000" to a more appropriate number, and add a laser power value:
- For engraving: "F1000.000000 S200.000000"
- For cutting: "F150.000000 S1000.000000"
- Delete all the remaining "F400.000000"s
- Delete all the "Z" settings - my laser doesn't have a Z-axis, but it spends time pretending to do the move
As you can see, that's just a pain in the ass. Eventually, last weekend, I actually coded up a Python script to do these "automatically", and I successfully tested it and "put it into production". Now I don't have to do those changes manually!
I can now just run cleanup_gcode <feed-rate> <laser-power> <gcode-file>:
cleanup_gcode.py 150 1000 example.gcode
I can just replace the numbers and file-name, and it will automatically spit out a fixed.
One thing I'd noticed early on, but not found any solution to in any of the programs I've tried, is that when cutting intricate designs with small internal cuts that are positioned inside larger cuts - like windows in the Goblin Cottage wall, it would often cut the outline before some of the inside details. This is a problem because materials are rarely perfectly flat, which means that not all of a sheet is in contact with the cutting bed; when an outline is cut, this results in the part "falling through" a couple of mm onto the bed below. This messes up the focal distance of the laser, meaning that the laser will often then fail to cut all the way through, but the pieces also sometimes shift horizontally a bit too, which is worse, because it then means those holes, subsequently cut, are not then properly aligned. The answer to this is to "simply" cut the holes, or internal details, first, and then the outline, but nothing seems to offer this as an option - not even the graphical ones.
So, recently I got to thinking - as G-Code is "just text", could I add a feature to my existing cleanup script, to rearrange the paths in a cut so that the small cuts are done before the large ones? Yesterday, I actually got round to putting this together. It turns out that GCodeTools helpfully puts comments in that identify each path from the SVG file it was generated from:
(Start cutting path id: path100)
G01 X27.523203 Y8.444720 Z0.000000 F400.000000
...
...
(End cutting path id: path100)
This makes it easy to identify each piece. It also rather helpfully starts with a "fast move" to the first point in the path, so each path is "self-contained". I experimentally manually rearranged a couple of objects on a test cut, and it worked as expected. I then wrote some code to extract the paths into a data structure, and another bit which went through all of the G commands working out a rough bounding box for each path - what it's lowest and highest x,y coordinates were. Once I had that, I could sort the objects by their bounding box vector: (x1,y1)-(x2,y2), and then reverse the order. I then just had to "rewrite" the paths' GCode in that order. Because a large area path necessarily has lower bottom left-hand corner coordinates than any of the smaller paths within its boundary, it will get cut after those smaller area paths. Well, shockingly it works! On top of that, it's also fast enough to be useful too! BINGO! I added it into the cleanup_gcode.py script, and it now runs "automatically" every time I use it. I might make it optional if I need to.
The code for the cleanup script is here, if you're interested: cleanup_gcode.py, again it's released under the GPL3, so you're free to use it for your own purposes, as long as you abide by the GPL3's terms.