Auto-On Shop Vac Controller Update 1
Manual Override Switch Fitted
I ordered some illuminated 12V DC panel switches on Ebay a few days ago, so I could add the planned feature of a manual override. This is so that I can run the vac without having to start an attached tool. Well it arrived yesterday, and tonight I got round to wiring it in, and fixing it to the front panel of the project box.
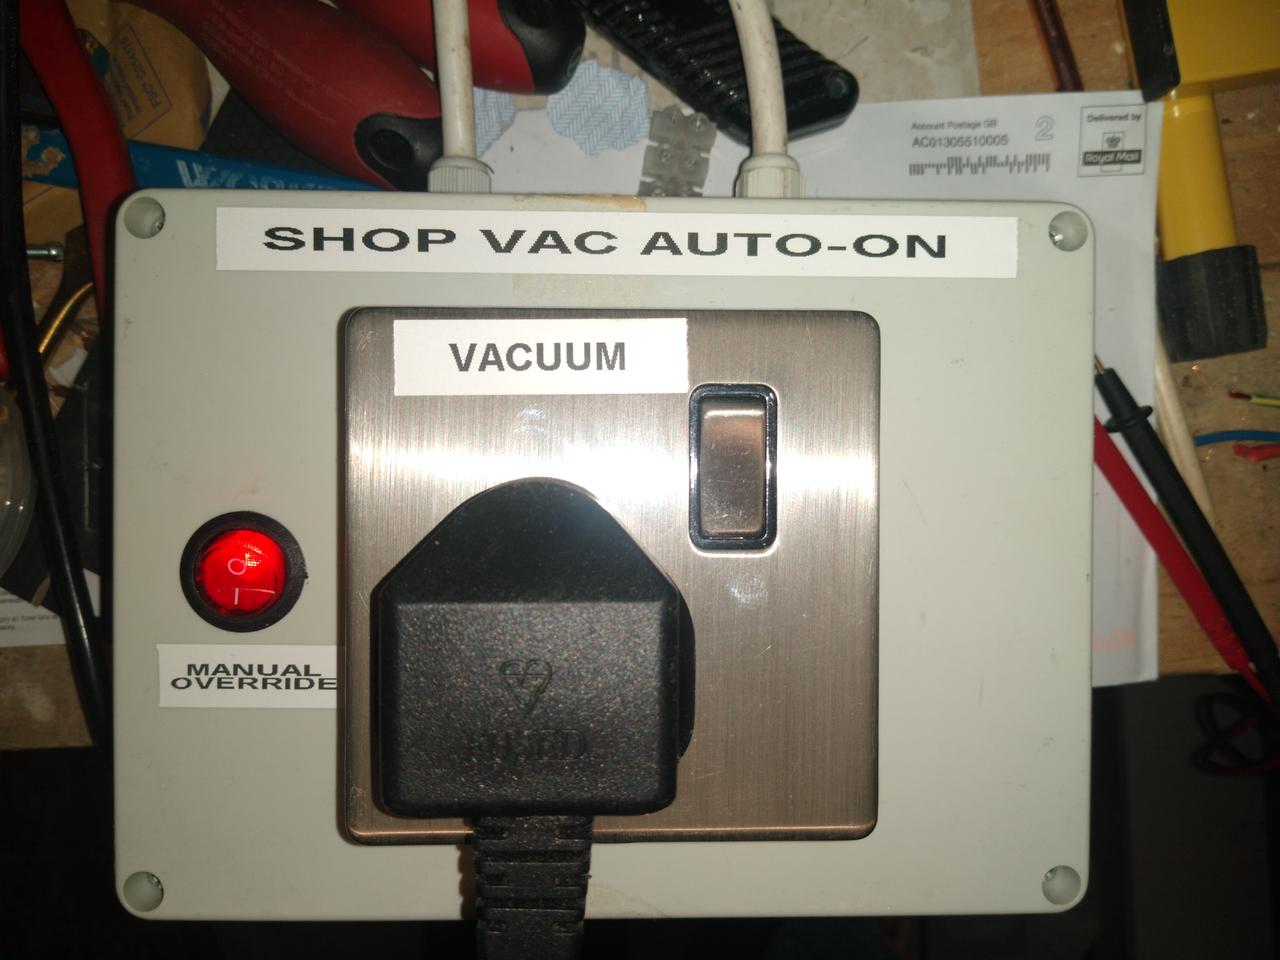
These devices are pretty simple switches, but they have an added LED wired in inside, and an extra pin to control it. The extra pin of the LED is marked by the tag being brass plated instead of plain tin, so it's "gold" coloured. It's wired to the cathode of the LED, so you have to tie it to negative; the other two pins just work as normal, but they are polarised because how else would the LED come on when the switch is closed? The centre pin is the negative side, and the one on the opposite side to the gold pin is the positive.
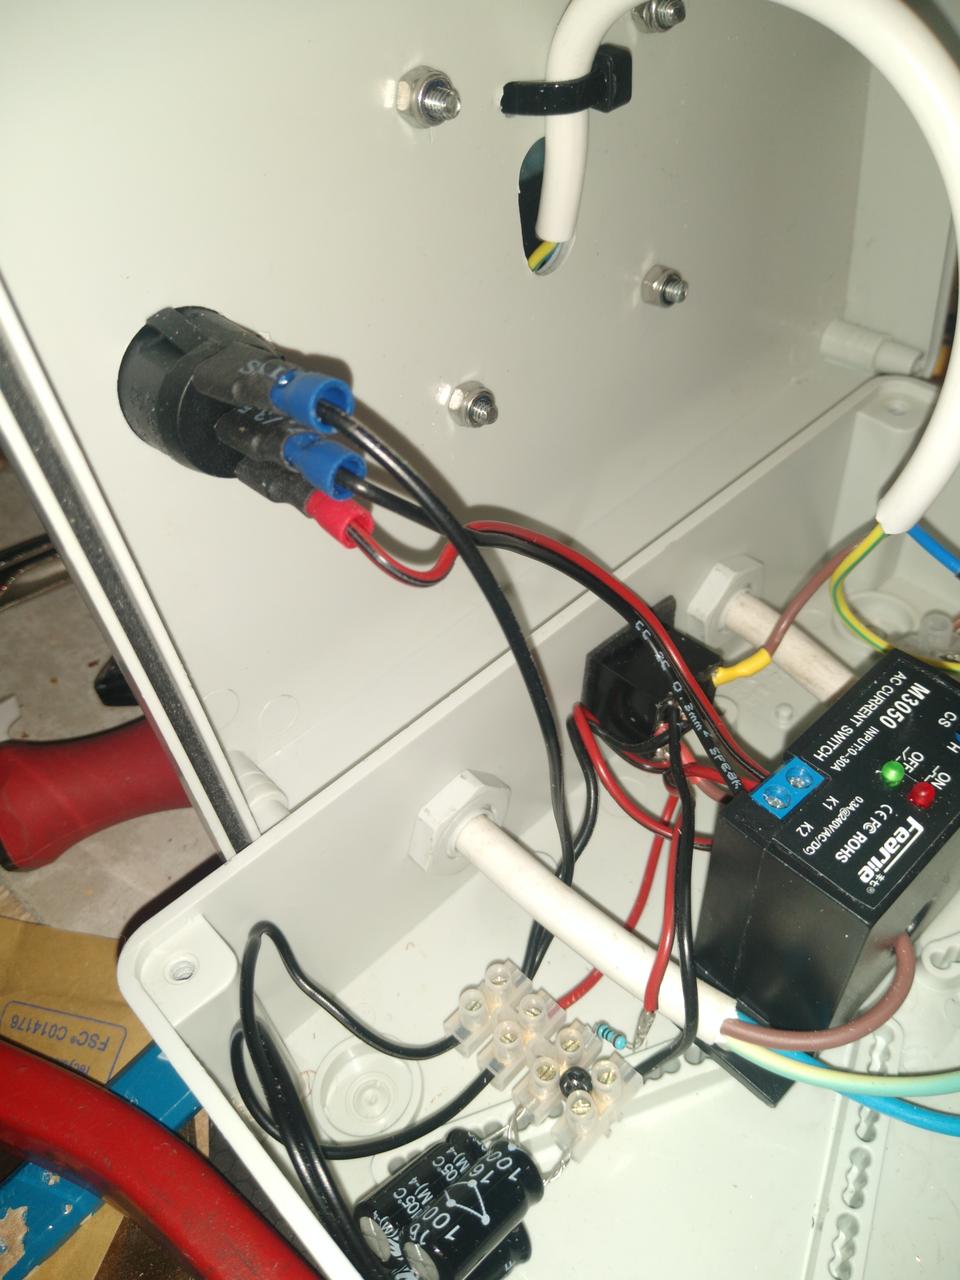
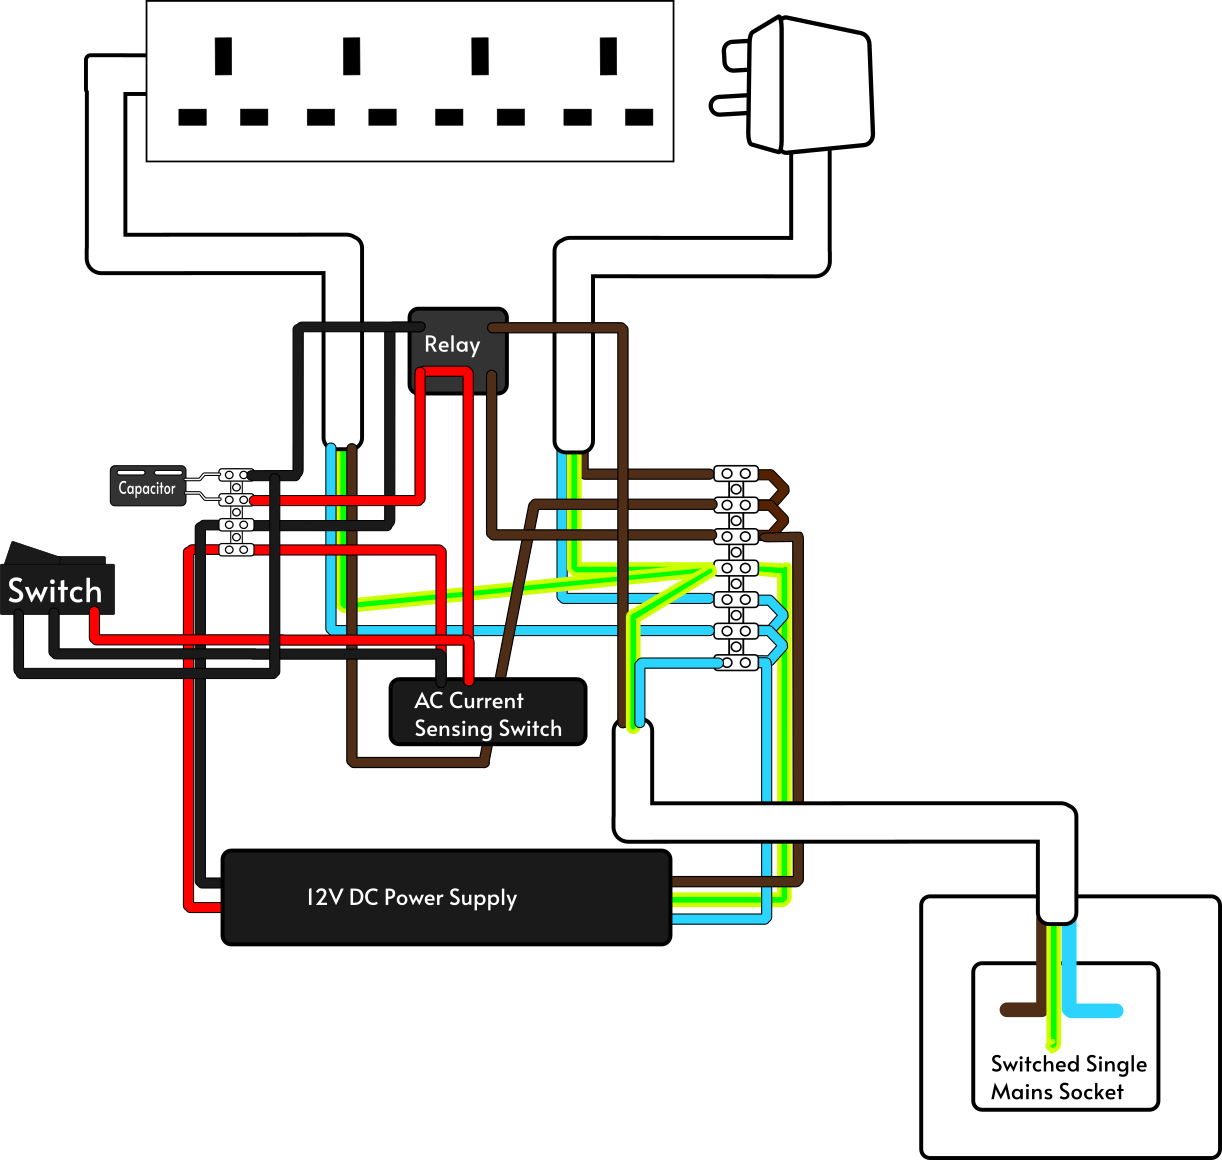
To make this work, I wired the switch pins across the AC Current Sensor's output pins - so when the switch is closed, it will bypass them, and drive the relay directly.
So now when I want to use the shop vac to suck up dust around the workshop, I don't have to unplug it from the controller! I call that a win.