System Reload Project
System Reload Project
It's been a while. Again. My brain's been out of action for a fair proportion of this year really, but after shutting down almost completely in the summer, a couple of months off sick has eventually got the ol' thinker going again. As I began to recover from the haze of an autistic shutdown/meltdown episode, I started feeling I needed something to get me motivated again.
Revamping Old Computers with Linux Mint
With Microsoft recently ending support for Windows 10, this will leave millions of people with computers that are no longer going to receive security or bug updates, and, thus increasingly vulnerable to attack by malware. The lead up to this was part of my motivation for this little project.
So, as background, over years of hoarding, I had accumulated a pile of old computers from various sources, and while I was off, I decided I needed to get the space they were taking up back. I managed, in fits and starts, through brain fog and dissociation, to get them fixed up and gifted out on Freegle. Some of them were just shells, missing combinations of hard disks, memory, power supplies etc. but some just needed a reliable operating system. I installed Debian on a few of the ones that were working enough to use, and put them up on Freegle with enough forewarning and disclaimer for people to make an informed decision. They were snapped up like hot cakes! There were laptops, a netbook, and some desktops. I made sure to tell people they could come back to me if they got stuck or needed help, and I've had a few minor requests, but nothing major.
When the news started to build around the "End Of Windows 10 Support", I realised there was a ready solution here. Some conversations I'd read and even taken part in on Mastodon had led me to the conclusion that a Linux Mint, a Linux flavour I'd first tried about 10 years ago, and not looked at since, had matured into a really decent, beginner-friendly distro. I decided to try it out on one of the family clunkers - a very beaten-up and abused old Acer Aspire that had languished in "The Pile" because it had a power supply fault, a dodgy keyboard and bits of case missing. I had to re-solder the power connector wires back onto the jack plug to get it going, and only 1 out of 3 USB ports worked, so I had to use a hub to connect an external keyboard, mouse, and installation memory stick. It was a pain, but so worth it.
I was impressed by the look, and as I started nosing around, I realised it wasn't just skin deep. I've been messing with Linux since, like, the beginning of the web, so I knid of know the pain points. Some things I observed in the first hour of using it:
- It could play DVDs as soon as I first logged in.
- The GUI is nice and consistent, pretty and logical.
- The Welcome Screen program provides a really decent run through of what to do when you first get logged in.
- Scheduled filesystem snapshots using Rsync to save you from bad updates.
- Automatic updates configurable right in the Update Manager.
- A nice, easy to use, beginner-friendly Software Manager.
- Printer support is awesome.
- Scanner support is also awesome.
The printer thing really impressed me, and I'm not impressed by much these days. I was busy pootling around, and a little notification popped up telling me my Epson inkjet was available to print. Interesting I thought, and carried on with my pootling. I ended up looking at LibreOffice Writer, and remembered the printer, so thought I'd send it a print. Now, this printer is a cantankerous bastard, it often refuses to print under Windows and printing from my usual Debian rig usually requires dancing a dance I can never quite remember the moves for, so I was prepared for a bit of tinkering, but I was totally unprepared for the amount of tinkering required. After I gritted my teeth and clicked print, I waited for the usual dance to begin, and, nothing. A printer icon appeared on the status bar with the other indicators. Then the thing that I was totally unprepared for happened: the printer did it's little start up grind, and then a page came out! And not only that, it wasn't gibberish, misaligned or a muddy brown instead of black! It had never been this compliant before, even when printing from Windoze.
I was DAZED. Printers are often a major sticking point on Linux.
Then I thought I'd try scanning, another major sticking point - not always because of communications problems, but often because scanning software on Linux is usually something like xSane, which is not what the name suggests. It's clunky and bery 90's-esque. On my Debian rig, I still have the HPLIP utility installed because I used to have an HP LaserJet MFP. I was not expecting the simplicity that is the Mint "Scanner" utility. Firstly, when opened, it spent all of 10 seconds to find the Epson inkjet's scanner. I did a scan and had it on the screen less than a minute later. This is not the way it often goes. The interface is, frankly, pretty sparse, but it actually works. It does the job, and, is really easy to understand. It can do multi-page scans direct to PDF too. Nice.
The next thing I noticed was an alert saying there were updates available, even though I hadn't even started the Update Manager yet. I decided I ought to go through the Welcome Screen at this point, and discovered about the snapshots, got the updates installed, and realised I could set up automatic updates if I first set up snapshots. I fiddled with the theming and colour-schemes. Then I browsed round the Software Manager, which is a refreshing, newbie-friendly change to Synaptic. I liked the concise summary of what programs do, and the familiar "app store" design language used.
A few days later, I was talking to a friend, one of the organisers at the local Climate Emergency Hub, and they mentioned they had an old laptop they didn't know what to do with. This sparked a conversation that resulted in me explaining we could install Linux on it. They mentioned how terrible it was about Windows 10 support being discontinued, and all the old computers that were now destined for land-fill. That was when I suggested we could do a session about installing Linux on them. I'm scheduled to do that in February.
Since then, I've convinced the local Repair Cafe, which I've volunteered as a repairer at for years, that we maybe should run a service for anyone who wants their computer converted to Linux. So it's snowballing, and I'm beginning to feel my enthusiasm for things coming back.
So, in the meantime, I've started offering the service on my local Freegle, as a way to get some experience, and hone the process. That resulted in the donation of an HP laptop that went out a few weeks ago, the friend from the Climate Hub's computer has been donated, and I have another in the pipeline, to go out probably this weekend.
One thing I realised early on, is that Linux of any flavour, is quite alien to ex-Windows users. So I've been writing a little "Helpful Hints" doc I can include for people, to ease them through the process. If anyone wants it, it's available here: Helpful Hints.odt
Here are my (partial) notes, an ongoing project on the issue of #EndOf10 and how the Repair Cafe might be able to offer a service to revamp old computers with Linux: Saving Old Windows Laptops From Landfill.odt
Both of these files are free to use, or modify, but please credit this blog.
2025 Laser Cutter Update
2025 Laser Cutter Update
Been a long time since Rock'n'Roll
Busy doing other stuff - life, making stuff, doom-scrolling Mastodon, that kind of thing. I was asked to show some of the stuff I've been making, and I thought the easiest thing to do was gett off my arse and do the first blog post in like forever. So here we are. I'm going to keep this less wordy than usual - just pics and a comment (we'll see how that works out).
First, the laser itself. I might end up repeating myself here, but I don't think I've actually blogged about the upgrades I've done, so here we go…
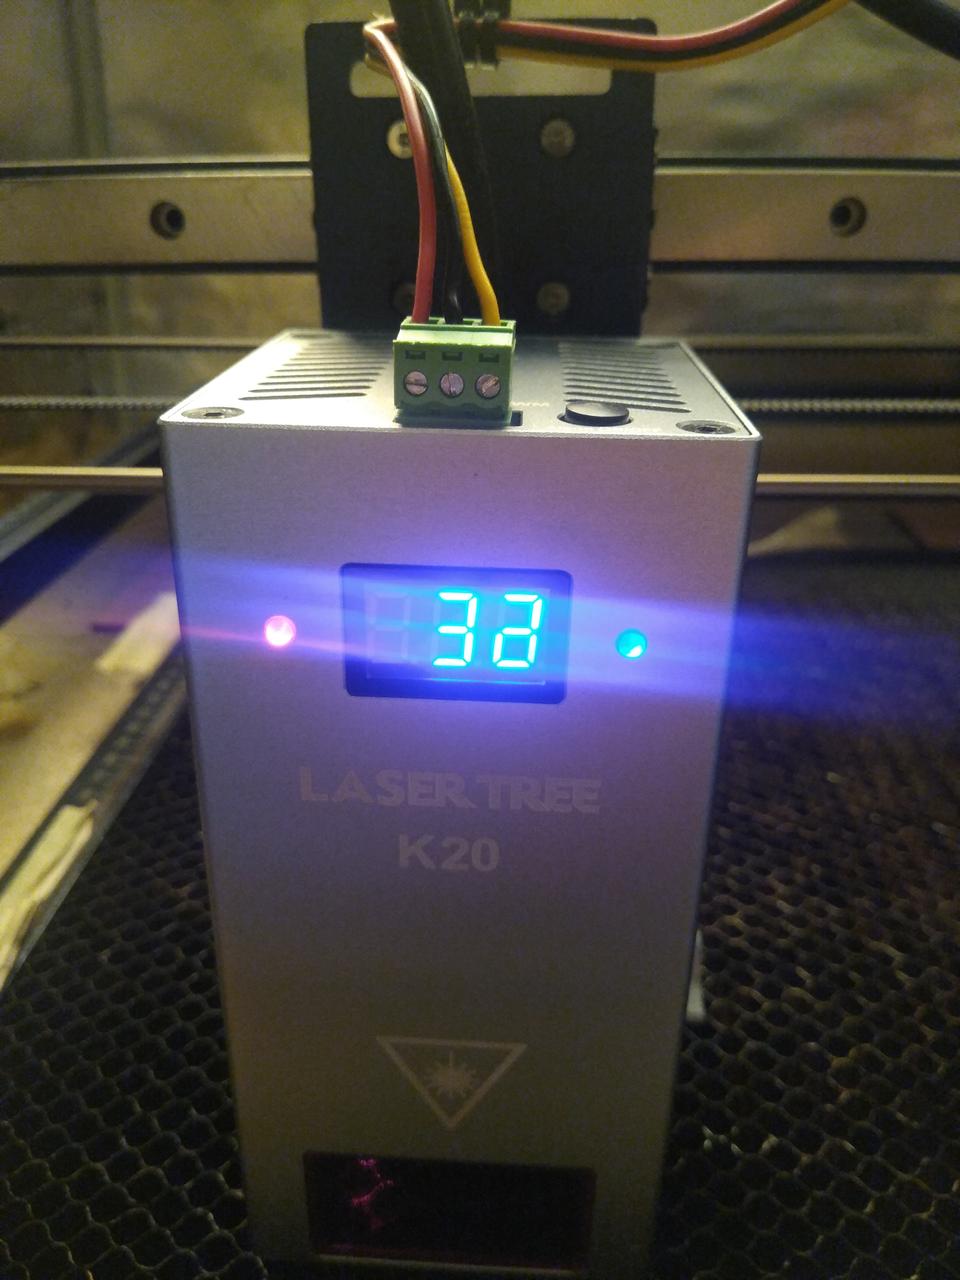
New laser module
I was having trouble cutting even quite thin materials with the 5 Watt output laser that the S30 came with, so I upgraded to a 20 Watt one. That was a bit of a project on its own - I bought a second hand one on ebay (caveat emptor and all that) and it didn't work - the cooling fans were dead. I had to jump through a lot of hoops with the ebay vendor and the manufacturer, but they eventually sent me new fans, and then after more back and forth, the right ones! The first ones they sent were for a newer model and didn't fit.
Presents and stuff
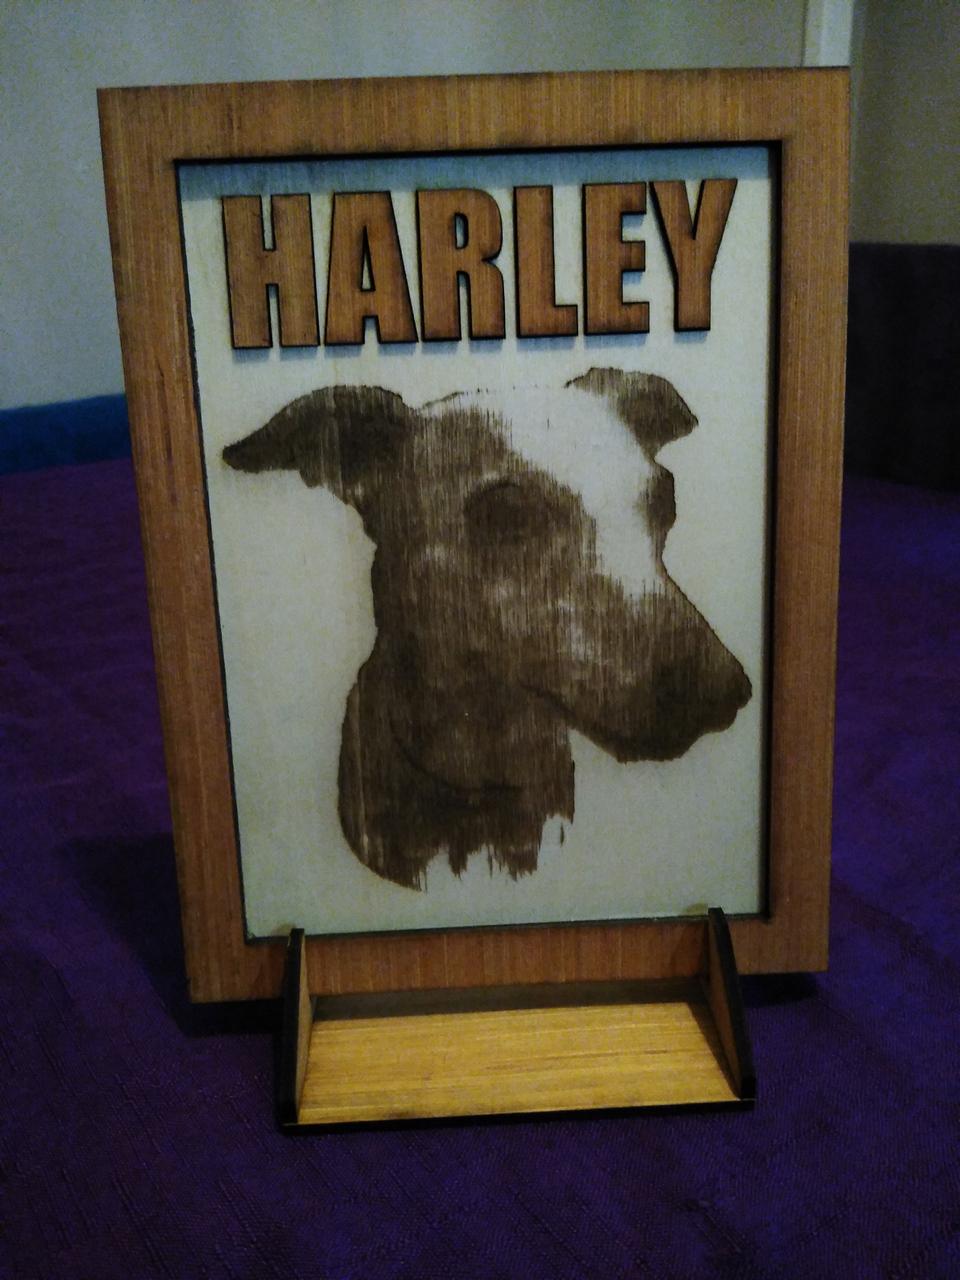
Once I had that, I was able to start easily cutting 3mm plywood, and a bunch of presents for family members followed.
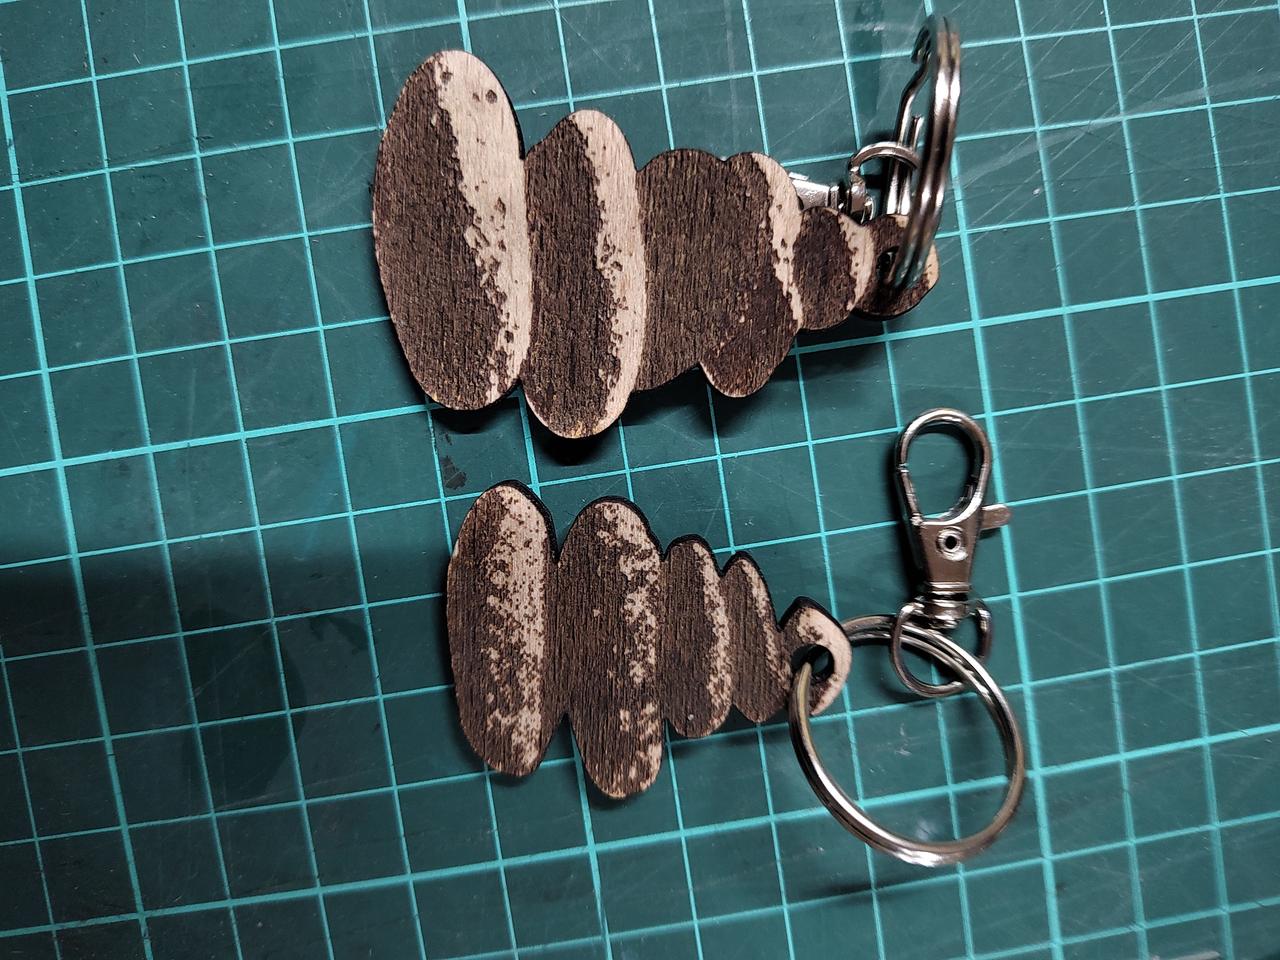
A birthday present for one of my sisters - a memorial to her dog who had passed away recently:
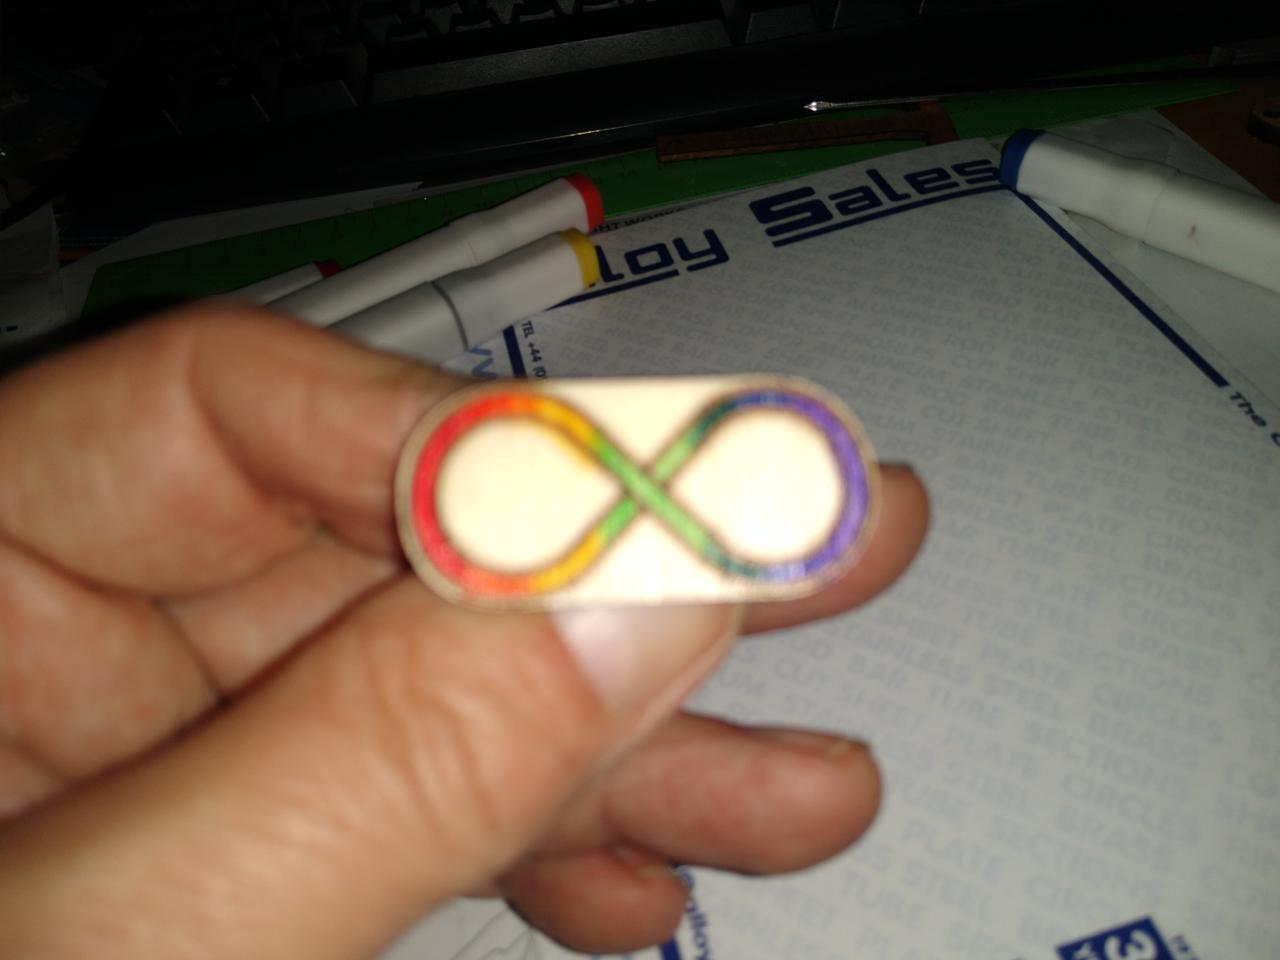
An Autism Infinity Loop badge for myself (I mean, why not?)
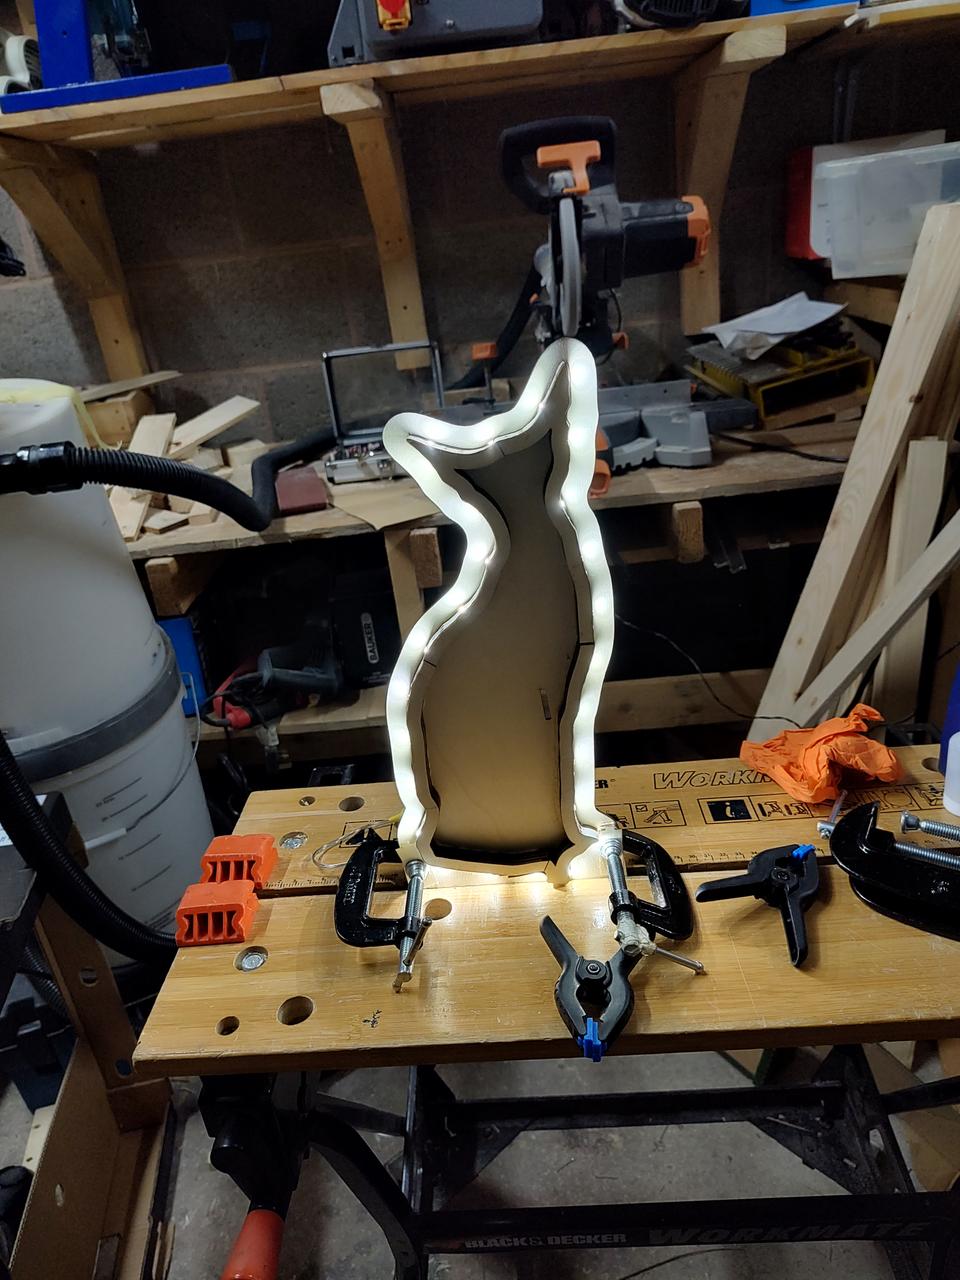
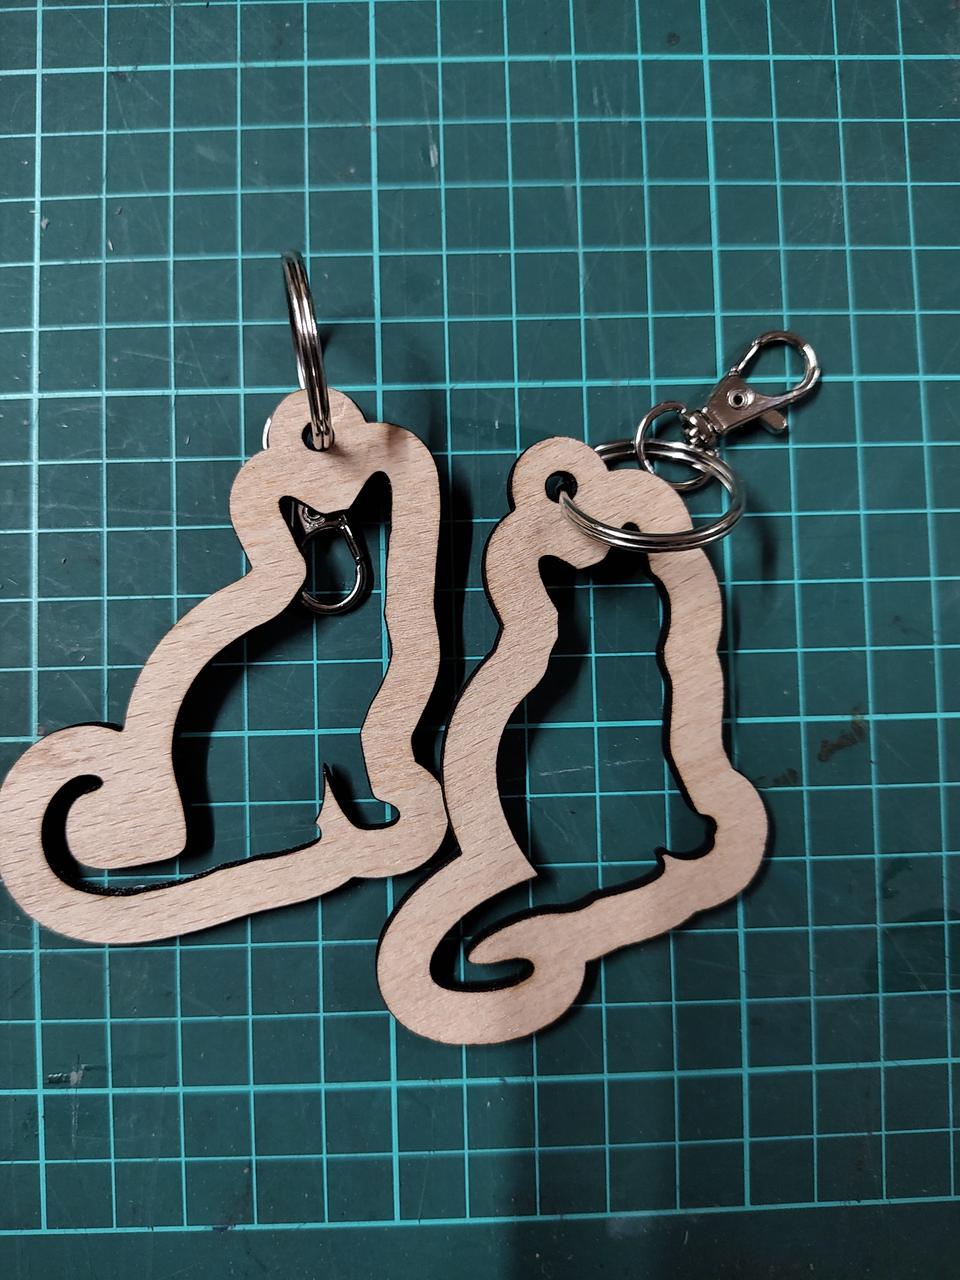
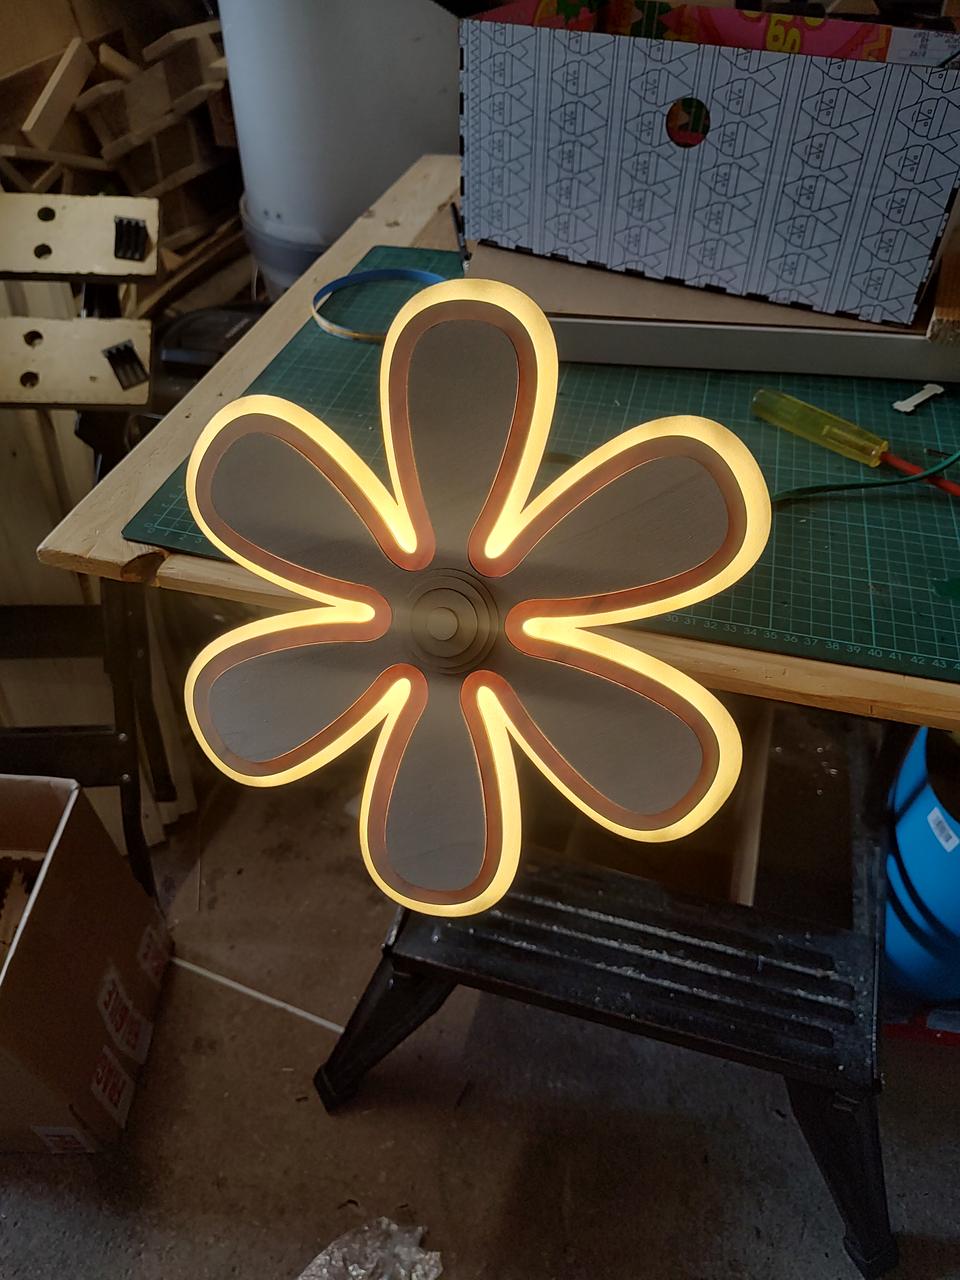
A siamese cat light for another sister's birthday, because she has quite a few of them:
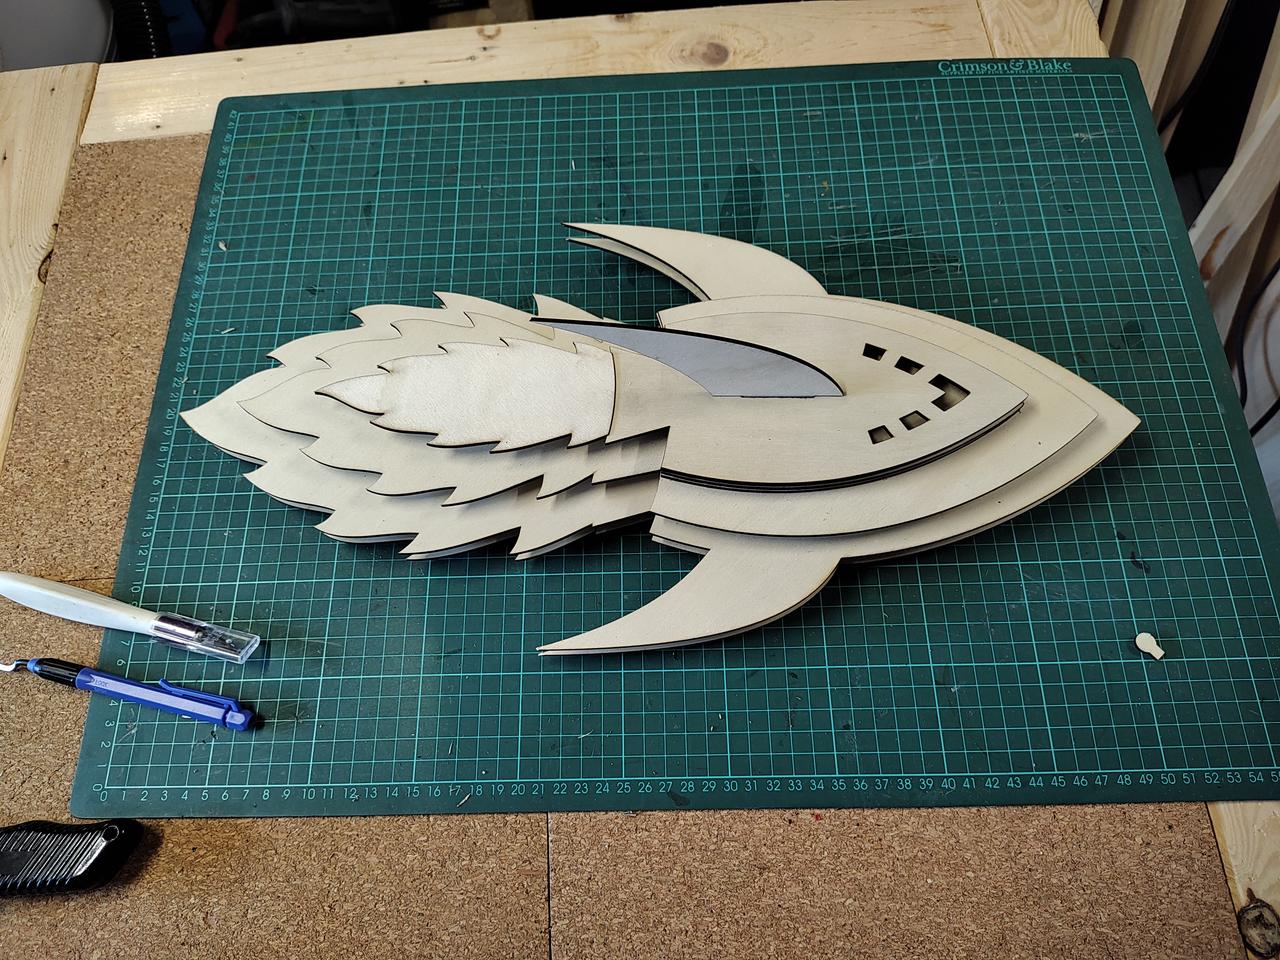
A rocket light for my youngest son's bedroom wall, which I designed and cut, and then didn't get round to completing for months. This is the shell not glued together yet:
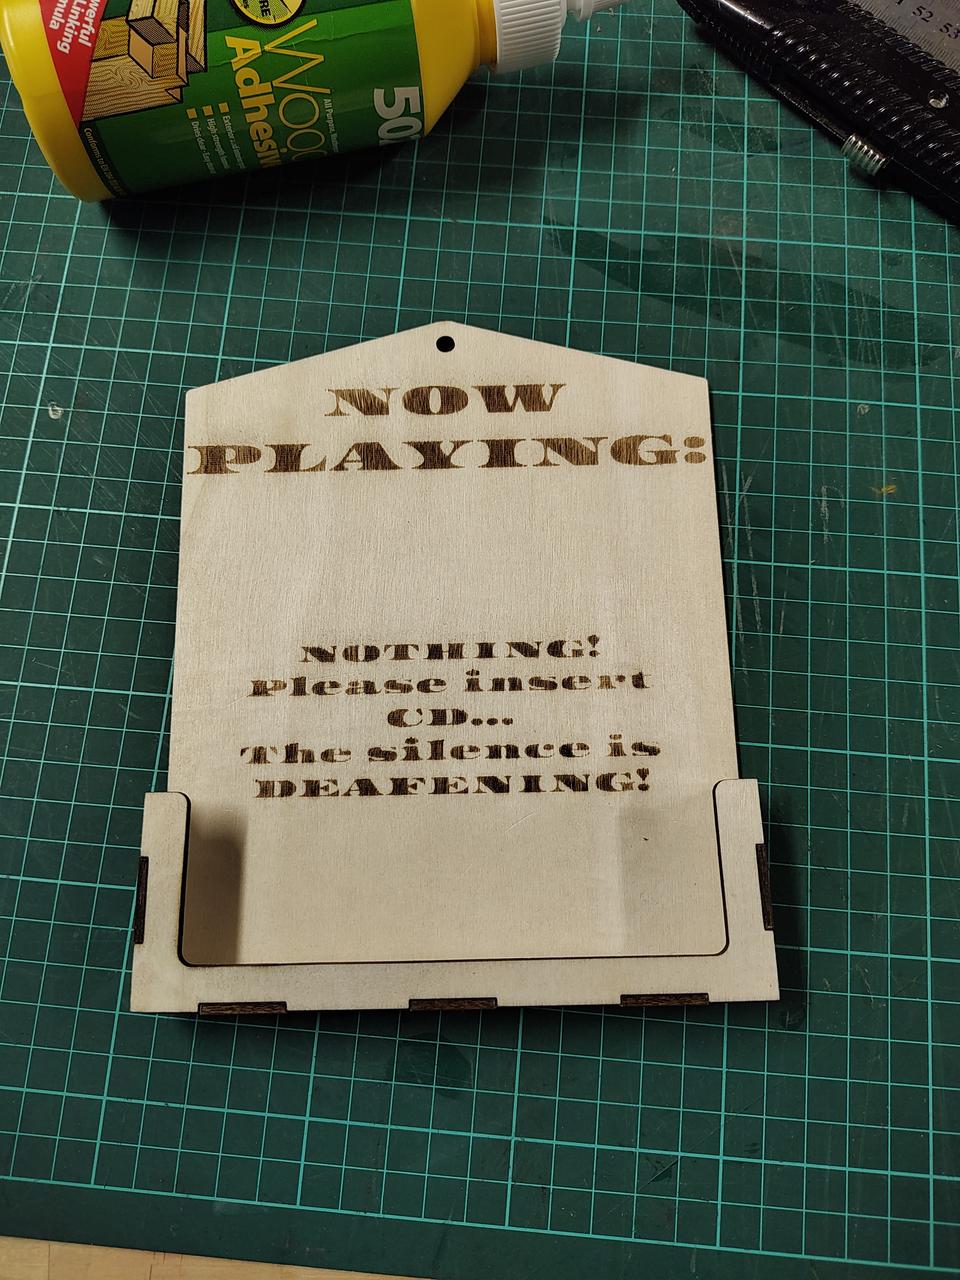
Then, suddenly christmas was upon us, and I made a load of presents for family:


.jpg)


Laser cutter expansion kit
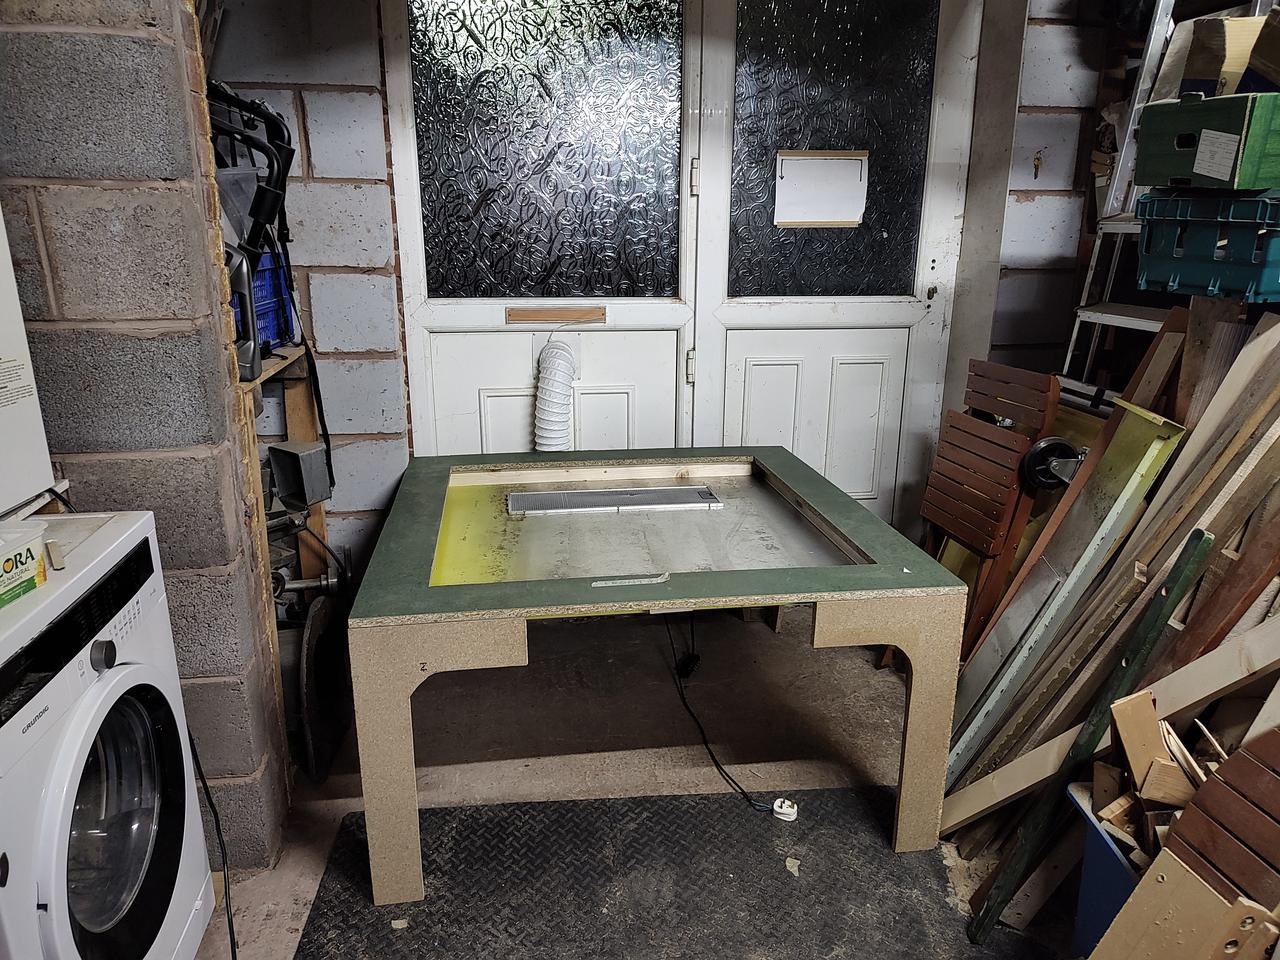
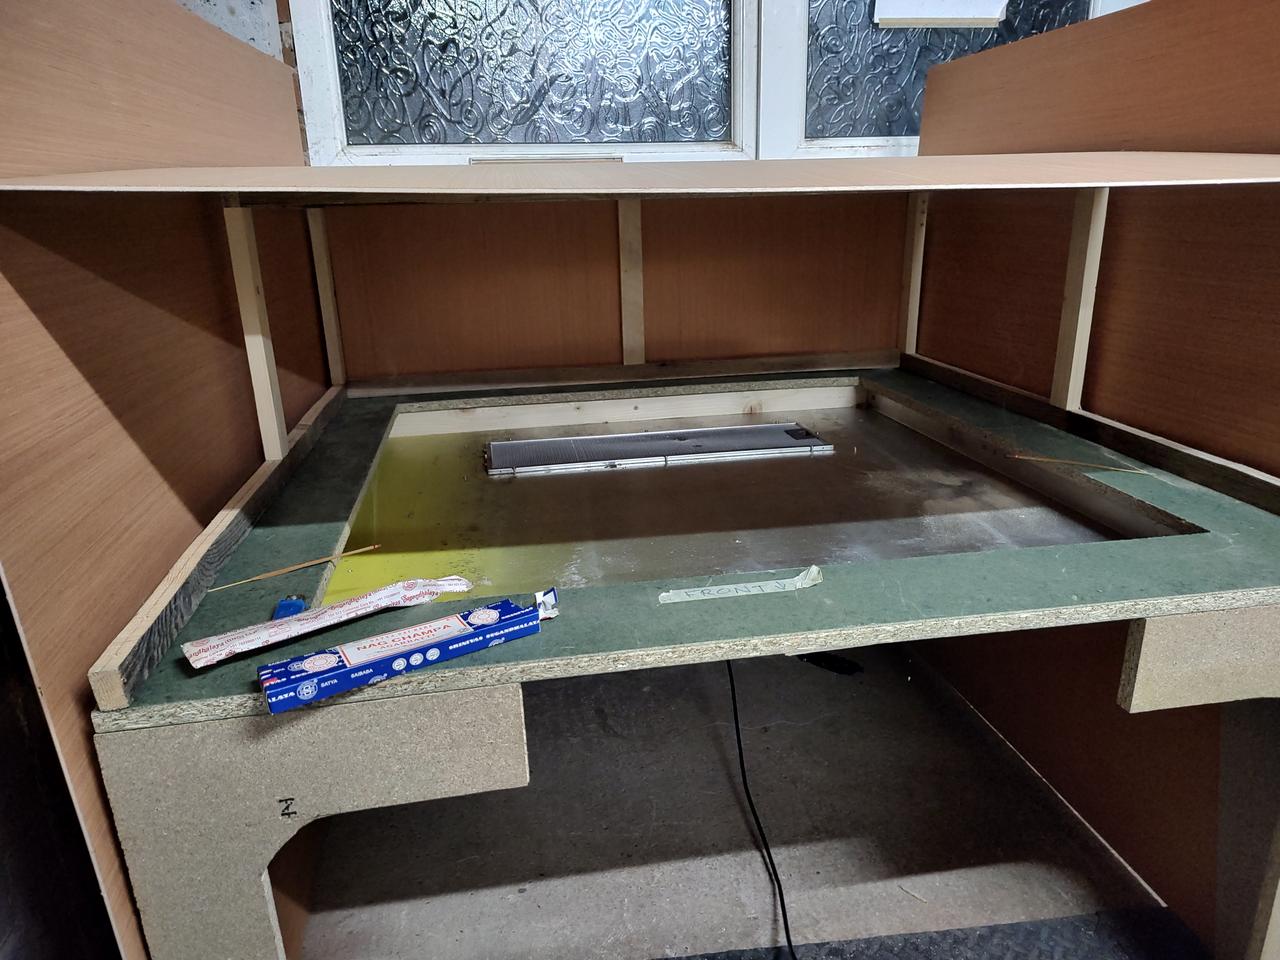
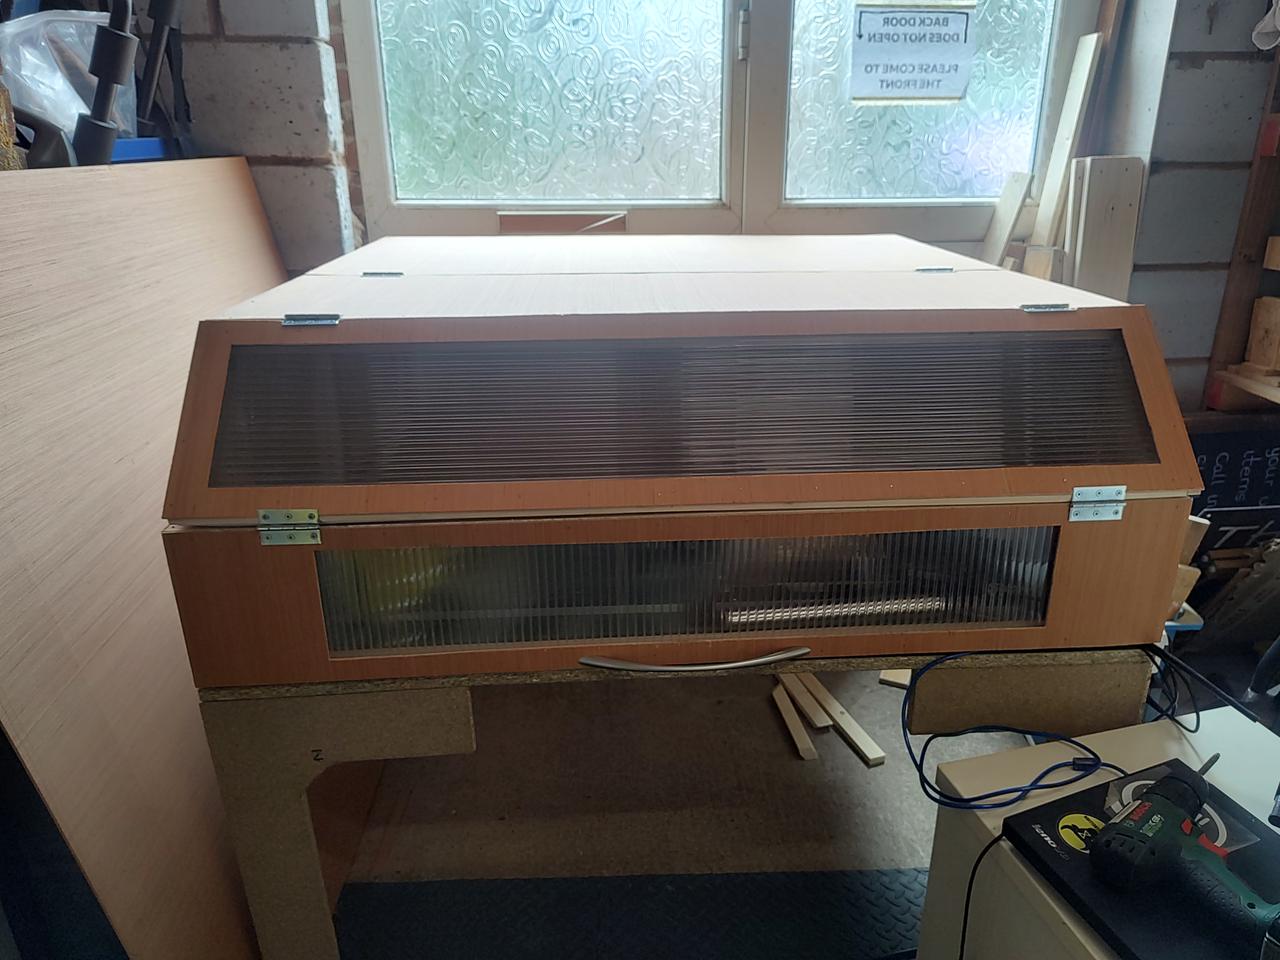
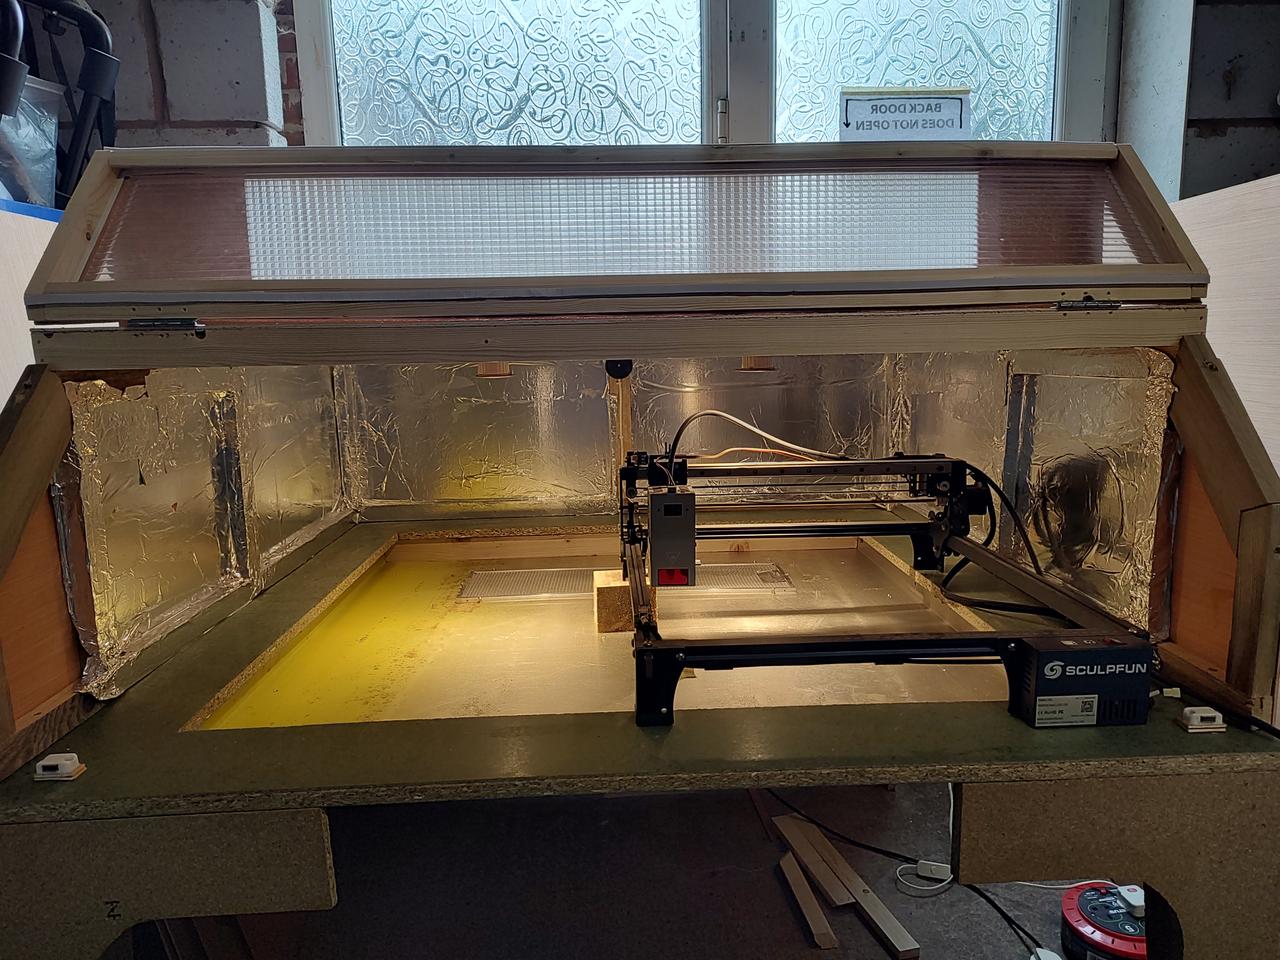
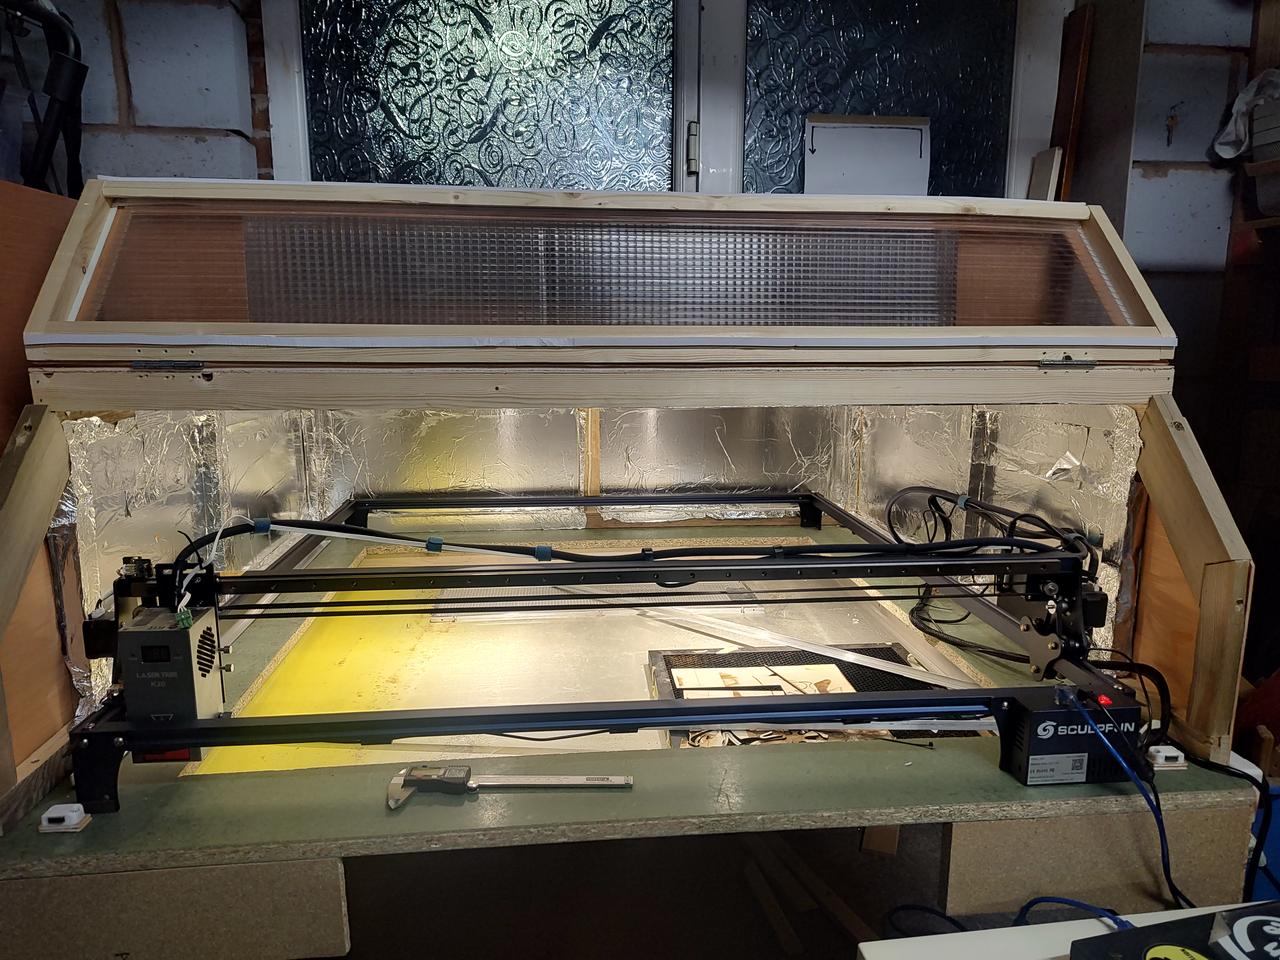
I was getting frustrated with the small size of things I could work on - I want to be able to make big wall art, and big objects. Eventually, I got the expansion kit for my laser, taking it from the original 400x400mm work area, to a whopping 895x895mm area. This also meant that I'd have to upgrade the workbench it stands on, and the fume extractor hood that sucks the smoke out. Another big project - using as much recycled materials as possible.

FAILED PROJECT: DIY Thicknesser
FAILED PROJECT: DIY Thicknesser
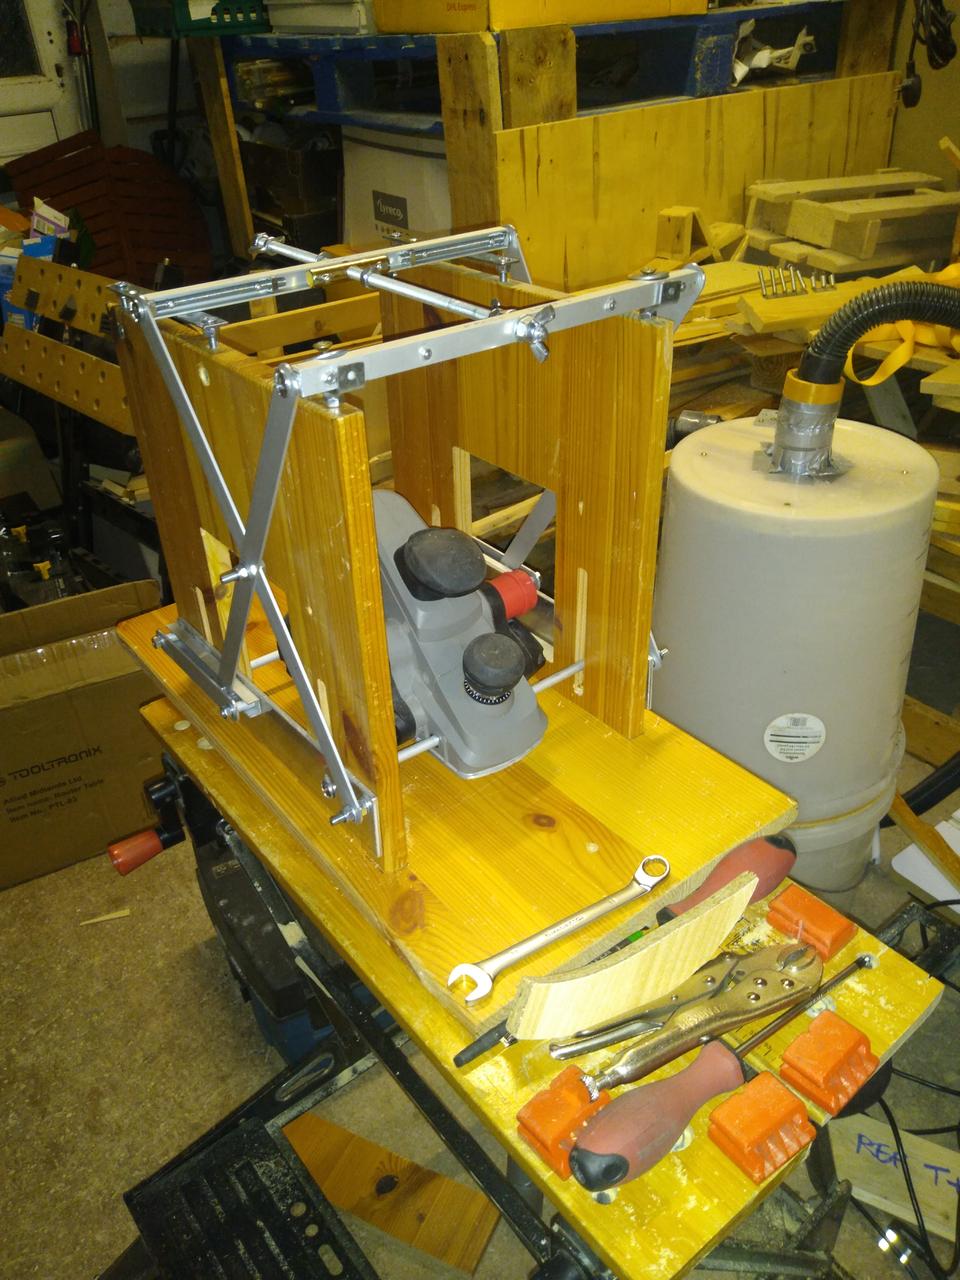
For the New kitchen cabinets project I need a way to turn irregular, wonky, rough pallet wood into something a bit more uniform and straight. I've tried sanding and planing, but the results are still too variable to make good dovetail and tongue-and-groove joints which I will need to do for the cabinets and doors I'm planning to make. So I realised I needed a "thicknesser" - a special type of electric wood plane that can precisely shave planks flat and to a uniform thickness. Trouble is, they're really expensive - even for the cheap ones, so after a lot of searching round on ebay, gumtree and the DIY and tool shops, I decided that as I already have an OK electric plane, I'd have to make one. I mean, "how hard could it be?" - famous last words. I watched a few youtube vids and worked out a plan.
I decided I could use a scissor lift design to "fly" the plane at a defined height - that's all you need, right? I sketched a lot of ideas out, and set to building. This was going to be so easy, and I was going to hone a tone of skills in the process! Little did I know I'd bitten off more than I could chew :-(...
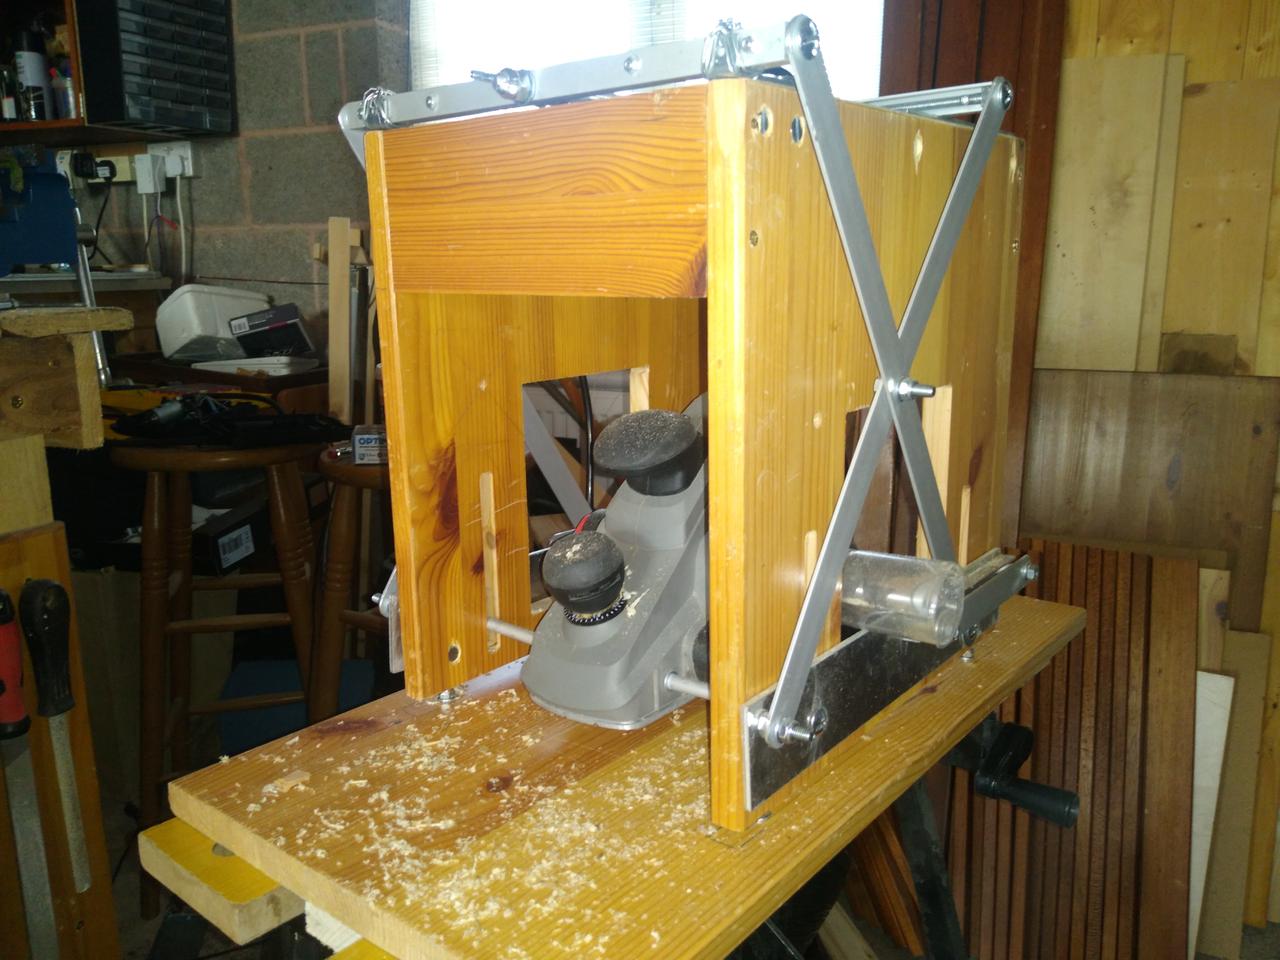
It went through several refinements, as I went through the build process and identified problems and came up with fixes.
Iteration 1
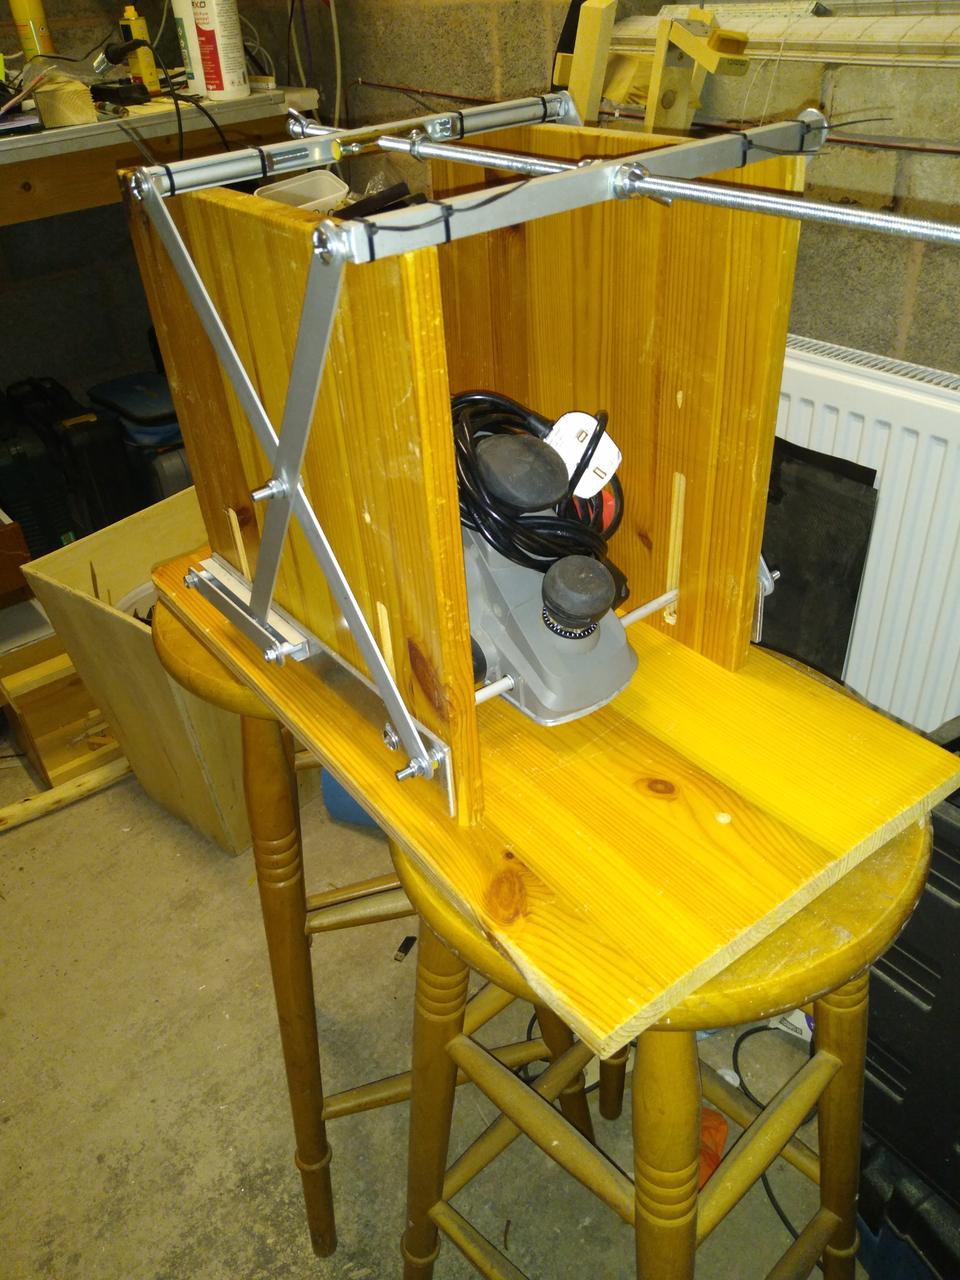 Iteration 1 Isometric View
This first attempt might look a bit shonky, but it's actually far worse than that! It has no adjustment to account for the plane not being level due to the support bars bending and errors in my cutting etc. that get amplified by the scissor mechanism. In use, it would just plane the first 30 or so mm of the plank as it entered the machine, and then just "ride" on the thicker section of the plank without cutting anything more off. I think this is because of the aforementioned wonkiness of the plane. Still, the scissor lift seems to work OK. This iteration also lacks any way to attach a chip extractor hose - notice that the side panels are still largely solid apart from the slots for the support bars. I learnt a lot about using the router, though - the slots are relatively straight, but I did destroy a cheap bit in the process. Notice also that some bits are still held together with cable ties. Professional - not!
Iteration 2
 Iteration 2 Isometric View
Iteration 3
 Iteration 3 Isometric View
Inkscape Laser-Cutter Restack Plugin
Inkscape Laser-Cutter Restack Plugin
I've mentioned before, in https://makerpunkbuzz.mywire.org/posts/new_laser_cutter_workflow/, about the Z-order, or "object stacking" order affecting the order that shapes are cut when converted to G-Code. I looked at revamping my code that post-processes the generated G-Code, but it seems the code produced by SvgToGcode is less amenable to that kind of text shuffling than that produced by Inkscape's GCodeTools, and I was always a little unhappy with the results too, because it only uses the "bounding box" of cuts to determine if they overlap, and this only truly works for rectangles: if a shape's contour is irregular, smaller shapes within its bounding box might not actually be inside its edges, like this:

Circles A and B are "outside" the outline of the triangle, but C and D are inside, but all of them are within its bounding box. It doesn't matter if A or B are cut before or after the triangle, but it does matter if C or D are cut after it, as the triangle could have dropped lower because it's no longer connected to the surrounding material, and the cuts for C and D would then be out of laser focus, and less effective. This can cause the cuts to not go right through, or burn or blur, resulting in a spoilt cut. Even worse, with very light material like card, the air assist could blow the triangle around, and the holes might even be done in the wrong place, or miss the material completely. So I'd want C and D to be cut before the triangle.
I had a look at the Python code of one of the "standard" Inkscape extensions, called "Restack", which I've already used, with only partial success, to try to alleviate this problem. From that, I was able to create my own version, which grouped smaller shapes by whether or not they were inside the bounding box of larger shapes, but that wasn't really any better than my old G-Code-juggler. I spent ages poring over the Inkscape Extensions documentation, and looking at other plugins to see how they tick, only to discover there was no way to "ask" Inkscape if two shapes overlapped. I had managed to get it to the point that it could order shapes by proximity, so that the laser head wouldn't have to jump round so much, but I couldn't work out how to check for contour overlaps, so I put up a post on Mastodon asking if anyone had any ideas how to do it. Somebody suggested I might be able to use Inkscape's "shell mode", and initially I thought this wouldn't work - one of the plugins I had looked at used it, and I didn't really understand what it was doing at that stage - but after I'd done some experiments with it, I realised I could make it answer, in a round-about-way, the question of whether two close-by shapes overlapped.
Inkscape has various operations you can do on paths which are really set logic operations: for example, you can compute the Union of two overlapping shapes, which creates a new shape which traces the outline of both the original shapes; Difference cuts away parts of the lower shape that are overlapped by the upper one; and so on. There is an Intersection operation, which produces a new shape which is just the area of overlap, and crucially, if they don't overlap, nothing at all.
These operations are all available in "shell mode" as commands. It took me a bit of time to work out how this text-based mode worked, because the documentation is a little sparse, and some things proved a bit counter-intuitive to me: most commands work on a "selection" of shapes, and there are subtle differences between how this works in the GUI and shell mode: the select-by-id: command destroys the current selection and replaces it with the named objects, if found. I had, for some reason, thought that I needed to "hide" all the other objects whilst doing path-intersection commands, but it turns out you don't. Once I'd figured that out, it didn't take too long to come up with the following steps to find out if two shapes overlap:
select-by-id: shape1,shape2
path-intersection
select-list
If shape1 and shape2 overlap, after path-intersection a new shape will be created; if not, nothing will be left of them, and crucially for my purposes, any new shape produced will now be the current selection. The select-list command will thus reveal if a new shape was created; if it output nothing, then the shapes didn't intersect.
I wrote a naive Python script to take an SVG file as input, and report on which shapes within it overlapped, and it worked. It used Inkscape shell mode to list all the shapes, and then created a script to do the operations above, then parsed the resulting output. However, it was fatally flawed, because it simply tested every shape against every other shape to see if they overlapped, and when presented with an even moderately complex SVG, it would basically never complete, because the number of tests performed is quadratic to the number of shapes present in the file.
My experimental extension already worked out which shapes were in the bounding-boxes of other shapes, so for the plugin, I was hoping this wouldn't be a problem, because I was only going to be checking a much smaller number of intersections. Initially, I only worked on getting the overlap information computed, and once I'd got that running on a test SVG I'd concocted, it was even able to handle files that the naive version had choked on.
It took me an embarrassingly long time to work out how to properly utilise the information I'd got back: eventually I had to write a recursive function to work out the final ordering, because if a small shape overlaps multiple larger shapes, I need to emit the most enclosed one first, and then work outwards through the enclosing shapes. Oh, and on top of that, I wanted the closest shape to be cut next. I found that an optimisation I'd made earlier, to reduce the number of comparisons, had actually shot me in the foot: I had decided to only consider the shape with the smallest enclosing bounding box for testing, but of course, a shape can be inside another's bounding box, but NOT overlapping, so this meant that I was missing a lot of overlaps in some situations. D'oh! Reminder: never try to prematurely optimise!
Eventually, what I had to do was create a "tree" of overlapping shapes, and then recurse the tree "depth first" so I could put the most enclosed shape at the lowest position, followed by its closest enclosing shape and so on, all the way up to the top. To do this, I ended up writing two recursive functions: one to build the tree from the shape enclosure test data, and another to output the shapes in the right order! Phew. Recursion is hard to reason about, and I've had a nasty brain fog of late, that has made it harder than it should be, and I also feel I'm rather out of practice too.
It's still not perfect, because it still sometimes puts shapes in a non-optimal order, resulting in the laser head jumping around a bit more than I'd like, but I think I can refine it to do what I want. I also have to take out an awful lot of debugging output, but I'm probably going to wait a bit before I do that - probably longer than I should, but that's how I roll!
Server move from RPi to FreeBSD
Server move from RPi to FreeBSD
For just over a year, this blog has run on a Raspberry Pi 4 running DietPi Debian, sat on my desk. It's done pretty well to be fair - maintenance is easy and it's never crashed or locked up - the only down-time has been due to it being accidentally powered off, and it's rebounded easily after power was restored. Since I got the NAS up and running, though, it's been niggling at me that I ought to host the blog on that and get a tiny bit of desk space, and a power socket back. The Rpi could then be re-utilised for something else.
So, here we are, running on FreeBSD instead of Debian, and using Nginx rather that Lighttpd. I've moved the Nikola site generator to my main laptop too, because it always felt a bit clunky editing blog posts in Vim over SSH. So I'm trying out editing this post in Zettlr, a GUI (shock, horror) app that I've used for years to manage my Markdown-based notes. Let's see how this works out.
The migration process was actually pretty easy, but required a few changes in software stack for ease of use and different environment. I decided to change the web server to Nginx as Let's Encrypt's "certbot" can automatically handle installing certificates in Nginx's configuration file, and somewhat simplifies the certificate update process compared with the more manual approach you have to use with Lighttpd, which was what I'd opted for on the RPi because it's supposed to be more efficient RPi. As the NAS is a fully fledged x86 CPU with an SSD attached, I didn't see the need to battle with the configuration differences between Debian and FreeBSD as well as the manual certbot shenannigans.
I'm glad I did, too, because it took a bit of reasearch to work out where FreeBSD puts everything: I'm a bit rusty with FreeBSD as I hadn't used it for nearly a decade before I set up the NAS last year, and it has a rather different approach to Linux, where non-OS programs like Nginx and Certbot have their files in a separate directory hierarchy - instead of all the config files going in /etc, they go in /usr/local/etc and there are some other oddities to catch you out if you're not careful. I thought I'd got everything straight - copied certs across from the RPi to the NAS box, got the software installed - Nginx and Certbot, and rsynced the static blog files across. Surprisingly, the cert worked first time once I got the broadband router to redirect port 443 to the NAS instead of the Pi, and I was able to page around my blog fine. However, when I went to test Certbot with automatic update of certs, it crashed with an error, which was due to me not realising that the domain config file for makerpunkbuzz.mywire.org actually contained hard-coded paths. It was relatively easy to fix once I worked out what was actually wrong: because things are now in different places, the paths in the config file were now wrong. It was an easy fix, but I feel I'm getting sooo rusty on this stuff. I tell ya, Windows (my current day job) rots your brain.
So, it's all up and running again, and I have a new whizzy wiggy markdown editor I can use to make blog posts - I'm hoping that might make it easier to keep up with blogging. I got loads of projects done last year - mainly laser cutter-related - but I just couldn't find the time and energy to blog about them. Going to try to correct that this year!
New Laser Cutter Workflow and New Designs
New Laser Cutter Workflow and New Designs
Hitting the CLI
I'm done with GUI laser cutter (or CNC) control software - I've gone all-in with CLI programs, and I love it. CLI things always seem to make more sense to me anyway!
But I'm not sure if I'm "there" yet, but with my latest tweaks to my workflow, and I feel I've now landed up somewhere more sustainable and comfortable. I had a look at the GRBLHud github site and noticed that the author, Johannes Noordanus, makes several other G-Code related utilities, in particular, ImageToGcode and SvgToGcode. At first, I thought they were just Python libraries, but it turns out they both have CLI interfaces, so you can just run them as commands - SvgToGcode's CLI command is named "svg2gcode". It turns out that SvgToGcode can also handle raster images directly, so I don't even need to use ImageToGcode myself - I can just use SvgToGcode, and it will spit out the paths and rasters. It will even split out the paths and the rasters to separate files if you tell it to, which is great for doing a graphical engrave, and then a cut around it. The laser power and feed rate are independent, too which means it produces a much simpler workflow. After playing round with that for an hour or two, I realised I could simply drop the Inkscape GCodeTools extension I mentioned I had been battling with in my previous post. With SvgToGcode, I no longer have to mangle the output G-Code to suit my GRBL laser - I can just pump it directly to the USB port using GRBLHud. I seldom have to edit the G-Code, at least for the purposes of correcting it, either - it's mainly for amending it - changing things like the laser power or feed rate. And it even controls the air-assist, though more on that later.
I could never get either LaserGRBL or UGS to handle rasters at all. I know, I didn't try very hard, but it really shouldn't be hard. The best I got out ot UGS was to outline trace raster images, but I could never get it to engrave the raster. Well, I got some kind of results on my first try with SvgToGcode, even though it did take quite a lot of tinkering to make it work with my laser. I think that the characteristics of mine must differ greatly from whatever Johannes has, so that's likely the root cause. After some experimentation, I got usable results by upping the lower threshold and maximum laser power, and I've since "optimised" my settings to get a decent output speed and "dark enough" etching. Early on, I was having problems with a kind of "ghosting" around images - dots being burnt away from the edge of the image, and I emailed Johannes about this - he responded quickly, and kindly, asking for some examples. This spurred me to investigate further, and then I discovered that Inkscape's seems to default to 96 DPI resoloution - like used on old CRT displays, but the laser's effective resolution is closer to 300 DPI. Through my own carelessness, I had managed to try to render chunky 96 DPI images on the laser, and SvgToGcode did the best it could with what I'd given it.
I think I have only one "complaint" about SvgToGcode - and that is pretty minor, too - the fan control - it's either on or off - there is no differentiation between vectors, meaning cuts, where you definitely want the fan on, and rasters, meaning engraving, where you defintely want the fan off. This is because for cuts, the air assist makes for a cleaner and faster cut, but with raster engraving, it causes a smoky smudge around the edges of the raster. So, because of that, I still need to modify the G-Code slightly to remove the "M8" commands from the raster engrave part of the job. The split output option makes this a simple matter because it appends "_images" onto the end of the filenames of the raster engrave part, so I just edit it out using vim, or run a "sed" command like this:
sed -i "/M8/d" *_images.nc
New workflow
My new workflow now looks like this:
- Design in Inkscape.
- Run svg2gcode on the Inkscape .svg file to produce G-Gode file(s).
- If there are _image parts, remove the "M8" air assist commands.
- Run the G-Code through grblhud to stream it to my laser, sending the _image file first if I have one, so that the engrave is done before the cut.
Object cut order
This was something that bugged me with Inkscape's GCodeTools, and I ended up writing a program to re-parse and rearrange the G-Code automatically. I might yet revive that tool, but at the moment, I've manage to work out what drives the path cutting order in SvgToGcode - it's simply the object Z-order, or layering. The lower an object is in the z-order, the earlier it is "drawn" - so for small cuts that need to be done before a larger enclosing cut, they just need to be "under" it. This means that I can control it directly in Inkscape, too, and so I'm not even using my fix-gcode script any more. Not that I can with the output of svg2gcode, because the format of the G-Code is differnet, so my program can't currently recognise where one object begins and ends. If doing it manually in Inkscape starts to grate on my nerves, I'll probably rework it, but I guess I could just write an Inkscape plugin instead...
New designs
This has all happened in parallel with a load more projects, and I'm pleased to say that I'm finding the process far less frustrating. The tools I'm now using feel like they're working for me, rather than against me. The first thing I made using ImageToGcode was a birthday present for my dad. I was stuck for ideas, and remembered that a couple of years ago, I made him a wall sign themed on his favourite Prog Rock bands - "Paul's Prog Rock Lounge" with my best rendition of the bands' logos, mounted on a dark background, in a frame. I've not had access to a laser cutter for quite a while, until very recently, so I thought I'd do a re-take on that idea. My dad is also a Coffee enthusiast, and has his own "home barrista" setup, so I made a "Paul's Prog Rock Cafe" sign, smaller, with a different arrangement. He seemed to like it, even though I made a number of newbie mistakes, and hadn't quite got the laser settings right at that point.
 Paul's Prog Rock Coffee Bar plaque featuring a number of band logos.
After that, I'd got bored with making Goblin Cottages, and made an A4-Sized illuminated sign, back lit with strip LEDs:
 Unlit illuminated sign, reading "Just vibin...".
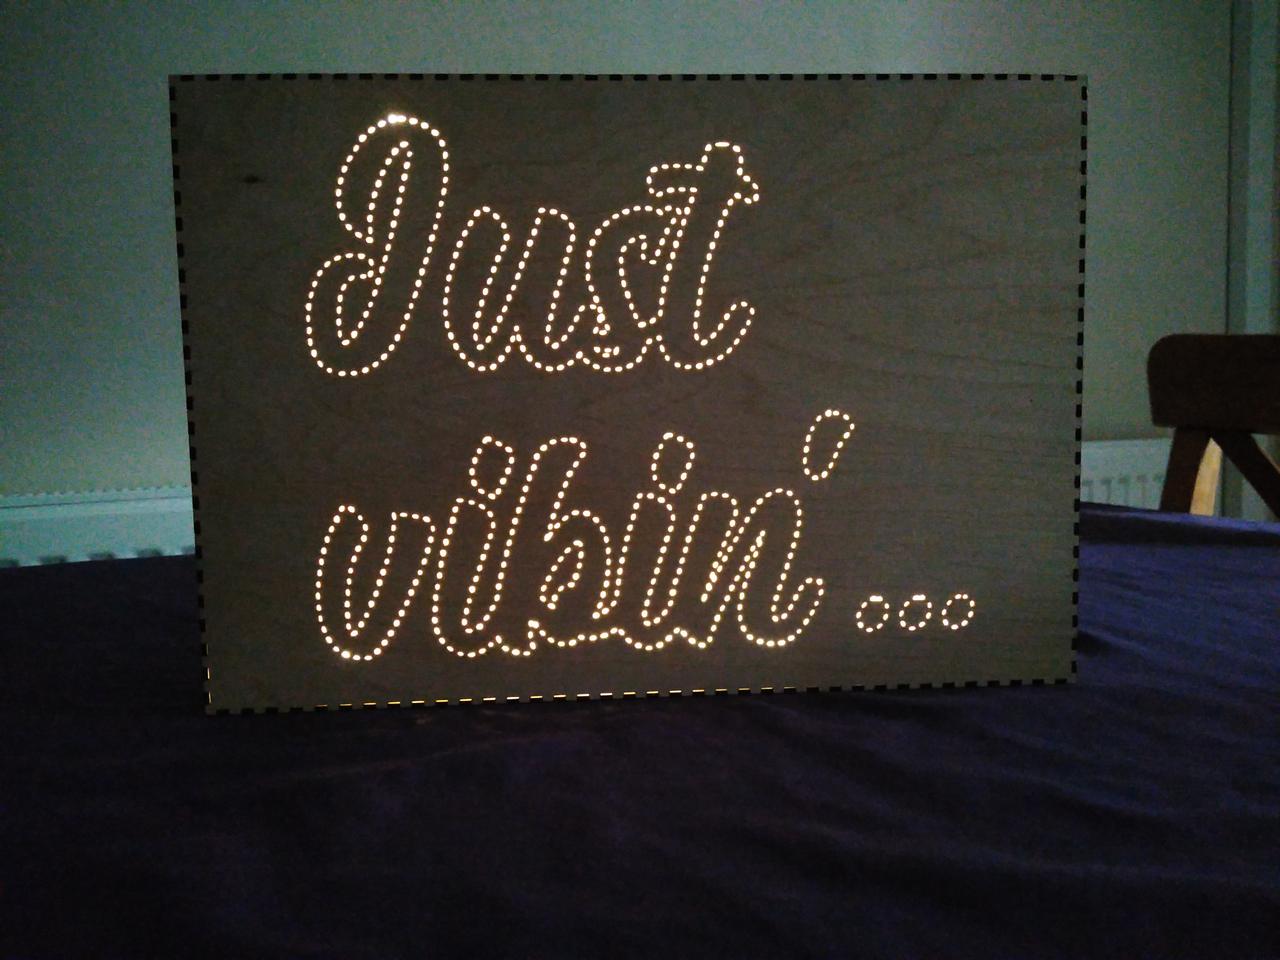 Lit illuminated sign, reading "Just vibin...".
It uses stock LED strip lights, powered by 3 AA cells in a battery box glued to the back:
I'm doing a trial craft fair stall to hawk my laser-cut wares, so I've done a number of trinkets for that: keyfobs, badges, fridge magnets and so on. This is not what I'm hoping will be my main theme, but it's good practice for trying to make consistent batches of things:
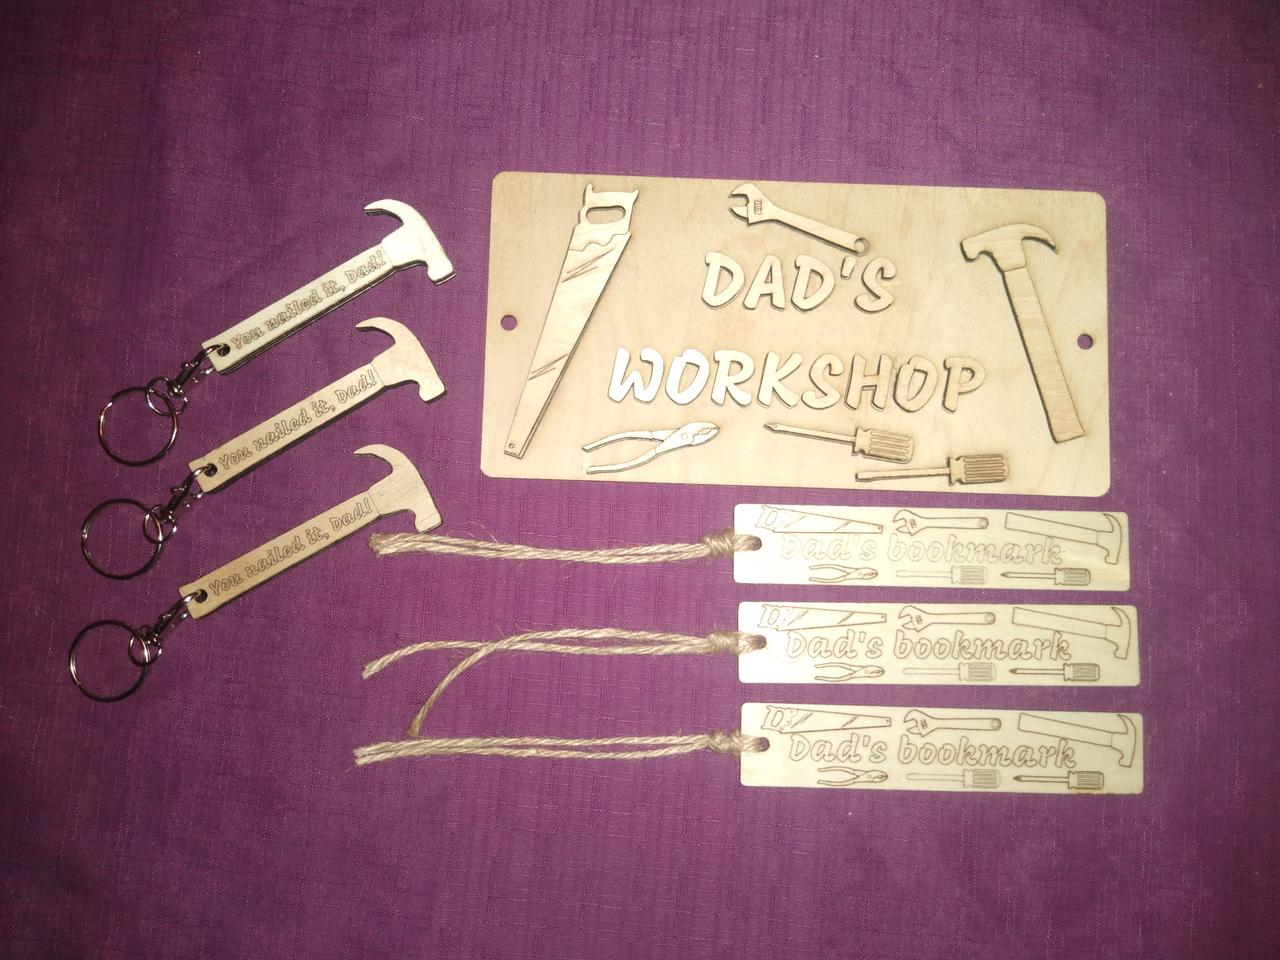 Father's day themed trinkets, showing "You nailed it dad" hammer shaped keyfobs; Dad's workshop door sign, and "Dad's bookmark" bookmark, featuring 6 hand tools.
Then I thought of doing some illuminated letter "bunting" and came up with this:
 DREAM illuminated bunting.
This was more complicated, because I had to cut up the LED strip into small 10cm segments and tack them back together by soldering sections of twin core wire between each section. Took way longer than I had expected, but it seems to work nicely.
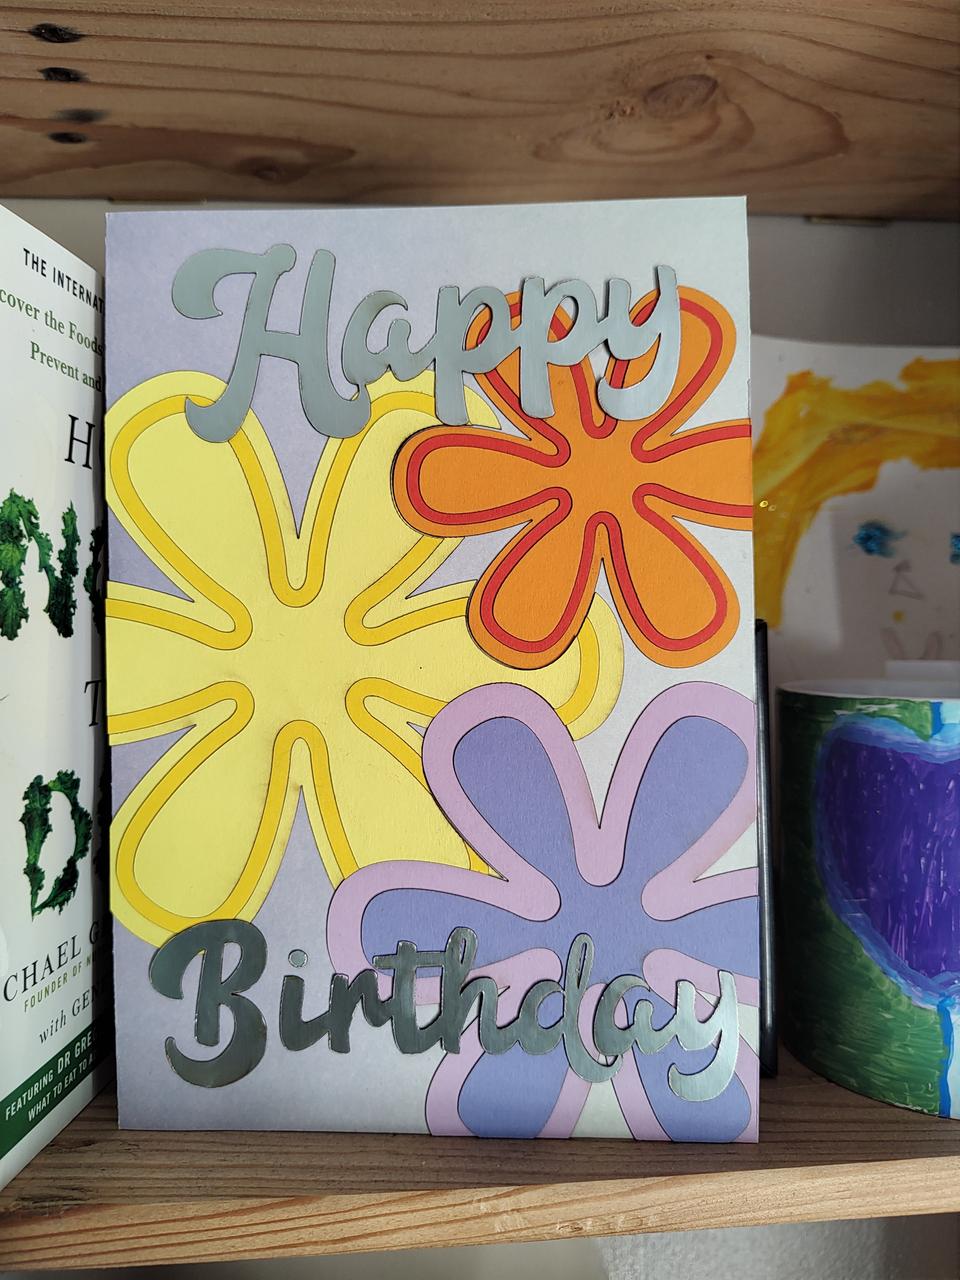
More recently, it was my wife's birthday, and we have this tradition of making cards for each-other, so I felt I just had to make something on the laser. Quite pleased with the result, though, and my wife seemed to like it too, which is fortunate!
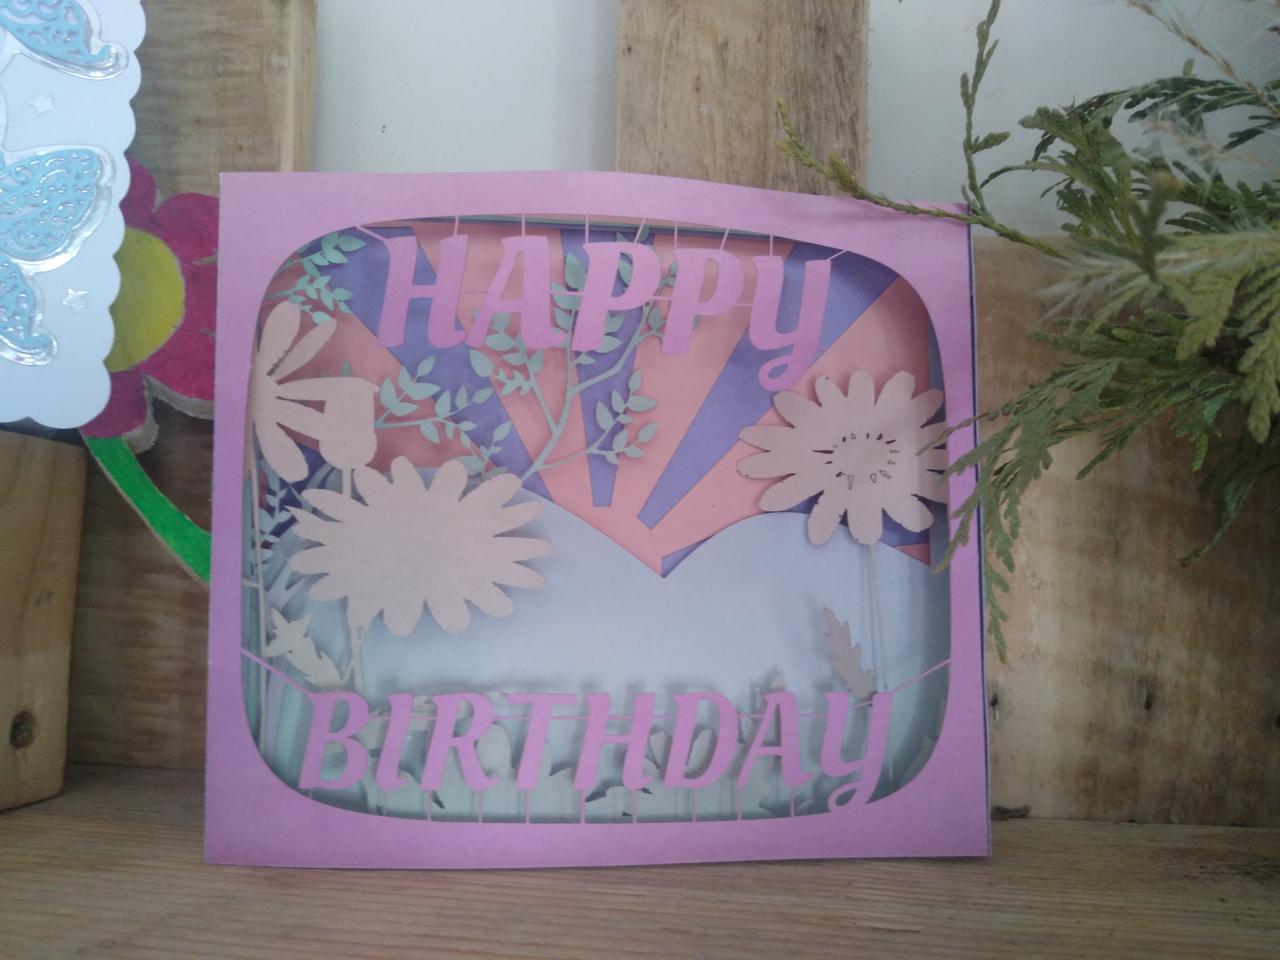 Five layer birthday card.
Laser Cutter Update
Laser Cutter Update
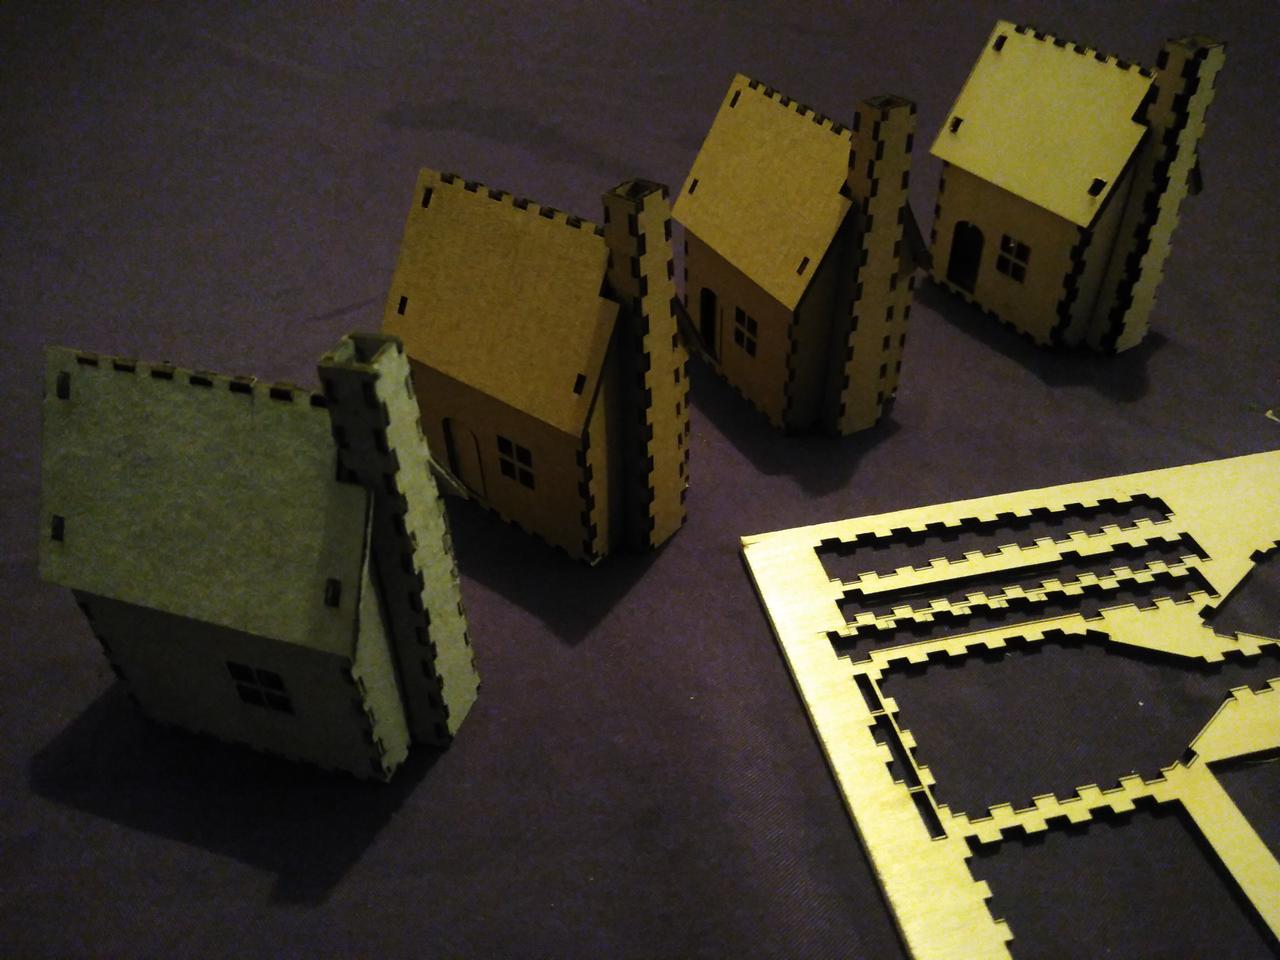 A row of four laser-cut Goblin Cottages in different materials - from left to right: 2mm dense cardboard; 2mm corrugated cardboard (x2); 3mm birch ply.
I've been quite busy of late, so I've neglected the blog for a while - I'm starting to address that with some updates. It's been quite the journey with the laser cutter - I'm no longer using the same control software, and I've "tweaked" my workflow quite a lot.
First off, LaserGRBL just wasn't working for me, despite all the effort to get it working. I couldn't get it to import images of any type, which is something I really need to do. But worst of all, I had several occasions where it just stalled and stopped sending GCode to the cutter mid job - leaving the laser on, too, and scorching the workpiece. It turns out that this is probably because Windows executables running under WINE are limited to 4GB of RAM, total, and when it fails to allocate memory during a cut run, it just freezes. It also flat out crashed a few times during job setup, meaning I had to start all over again, which is frustrating. I'm using an old but well-specced laptop for this, which boasts 16GB of RAM, so it's not really lack of actual memory at issue here. However, throughout the process, I learnt a lot about my machine, about G-Code, and also about what I do and don't like about LaserGRBL too, so it's not all lost. After all of that, I started looking round for something else.
I found "Universal G-Code Sender", or "UGS" for short, which is a Java-based program. It was so much easier to install and get running than LaserGRBL, but the interface is somewhat quirky in comparison. For a start, the work-flow is just weird in some respects. With LG, you can more or less just load an SVG vector or G-Code the same way, and start cutting; with UGS, you have to use a different tool for working with SVG than pure G-Code, and flipping between the two sometimes puts UGS into a state where I couldn't work out how to get it to do anything. Restarting the program would fix this, and I think it's primarily my lack of understanding of the "modes" of the program that causes this, but it was very frustrating. Another difference is the way the program handles "macro buttons" - both programs have similar concepts, where you can assign a bit of G-Code to a custom button in the interface, which will get sent to the cutter when you click it. LaserGRBL puts these along the bottom of the window, just under the G-Code visualiser panel; in UGS, they're "hidden" in the "Macros" tab of the Toolbox sub-window, and by default, you can't have them visible at the same time as the jog controller. That makes them a bit awkward to use, and they're also a lot more simplistic than the LaserGRBL ones - it offers just one type, whereas LG offers three types: standard, toggle and momentary action buttons, the latter two of which allow two separate bits of G-Code to be sent in each state, for instance you can toggle the air-assist with M08 in the first state, and M09 in the second. In UGS, you need to have two seperate buttons to achieve this, and the jog buttons are too big to be displayed at the same time.
Once I'd got my head round the quirky interface, and managed to work out how not to make it "lock up", I was able to get some work done. I did some more ambitious cuts than I'd done with LaserGRBL, and it was more stable. However, it seems that the same problem with freezing up during a job still occurs with UGS - and for much the same reasons, too: lack of memory. I suspect this is a limitation baked into the Java executable's configuration, but I've not delved into that.
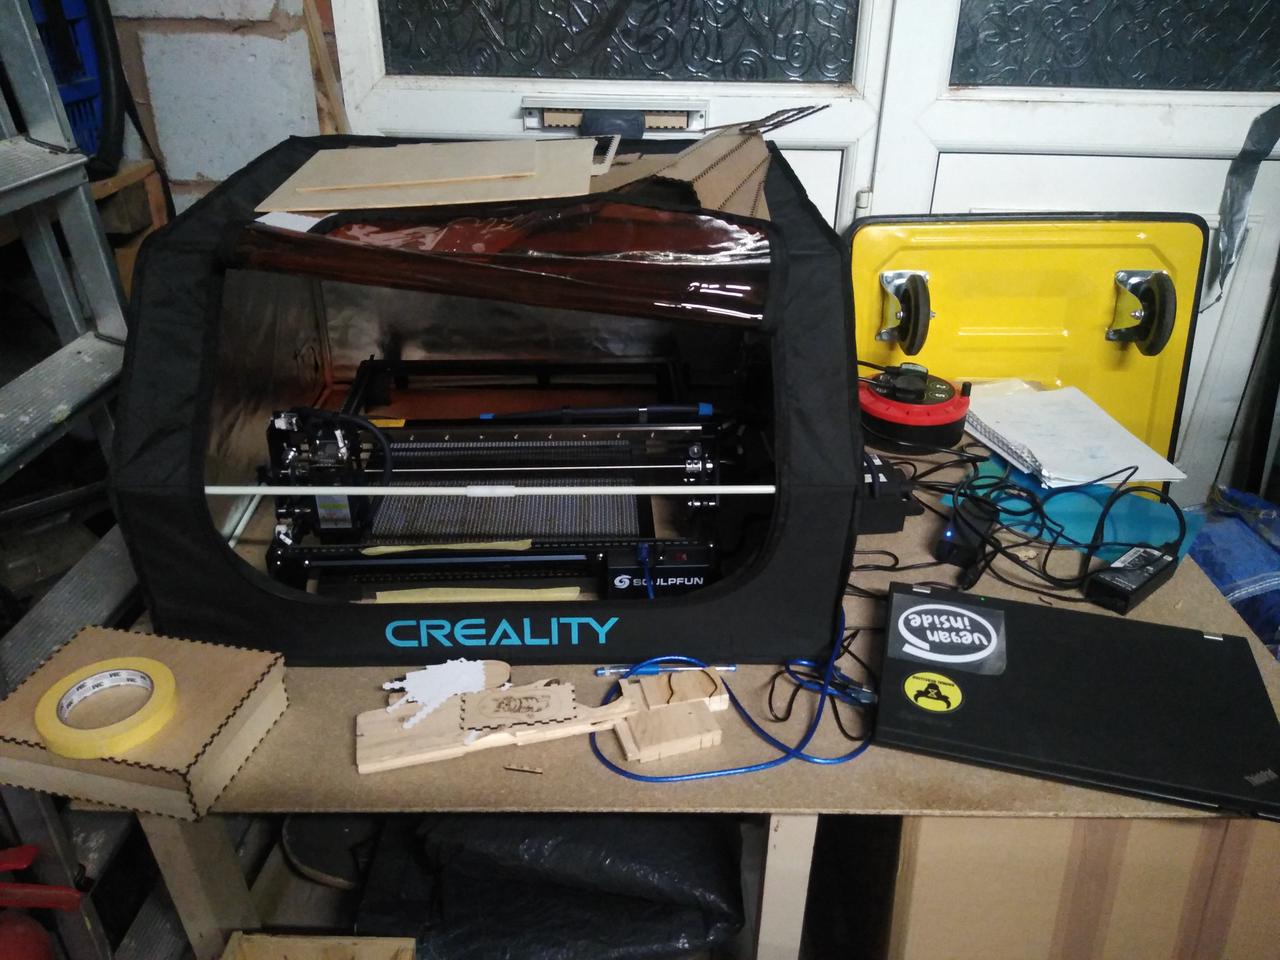 My laser cutter rig, tucked away in a corner of the
garage/workshop. The fume hood is made by Creality, but the laser cutter is by Sculpfun.
My laser cutter rig, tucked away in a corner of the
garage/workshop. The fume hood is made by Creality, but the laser cutter is by Sculpfun.After all that, the search for another approach was on again, and I even wondered if I could "just send the G-Code directly to the cutter" over the USB Serial link. On investigation, this apparently can work, but it won't notice if the controller returns an error - like seeking out of bounds - and can easily overflow the controller's buffer, leading to dropped commands, and spoilt workpieces. However, there are a number of command-line (CLI) G-Code utilities, and I tried out one of them called "GRBLHud". It's written in Python, so it might also work on Windows, and can be installed via Python's "pip" package installer. It has a rather spartan user interface, which is controlled by entering shell-like commands, and some instant-action key combinations, like "ctrl-c" (to cancel the currently running job). Everything else is manual, but it does have code that monitors responses from the controller, looking for errors, and it keeps track of how much buffer space it thinks the controller has available, and makes sure not to send too much at a time so it doesn't over-run the buffer, and drop commands. It doesn't have any sort of "buttons" or jog panel - but you can enter some G-Code commands directly on the command-line to jog the head to where you want it, and there is a command history that is remembered between jobs. It also doesn't deal with anything other than G-Code files - if you want to cut an SVG file, you have to convert it to G-Code some other way, but it has one big advantage that I am liking very much - you can launch it directly from the shell, with a G-Code file specified, and it will immediately start streaming that file to the controller. It's not fancy, but it is effective, and it hasn't once locked up when sending a job - the memory usage is obviously far lower because not only does it not have a memory-hungry GUI, but it doesn't try to "visualise" the progress of the cuts, which is evidently quite memory-intensive. I've now been using it for a couple of weeks, and I'm happy with it so far.
I've been using Inkscape's GCodeTools to turn vector designs into G-Code right from the start, but I have been unable to work out how to engrave JPEG or PNG images using this. I tried a number of DIY approaches, but all I got was Inscape crashing because I pushed it too far! That's not Inkscape's fault. UGS can import images, but it just seems to trace the edges of the image, rather than doing a raster-burn of them, and LaserGRBL says it can, but just hangs when trying, so I had to search for another way. I used to use a "K40" laser at hte local makerspace, and we used software with that called "K40-Whisperer", and that could burn rasterised versions of images, but it doesn't work with G-Code based cutters so is no help to me here. After a bit of searching, I managed to find another Python program called "image2gcode" that does exactly what I want: takes an image and, dot by dot, and converts it into G-Code "cut" moves to burn the image with a laser (or cut it with a CNC mill). You can tweak all sorts of parameters to get output you like, and the conversion is surprisingly fast, too. It did take a fair bit of twiddling to get right for my cutter, but it felt like discovery rather than a fight.
So now it feels like my workflow is shaping up quite well; I can design stuff in Inkscape, and export G-Code; I can rasterise images to G-Code with image2gcode, and I can send them to the cutter with GRBLHud. Sorted! Well, of course, not quite.
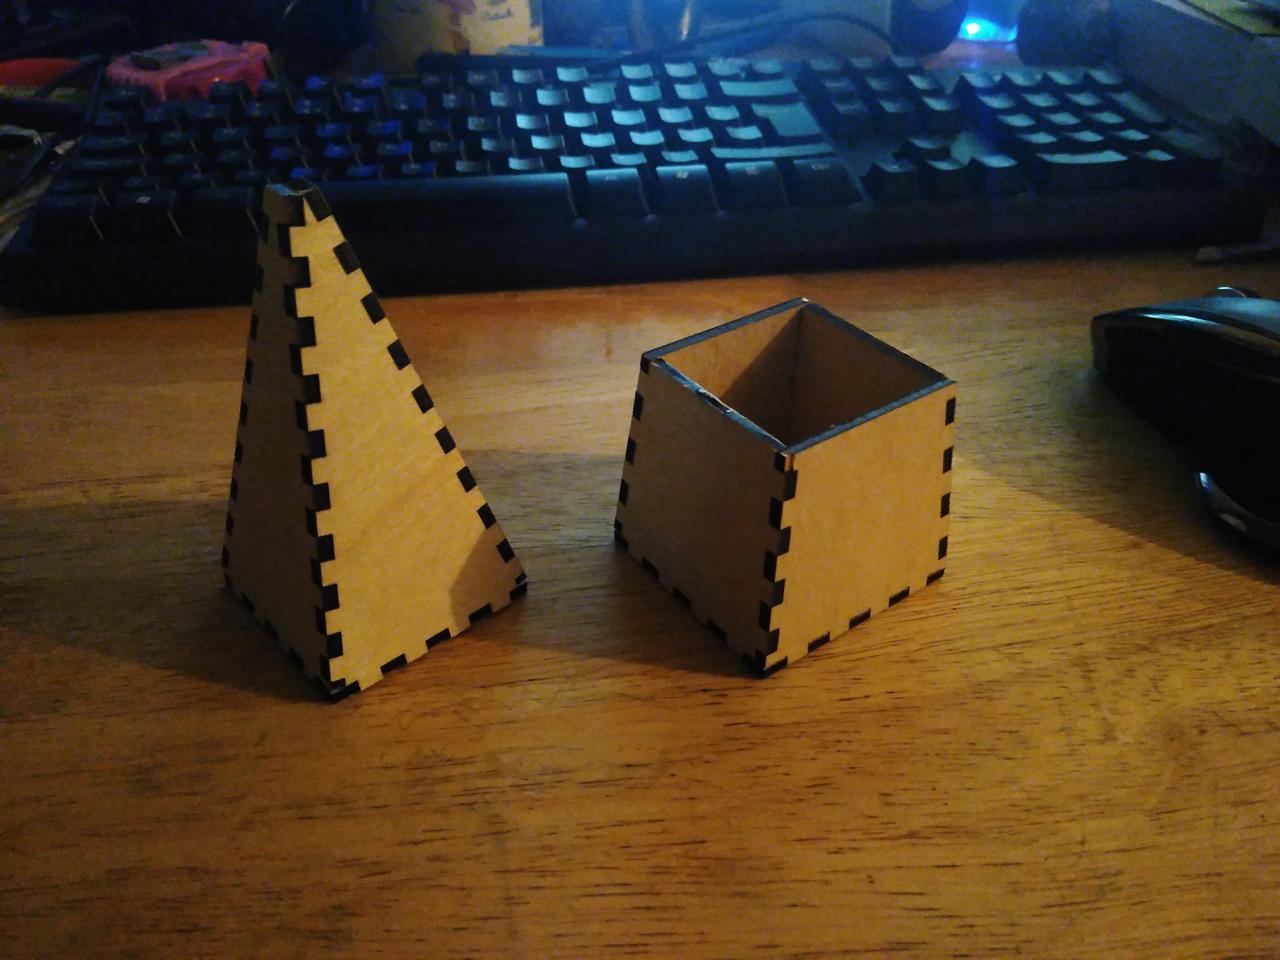 Tabbed structures - a tall pyramid, and a
slanted open-top box.
Tabbed structures - a tall pyramid, and a
slanted open-top box. Plaque for my dad's birthday. It bears the
logos of several famous prog rock bands, and bears the inscription "PAUL'S PROG ROCK COFFEE BAR".
Plaque for my dad's birthday. It bears the
logos of several famous prog rock bands, and bears the inscription "PAUL'S PROG ROCK COFFEE BAR".Along the way, I've been working on a number of projects to hone my technique - tabbed boxes; name-badges; some little model "Goblin Cottages"; and a plaque as a birthday present for my dad. I had got into the habit of manually modifying the G-Code files to do things like switch on the air-assist, and adjust the cutting speed (feed rate) and power (spindle speed), and was getting bored with the repetetive manual work involved. I'd decided I should fix that "at some point". The changes I would usually make - using a text editor, usually "vim" - were the following:
- Remove all "G00 Z0.000000" lines
- Remove all "G01 Z0.000000 F100 (Penetrate)" lines
- Insert a "M08 (Air on)" near the top
- Amend the first G 01, 02, or 03 line's feed rate from "F400.000000" to a more appropriate number, and add a laser power value:
- For engraving: "F1000.000000 S200.000000"
- For cutting: "F150.000000 S1000.000000"
- Delete all the remaining "F400.000000"s
- Delete all the "Z" settings - my laser doesn't have a Z-axis, but it spends time pretending to do the move
As you can see, that's just a pain in the ass. Eventually, last weekend, I actually coded up a Python script to do these "automatically", and I successfully tested it and "put it into production". Now I don't have to do those changes manually!
I can now just run cleanup_gcode <feed-rate> <laser-power> <gcode-file>:
cleanup_gcode.py 150 1000 example.gcode
I can just replace the numbers and file-name, and it will automatically spit out a fixed.
One thing I'd noticed early on, but not found any solution to in any of the programs I've tried, is that when cutting intricate designs with small internal cuts that are positioned inside larger cuts - like windows in the Goblin Cottage wall, it would often cut the outline before some of the inside details. This is a problem because materials are rarely perfectly flat, which means that not all of a sheet is in contact with the cutting bed; when an outline is cut, this results in the part "falling through" a couple of mm onto the bed below. This messes up the focal distance of the laser, meaning that the laser will often then fail to cut all the way through, but the pieces also sometimes shift horizontally a bit too, which is worse, because it then means those holes, subsequently cut, are not then properly aligned. The answer to this is to "simply" cut the holes, or internal details, first, and then the outline, but nothing seems to offer this as an option - not even the graphical ones.
So, recently I got to thinking - as G-Code is "just text", could I add a feature to my existing cleanup script, to rearrange the paths in a cut so that the small cuts are done before the large ones? Yesterday, I actually got round to putting this together. It turns out that GCodeTools helpfully puts comments in that identify each path from the SVG file it was generated from:
(Start cutting path id: path100)
G01 X27.523203 Y8.444720 Z0.000000 F400.000000
...
...
(End cutting path id: path100)
This makes it easy to identify each piece. It also rather helpfully starts with a "fast move" to the first point in the path, so each path is "self-contained". I experimentally manually rearranged a couple of objects on a test cut, and it worked as expected. I then wrote some code to extract the paths into a data structure, and another bit which went through all of the G commands working out a rough bounding box for each path - what it's lowest and highest x,y coordinates were. Once I had that, I could sort the objects by their bounding box vector: (x1,y1)-(x2,y2), and then reverse the order. I then just had to "rewrite" the paths' GCode in that order. Because a large area path necessarily has lower bottom left-hand corner coordinates than any of the smaller paths within its boundary, it will get cut after those smaller area paths. Well, shockingly it works! On top of that, it's also fast enough to be useful too! BINGO! I added it into the cleanup_gcode.py script, and it now runs "automatically" every time I use it. I might make it optional if I need to.
The code for the cleanup script is here, if you're interested: cleanup_gcode.py, again it's released under the GPL3, so you're free to use it for your own purposes, as long as you abide by the GPL3's terms.
Raspberry Pi GPIO-Triggered Video Player script
Raspberry Pi GPIO-Triggered Video Player script
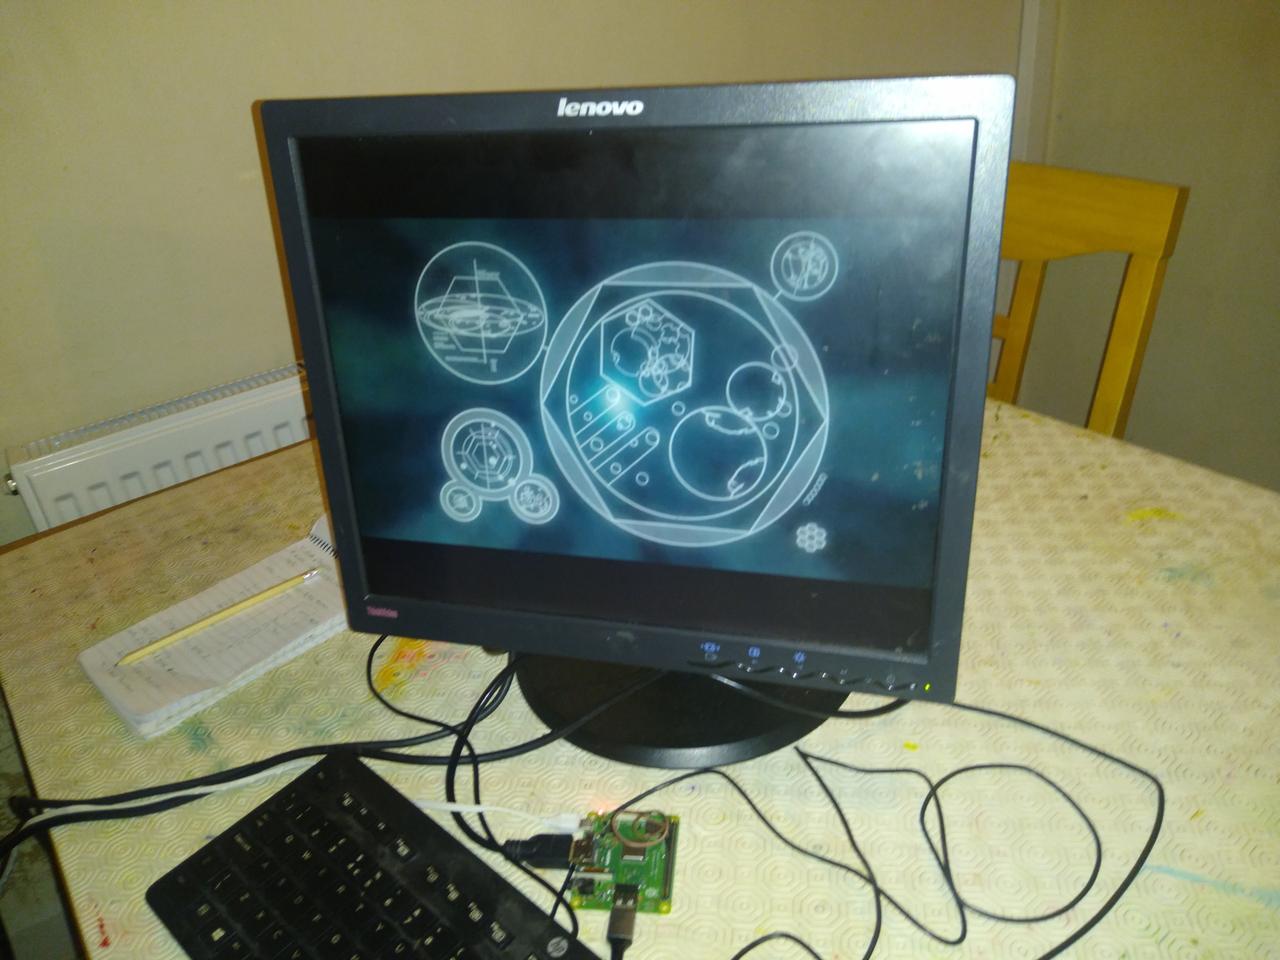 Video player running on RPi 3 Model A.
I've been sitting on this for too long, and my friend Chris wanted to see the blog post I had done about it, and I had to admit I hadn't done it yet. Sorry, I have a backlog and other things to do - bite me!
Anyway, Chris recently asked me to help him with a video player which was going to run on a Raspberry Pi 3 Model A+. He has a number of video files which he wants to be displayed when a particular push-button switch is pressed - not a keyboard buttons, but physical momentary-action switches, wired to the GPIOs. It's going to be installed in a console in one of his Dr Who prop repro projects, so a physical keyboard is not going to be available. It needs to start automatically, and play a "default" video on loop, only switching when a button is pressed.
He'd found several scripts to do this, they either didn't quite do what he wanted, were limited in some way, or were so old they required sofware that isn't part of the Raspberry Pi OS any more. We looked at several of these scripts, and I decided it would actually be best to write it as a BASH shell-script, rather than in Python, because it's really just a process manager - launching a new video player when a button is pressed. This is slightly easier to do in BASH than Python, and is less prone to supporting software becoming removed from the OS.
We got some inspiration from this project on Instructables: https://www.instructables.com/Play-Video-With-Python-and-GPIO/ but I didn't like the way that to add another video, you have to copy-and-paste a new "if" clause every time. The list of videos and their triggering GPIO should just be data, and adding a new one should just require adding an extra definition in the controlling list. This makes it easy for non-coders modify the list of videos as they need, by using the existing list entries as examples.
The above Instructable is one of those that uses a program that's no longer included in the package repository - omxplayer - so we opted for "cvlc" instead. It has the added advantage that it will also play without having to have a GUI desktop, meaning quicker boot-up, and smoother operation. It also allows smoother playing of videos, because there is less "code" between the player and the screen hardware - GUIs actually impose quite an overhead as data has to be passed through many layers of subsystems. This approach bypasses a lot of that, and the smoothness of play benefits.
To play a video on repeat, you can just do:
cvlc --no-video-title-show $videoname
It tends to output unwanted messages occasionally, so we ended up tacking a redirection onto the end to prevent that:
cvlc --no-video-title-show $videoname > /dev/null 2>&1 &
The bit on the end redirects "stdout" (the standard output file) and "stderr" (the standard error file)
to /dev/null, the system's "black hole", effectively "throwing away" any messages that the program
produces in operation. Well, obviously not the video it's playing, though.
For GPIO read and write functions, there's a standard RPi OS utility, called "raspi-gpio". It's easy to use from within a shell-script.
You can set GPIO pin states with raspi-gpio set followed by the pin number and then a setting. We want to
use "pullup" mode, so that we can wire each switch to ground; this means that the pin is "pulled up" to
3.3 volts internally, but when you connect it to ground, for example by pressing a button, it will be
"pulled down" to 0 volts, and we can detect that by asking what its state is.
The command to do this is:
raspi-gpio set 2 pu
Which would set GPIO pin 2 to "pull up" mode. There are other modes, of course - go and take a look!
To read a GPIO's state, you use raspi-gpio get, again followed by the pin number, like this:
raspi-gpio get 2
The program then reports back the specified pin's state as "level=0" for low and "level=1" for high. We can then look at what it reports back in the shell-script, and act accordingly. Unfortunately, there isn't a way to ask "which pins are low" - you have to poll them one after another, so we wrap that up in a loop that goes through each of the pins we are using, asking if they are low.
We needed an easy way to keep a list of which GPIOs would trigger which videos, and the "best" way to do this in BASH is to use an associative array. This allows us to have an easy-to-exit list of entries like this:
declare -A vids
vids["2"]="/home/thedoctor/Vids/vortex 1.mp4"
vids["3"]="/home/thedoctor/Vids/vortex 2.mp4"
vids["4"]="/home/thedoctor/Vids/vortex 3.mp4"
The number in quotes inside the square brackets is the GPIO pin number, and the filename in quotes after the "=" equal sign is the path to the video file to be played for that pin number. To remove one, you can just delete its line, and to add a new one, you can just copy the format of another line, and decide which pin will control it. The order doesn't matter - they don't have to be in ascending order, or any order at all, though it makes it easier to see what's going on if they are.
Now that we had a way to do everything we needed to do, we needed a bit of code to tie it all together. It needs to loop "forever", checking each of the assigned GPIO pins, and launching videos when it finds one which is "low". There's a little bit more to it than that, of course: there will "always" be a video already playing, so we need to kill that off, as long as it's not the same video that we are already playing, and we wanted to ignore "switch bounces", so we put in a short delay after starting a video playing. This is a bit of a kludgey way to do it, but it's simple and it works for this application...
while true; do
    #find any playing video
    vid=`ps aux|grep -o "/home/thedoctor/Vids/.*\.mp4"|head -n1`
    #loop through gpios checking if any are low = activated
        for gpio in ${!vids[@]}; do
        #get the file name of this video
                thisvid=${vids["$gpio"]}
        #read  state of  gpio pin (level =0)
        if [[ `raspi-gpio get $gpio|grep -o "level=."` == "level=0" ]]; then
            #is currently playing video different from the one  requested
            if [[ "$vid" != "$thisvid" ]]; then
                #force the  current video to end
                killall /usr/bin/vlc
                #play the requested video
                cvlc --no-video-title-show "$thisvid"  > /dev/null 2>&1 &
                sleep 1
            fi
        fi
    done

done
The entire source code (all 52 lines of it) can be found here: player.sh
I'm releasing it as GPL-3 licensed - please feel free to use it, or modify it for your own purposes, but please abide by the license if you pass it onto anyone else, and post the code somewhere that they can get to it, and of course tell them where it is!
The New Greenhouse Saga
The New Greenhouse Saga
The last storm back in January took out our mini-greenhouse, and with spring looming my wife was getting gloomy about how she would do at starting off fruit and veg seedlings this year. We're not adept gardeners, but we like to give it a go, and it's great when things grow well, and without some kind of greenhouse, that wasn't going to happen. We've had "proper" greenhouses before in previous houses, but not where we currently live - we've made do with those little plastic film and metal tube ones that are really more like a steamy tent. I recently saw an ad on Freegle for an aluminium greenhouse, but it had lots of missing glass, and I was concerned I might just end up being a waste collector for the donor, and have to skip it anyway, but it got us thinking about greenhouses.
Wifey found a really cheap one on Ebay - made with corrugated polycarbonate sheets instead of glass, but with an aluminium frame. After confirming we actually had some space for it, we decided to stump up the 200 quid for it. Now, with something this cheap, you just know you're going to have to do some reinforcement and "tweaking" but it should still cost a lot less than a regular price one.
I knew from previous experience that it's best to have a stable platform for a greenhouse, and not just plonk it down on bare soil, so I ordered a ton of sand, and 16 concrete slabs to form a base. I had to move our existing composter, and dig out a flower-bed, then rake the 2.4 metre square area flat. That alone took a weekend, but the weather was mostly kind to me. We have a lot of flint pebbles around our property that were put in by the previous owner, and are not really so decorative these days, so I used a few barrowfulls of them as a kind of hardcore to help level things off before I put the sand down. As I didn't want to hire a whacker compactor, I decided to use water instead as this is an easy way to achieve similar results, though obviously not as good. This is just a greenhouse base, so I'm not too concerned about a bit of movement.
 Sand patch ready for paving.
I made a wooden perimeter to keep the sand in and make it easier to level off before laying the slabs, but ended up having to tweak it after the fact when I'd laid 14 slabs and found the last ones didn't fit because I'd not put the perimeter together the way I'd planned and it was off square by about 2cm! After fixing that, I was able to get the last row done, and level off the slabs - fortunately, they didn't need too much. And, yet again, it is just a greenhouse base - and the cheapest of cheap slabs are not really pretty enough to bother making too much fuss over.
Building up the greenhouse was mainly uneventful, apart from initial difficulties finding the instructions. I've heard that these instructions are a bit lacking - and they aren't the clearest - but I didn't find them too bad. Some of the Chinese-to-English translations were quite amusing though, and some parts took a bit of squinting at to work out what the diagrams were trying to convey. One thing I found I had to watch out for was that although they had drawings of the parts required for each step, the apparent dimensions were often way different from reality, with what looked like short metal poles looking substantially larger in real life! They basically guide you through building the sliding door and window first, then the front and back, then the side sections, and finally putting it all together. The steel base comes in a separate box, but does not have separate instructions. The diagrams of the corner angle brackets are way off, and talk about burying them in the ground, which you wonder how you will do just looking at the diagram. It's not until you see them IRL that you realise that they are basically stakes that you are supposed to drive 20cm into the ground. This was obviously not going to work with my newly laid slab patch, so I had to hacksaw them down to just the width of the base. I now have 4 20cm chunks of steel L section spare. I had always planned to screw this base to the slabs anyway, so this was no real problem. I laid the base out on the slabs, and drilled 8 6mm holes near the corners and then drilled corresponding 5mm holes into the slabs using an SDS drill my dad gave me a few years ago. I decided to use some concrete screws I had lying round to tie the base down, as I was worried that wall plugs might crack the slabs over time due to their expansion forces.
Attaching the greenhouse frame (without the plastic panels in) was surprisingly easy - it's just a bit precarious until you can get a few of the metal ties on and it stops being slidey. Once in place, I then went round and properly tightened up all the nuts and bolts with a 'leccy drill. Next was the task of fitting the door and window, and then the polycarbonate panels. A bag of stainless steel wire spring clips is provided, which are a bit of a pain to put in, especially when you're a short-arse like me who can't properly reach the ones near the apex of the greenhouse roof! I was also a little concerned that the panels were rather loose under the clips, and there didn't seem to be a way to make them more snug. Anyway, I managed to get the panels in just before it started getting dark, and gave myself a pat on the back, and a cup of earl grey tea as a reward.
 The greenhouse assembled.
Next morning, looking out of the bedroom window, the greenhouse was still there, so I was even more pleased with myself! However, just as I was finishing up my morning coffee, the doorbell went, and it was one of our neighbours, to tell us that one of the "glass" panels was lying in the lane just the other side of our fence. I retrieved it and on inspection, I could see that because the panels are fairly flexible, they could deform enough with a minor gust of wind to make them too narrow for the clips to retain them. This is the cause of one of those foreshadowed "reinforcements" mentioned above...
I thought about packing out the clips somehow, but whatever I did, I would have to do about 150 times - once for each clip, and it would still allow the panels to deform in the wind and come out. I also thought about just screwing all the panels in, but I was worried that I'd damage them, and a strong gust could just rip them off. In the end, I decided to use a reel of galvanised steel gardener's wire I'd had floating round in a workshop drawer for years. I drilled holes in the frame for the wire to pass through, outside the plastic panels, as a kind of "retaining strap" across the vertical middle, and about 5cm from the ends of each panel. I pulled the wire "finger tight" and secured it by just winding the tail end back around the wire - steel gardener's wire is nice and soft, so this is easy to do. It took about two hours, to do, but the result is that now, none of the panels can easily distort enough to come out, and, well, they're held in by the wire anyway. Time will tell if this is proof against gales, but I'm quietly confident. This has been in place for a few days, and we have had a few strongish gusts of wind, and nothing has come loose, so I guess that's a win!
 Greenhouse corner showing retaining wires.
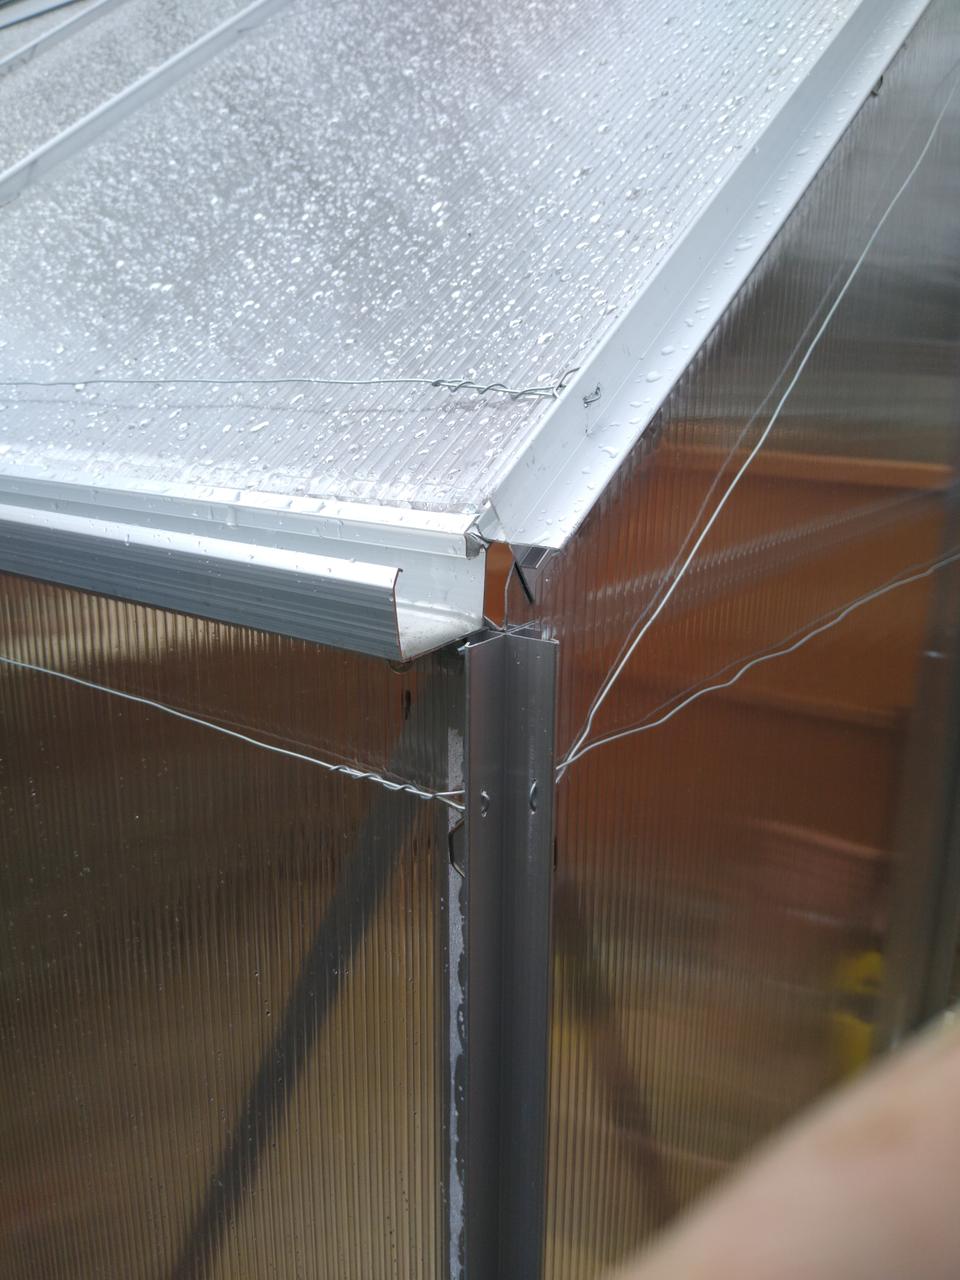 Close-up of greenhouse corner showing retaining wires.
The final challenge was the sliding door - it had no end-stops on the rails, nor any kind of catch to keep it closed, so the wind would blow it back and forth constantly. The problem was, I couldn't see anywhere I could put a catch easily, so in the end, I decided to go with a home-made magnetic contraption instead! I have a carrier bag of powerful neodymium magnets that were removed from old "spinning rust" hard disk drives, that I have found multiple uses for over the years. I used a piece of scrap aluminium to fashion a "holder" for one of these flat, curved magnets, so I could attach it to the leading edge of the door, near the bottom. I used a 50mm length of the angle section I had earlier cut off the base corner brackets that were meant to form the "stakes" I didn't end up using. The plan was to attach it to the front of the base rail of the greenhouse frame with a corner brace L bracket. During this process, however, whilst drilling holes for the self-tapping screws to hold it on, the drill-bit shattered, and I ended up slicing through the fingernail of my left index finger, which delayed things a bit as I rushed inside to get my wife to patch me up whilst cursing loudly and being a squeamish crybaby as it was bleeding quite freely for the tiny wound I had incurred.
 Partially healed damaged fingernail.
I persisted through the pain and blood though, and managed to complete the magnetic catch despite everything. Up until this point, I thought I was doing rather well not to have injured myself during the digging, slab laying, and assembly of the rather sharp aluminium greenhouse frame. I guess I kind of brought it on myself then. Smugness never pays off. Anyway, the finger is healing up quite well, thanks...
 Greenouse door magnetic catch - closed.
 Greenouse door magnetic catch - open.
Well, that's not the end of the saga, though! It nearly is, but not quite. My final task, before my wife takes over management of the greenhouse, is to make some "furniture" for it - to wit, a "potting table" and a growing rack. She'd foolishly already told friends that I would build her these out of recycled pallet-wood, so I thought I'd better not let her down on this. I had considered picking up a set of utility tables I saw in Lidl last week, but at fifty quid, I thought better of it, and I still do have a lot of pallet-wood on hand, in particular, a whole pallet I've had in the workshop for months from a delivery way back in November.
After attacking it with a hammer and crowbar for about half an hour, I had managed to disassemble it without too much splitting of the wood, and I had a pile of planks enough to make the potting table. After consulting with the major stakeholder in the project - my wife - I had my project scope: about waist-height like the kitchen worktops, no gaps between the slats on top, and about as deep as a bag of compost. I had to add a couple of chunkier 30x70mm "beams" from the wood pile, and set to with the mitre saw to cut the planks to size and trim off a few split ends. I arranged the top planks on the two beam sections, and used some 60x5mm wood screws to join them to the beams, then screwed on the four leg slats, followed by three pieces at the base of the legs to stabilise the structure. All in all, that took about an hour, and I now have this:
 Pallet-wood potting table.
Next up is the growing rack. For this, I used an old pallet of a different style, which has seven horizontal slats attached to two beans. I just cut this in half width-wise, forming two pieces one of four slats, and another of three. Then I pulled some more slats from the wood-pile to form the legs, making this:
 Pallet-wood growing rack.
Now it's over to my wife to wield her green-fingered magic and conjure up some nice tomatoes and veg over the summer!
Installing LaserGRBL on Debian
Running LaserGRBL on Debian under Wine
I recently got a GRBL based laser cutter, and it seems that unlike with 3D printer software, there isn't anything graphical that's FOSS that runs on Linux for laser cutting. However, there IS LaserGRBL, which is for Windows, but is GPL3 licensed. This is how I got it working on my Debian system.
 LaserGRBL 6.2.0 running on Debian 12
There are instructions on the LaserGRBL website, but they seem very outdated, and I couldn't get it working using them my system, so I had to work out my own way. I definitely used them as guidance, though, and some parts work without modification. After a fair bit of experimentation, I did get up it and running, and have successfully used LaserGRBL to control my Sculpfun S30 laser cutter!
First off, these instructions are only guaranteed to work on Debian 12 (Bookworm) with the software releases I'm stating right here... things change, so these instructions might need further tinkering if the current versions are newer than what I'm talking about here. Hopefully this will help you get going anyway...
Software releases
- LaserGRBL v6.1.1 or v6.2.0 (newer may well work, but YMMV)
- Debian 12 (Bookworm) 64-bit x86_64
- MATE Desktop
- Wine 8.0
Hardware requirements
- An Intel or AMD based PC (I don't expect this to run on Raspberry Pi or anything ARM based)
- USB-connected GRBL-based CNC laser cutter
Installing
First, add yourself to the dialout group so you can access the USB ports.
sudo usermod -aG dialout andy
Obviously, replace "andy" with your username. Now log out of your Linux
session, and back in again. If you get an "Access Denied" message later when
trying to connect to your laser cutter, you need to check this bit. A reboot
might help if you have definitely done it and it still doesn't work. Go figure.
You can check your group memberships with the command groups to confirm that
"dialout" is listed.
Continue installing...
sudo dpkg --add-architecture i386
sudo apt update
sudo apt install libmpg123-0:i386
sudo apt install wine wine64 wine32 wget

wget https://raw.githubusercontent.com/Winetricks/winetricks/master/src/winetricks
chmod +x winetricks
./winetricks gdiplus msxml3
mkdir ~/.fonts
ln -s /usr/share/wine/fonts/tahoma.ttf .fonts/
When you plug your laser into your PC, a new entry for it will appear in /dev,
named either "ttyUSBn" or "ttyACMn" (n may vary, but is usually 0 if you
don't usually have any other USB serial communications devices plugged in, like
Arduino's, 3D printers or similar devices. The command ls /dev/tty* will list
your "tty" devices - run the command before you plug in, then again after, and
compare the output.
Now we need to set up some virtual USB ports in wine: run the command
wine regedit
The regedit application should load. Perform the following steps, substituting the name of the ttyUSB or ttyACM devices you identified in the previous step.
- Navigate to HKEY_LOCAL_MACHINE/Software/Wine/Ports
- Create a String key named "com10" and set its value to "/dev/ttyUSB0" OR "/dev/ttyACM0"
- Exit regedit
Now create a soft link to the your ttyUSB or ttyACM device. Run the appropriate one of the following, substituting your actual device name as appropriate:
ln -s /dev/ttyUSB0 ~/.wine/dosdevices/com10ln -s /dev/ttyACM0 ~/.wine/dosdevices/com10
Ok, now the prep is mostly done - wine should be up and running, and your ports should be accessible. LaserGRBL needs the mono library (a Free Software Microsoft .NET-compatible framework), so we need to download and install it:
wget http://dl.winehq.org/wine/wine-mono/4.9.4/wine-mono-4.9.4.msi
wine msiexec /i wine-mono-4.9.4.msi
Now we get to the money shot: download and install LaserGRBL:
wget https://github.com/arkypita/LaserGRBL/releases/latest/download/install.exe
This should run the LaserGRBL installer - just take the defaults - and then start LaserGRBL itself at the end. If it doesn't start up, you need to find out what it's failing on, and the easiest way to do that is to run it from the Linux command-line:
wine "C:Program Files (x86)/LaserGRBL/LaserGRBL.exe"
If something is still wrong, it will probably vomit out a "stack trace" and you can hone your google-fu to find out what's wrong! For example, you might get a message about being unable to load a font, check you did the tahoma.ttf copying step properly.
First steps using LaserGRBL
There are excellent instructions on the LaserGRBL website, but some things took me a while to figure out - maybe I'm just slow - but you might find this useful:
- You connect LaserGRBL to your Laser CNC device by selecting the correct COM port in the top left of the window, then the baud rate (115200 works for me), and then clicking the "Plug and lightning" icon to the right of these. You should hear a confirmation beep when successful.
- Before you can start cutting, you probably need to click the "Home Cycle" button on the icon dock at the bottom of the window. This will make your device seek to its limit switches - if it has them. If this doesn't exist, you might need to switch this on.
- To switch on "Home Cycle" you may need to go to "GRBL/Grbl Configuration", and adjust "$22 | Homing cycle enable" to "1" and then click the "Write" button. If you can't find this, it might mean your device doesn't support this function.
- You can click the "Home" button in the middle of the cluster of "jog" arrows to seek the head to 0,0.
- You can load various vector and bitmap resources for engraving or cutting using either "File/Open File" or the "Filename" field just under the COM and Baud fields - click the little "folder" icon to the right of the field.
- I'm mainly using ".svg" (scalable vector graphics) made with Inkscape, another brilliant FOSS program.
- If you want to engrave and cut in the same job, split your source file into separate parts for each pass, and load the first asset as normal, set the engrave parameters accordingly; THEN load the next part with "File/Append File", and set the parameters for cutting - this adds the new asset "onto the end" of the currently loaded one. It seems important that the assets are the same dimensions so they line up.
- The "jog" buttons can be used to move the laser head around your workpiece to position for cutting, but you have to click on the "Globe" icon to make the next job start from this point, otherwise it will just start from 0,0 agin.
- Before you start burning, you can use the "Frame" button to move the laser head around the perimiter of your loaded asset in order to check it's lined up right.
- If your device has an air pump, you can switch it on automatically at the start and end of your jobs by adding a little G-Code to the "Header" and "Footer" settings. Go to "Grbl/Settings", and change to the "GCode" tab; then add "M08" to the Header code, and "M09" to the Footer code (both on a new line).
- You can create "Custom buttons" to run arbitrary G-Code when you click their icon - right-click on the blank space next to the icons in the bottom icon dock, and select "Add Custom Button".
- There is a G-Code reference for GRBL at https://www.sainsmart.com/blogs/news/grbl-v1-1-quick-reference
Good luck out there!